![](https://ucarecdn.com/6bf78835-826c-423f-a0e5-19453208771e/-/format/auto/-/preview/3000x3000/-/quality/lighter/Blog-1000x1000-christine-4.jpg)
![](https://ucarecdn.com/c50820d6-f489-451b-97ea-e9304e8f70e8/-/format/auto/-/preview/3000x3000/-/quality/lighter/BLOG-TOP-BANNER-1800X450-christine-4.jpg)
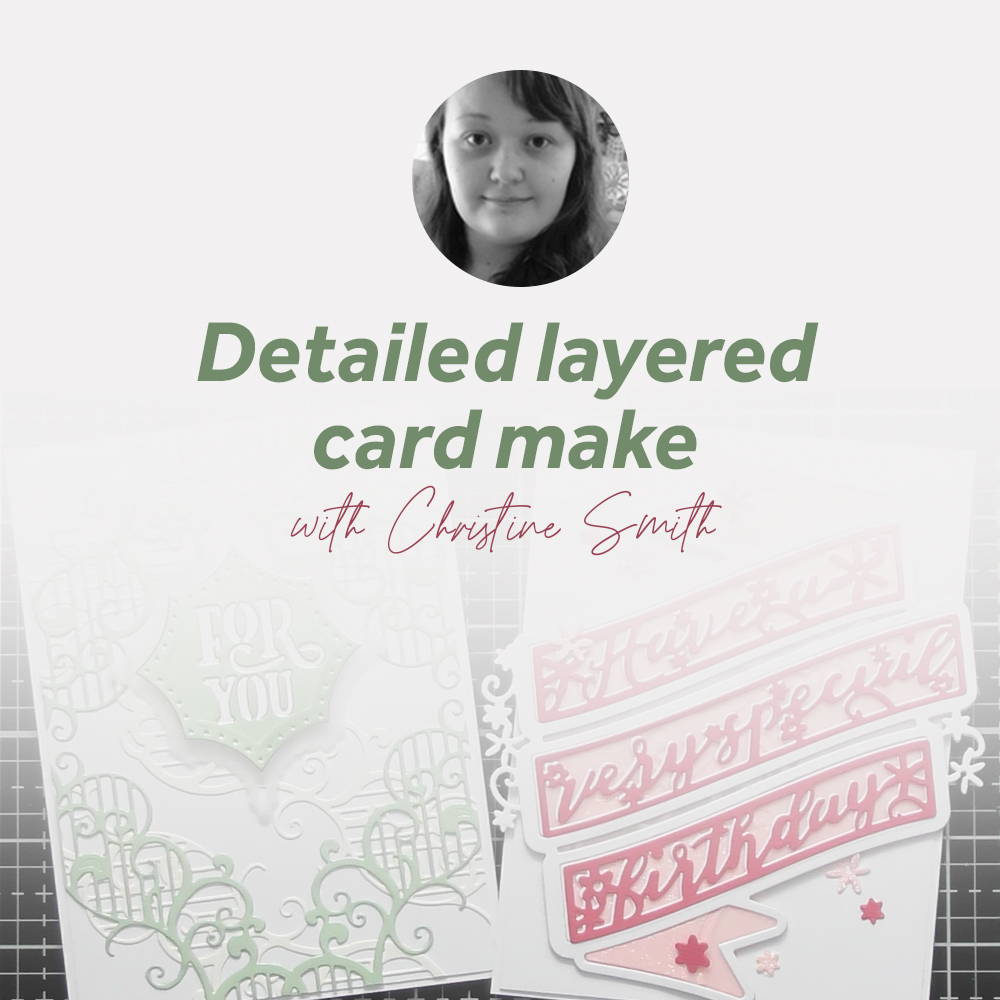
Both the Special Birthday Beautiful Banner and For You Elaborate Swirls are fantastic detailed Layering Die sets for your larger cards, however, they also work wonderfully for smaller cards too :D So I thought I’d run through one card idea with each set for you
Step 1
![](https://ucarecdn.com/c1143766-ccf1-462b-b6d2-89a8b0ffa739/-/format/auto/-/preview/3000x3000/-/quality/lighter/Picture1.jpg)
A quick card with ‘For You Elaborate Swirls’ Die-cut the pieces shown, I’ve used pearl mint, ivory, satin mint, white and vellum to cut my pieces.
Step 2
![](https://ucarecdn.com/4da5b3a2-3a9a-4f51-a0b3-797b418105ee/-/format/auto/-/preview/3000x3000/-/quality/lighter/Picture2.jpg)
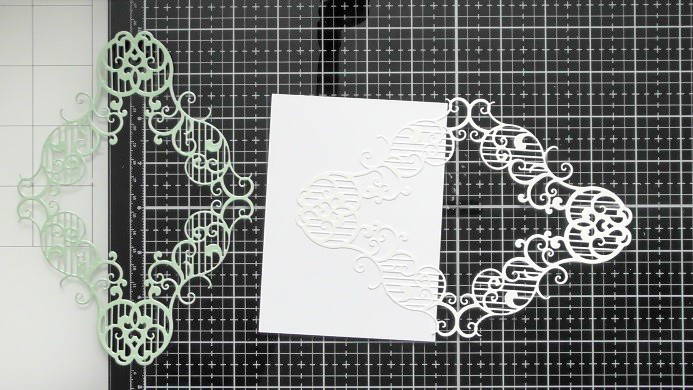
Trim a piece of white card to your favourite small card size (mine is 10x13 cm) and use the Ivory die-cut to start building your background, stick half on the card and shown, then trim the excess.
Step 3
![](https://ucarecdn.com/562308bf-a2b7-4efc-8823-9c5762972833/-/format/auto/-/preview/3000x3000/-/quality/lighter/Large%20Layering%20dies%20Blog%20SBS%20-%20Christine%20Smith%20%20_4_-2.jpg)
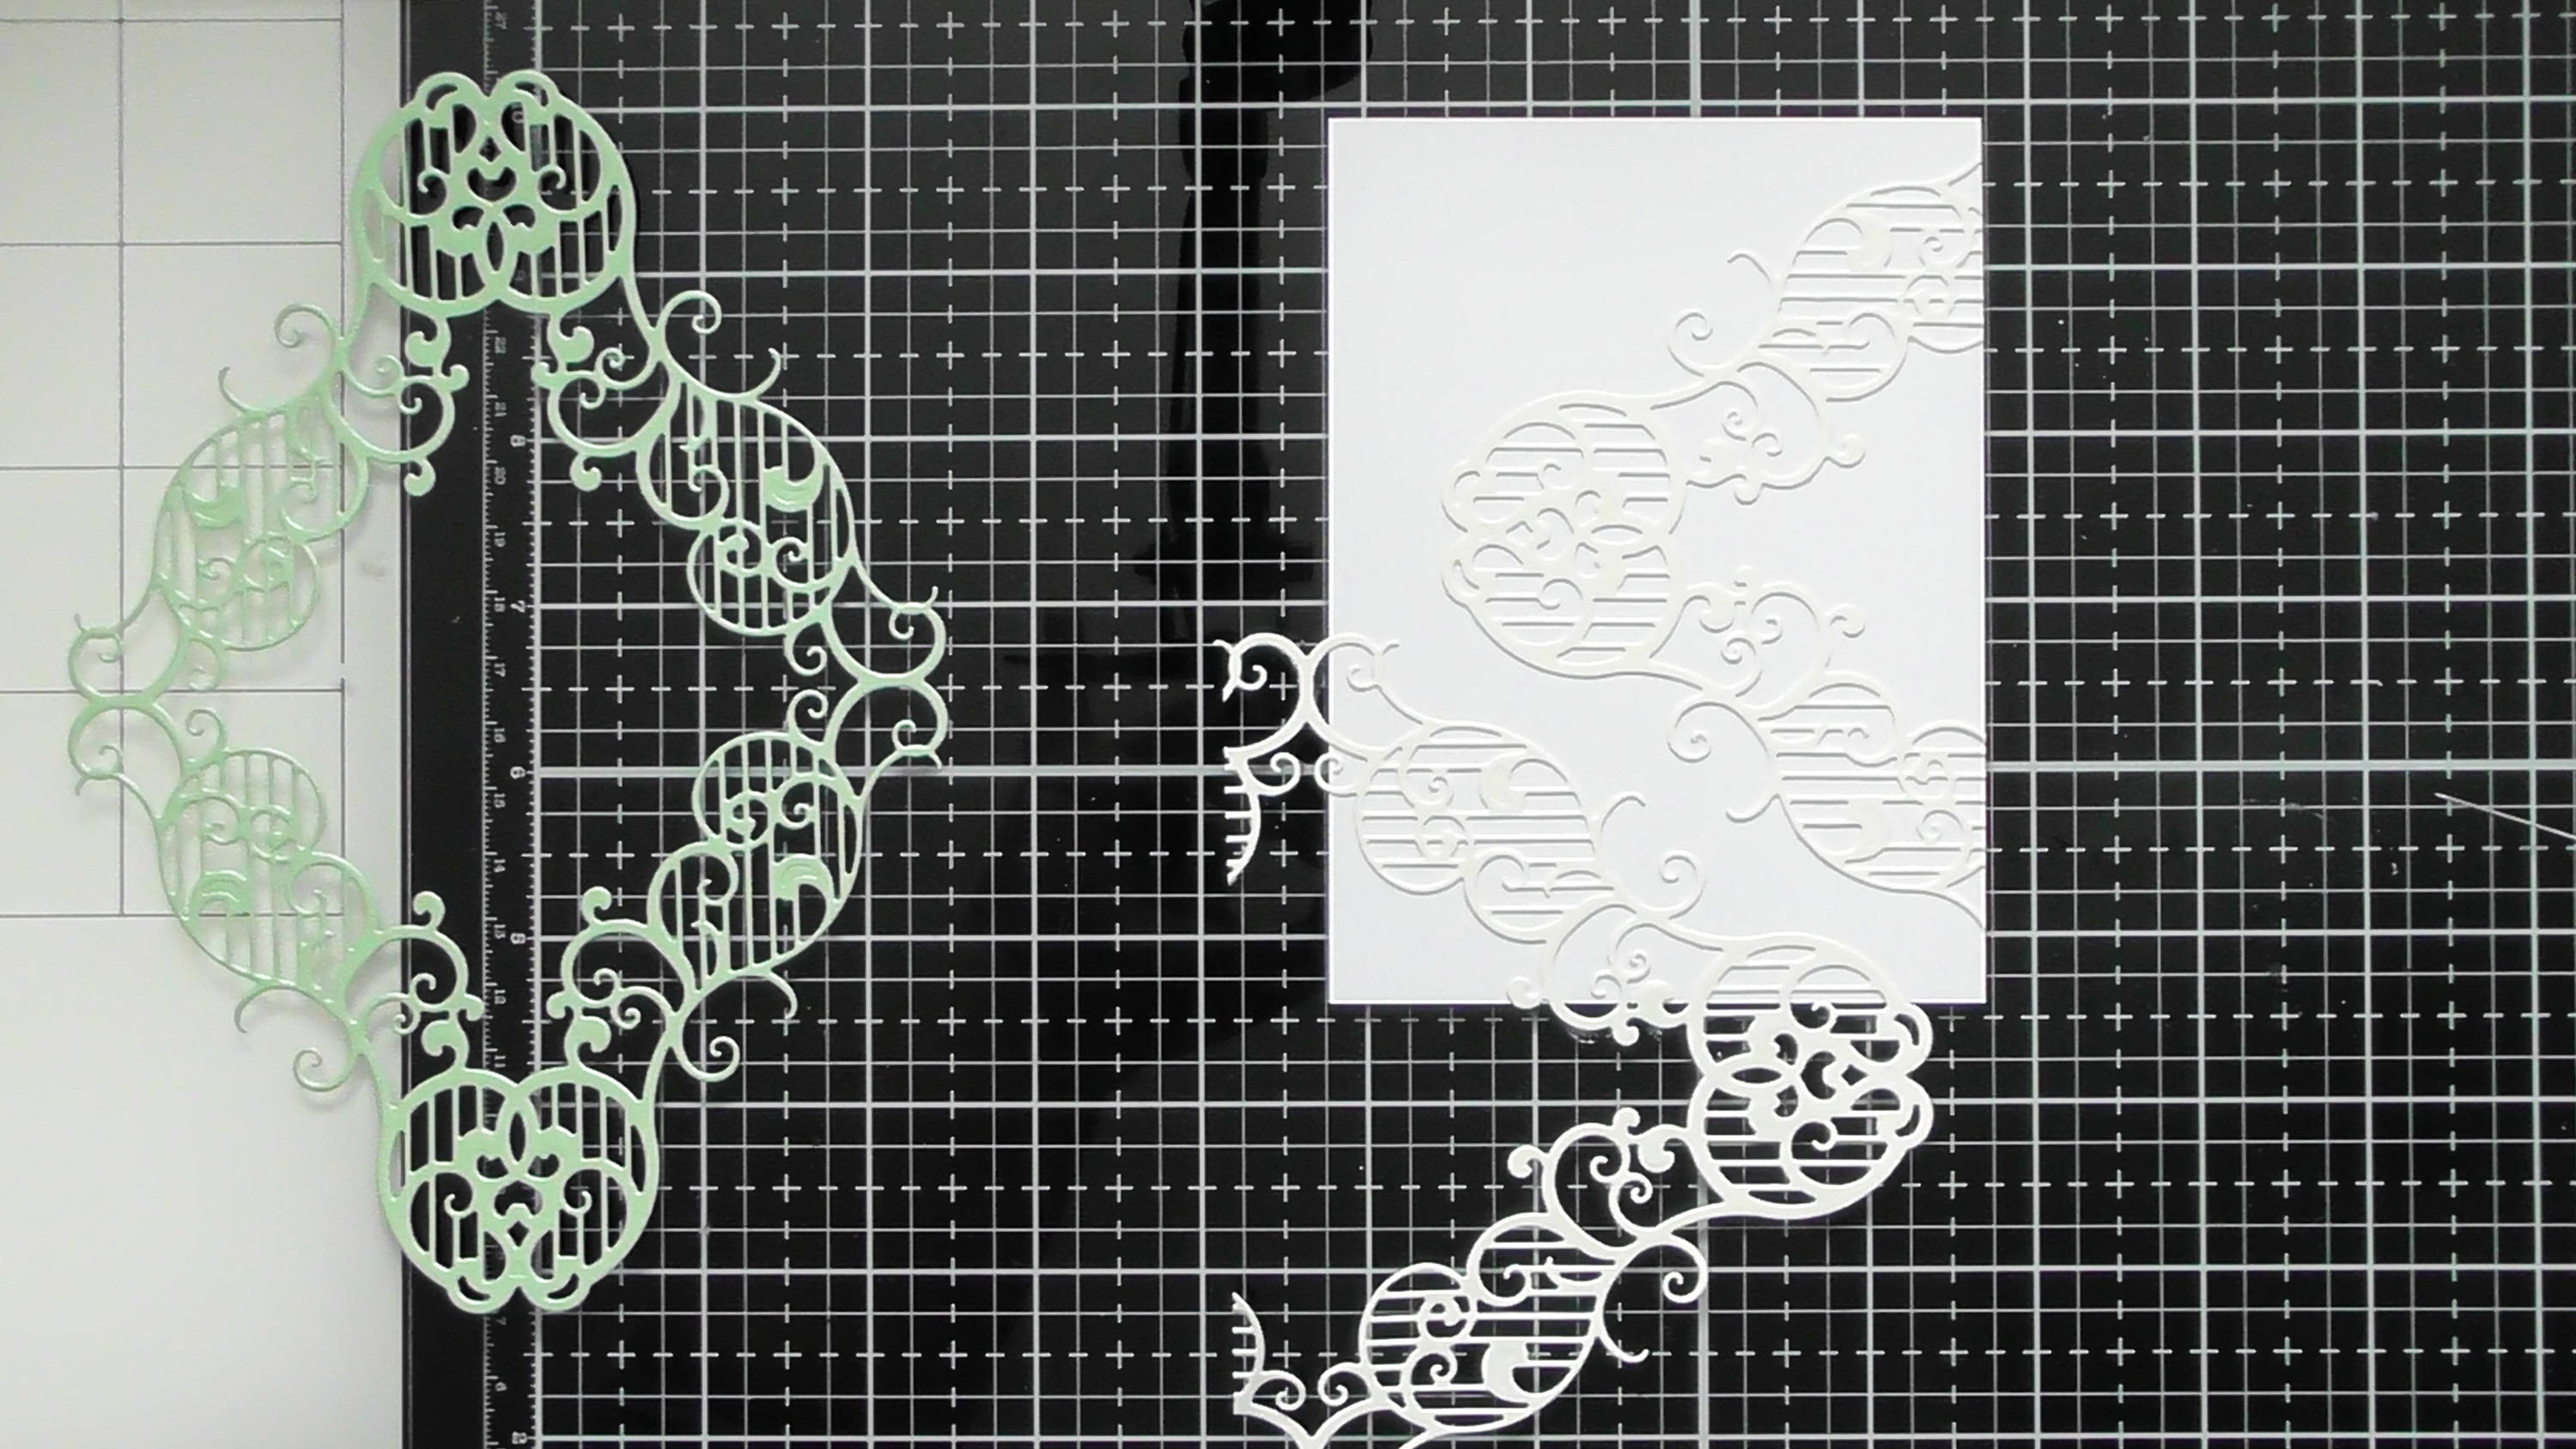
Use the excess to fill in the other areas...
Step 4
![](https://ucarecdn.com/80178ad9-7bbb-4ac2-8548-ce5bb9ea08f9/-/format/auto/-/preview/3000x3000/-/quality/lighter/Large%20Layering%20dies%20Blog%20SBS%20-%20Christine%20Smith%20%20_5_-2.jpg)
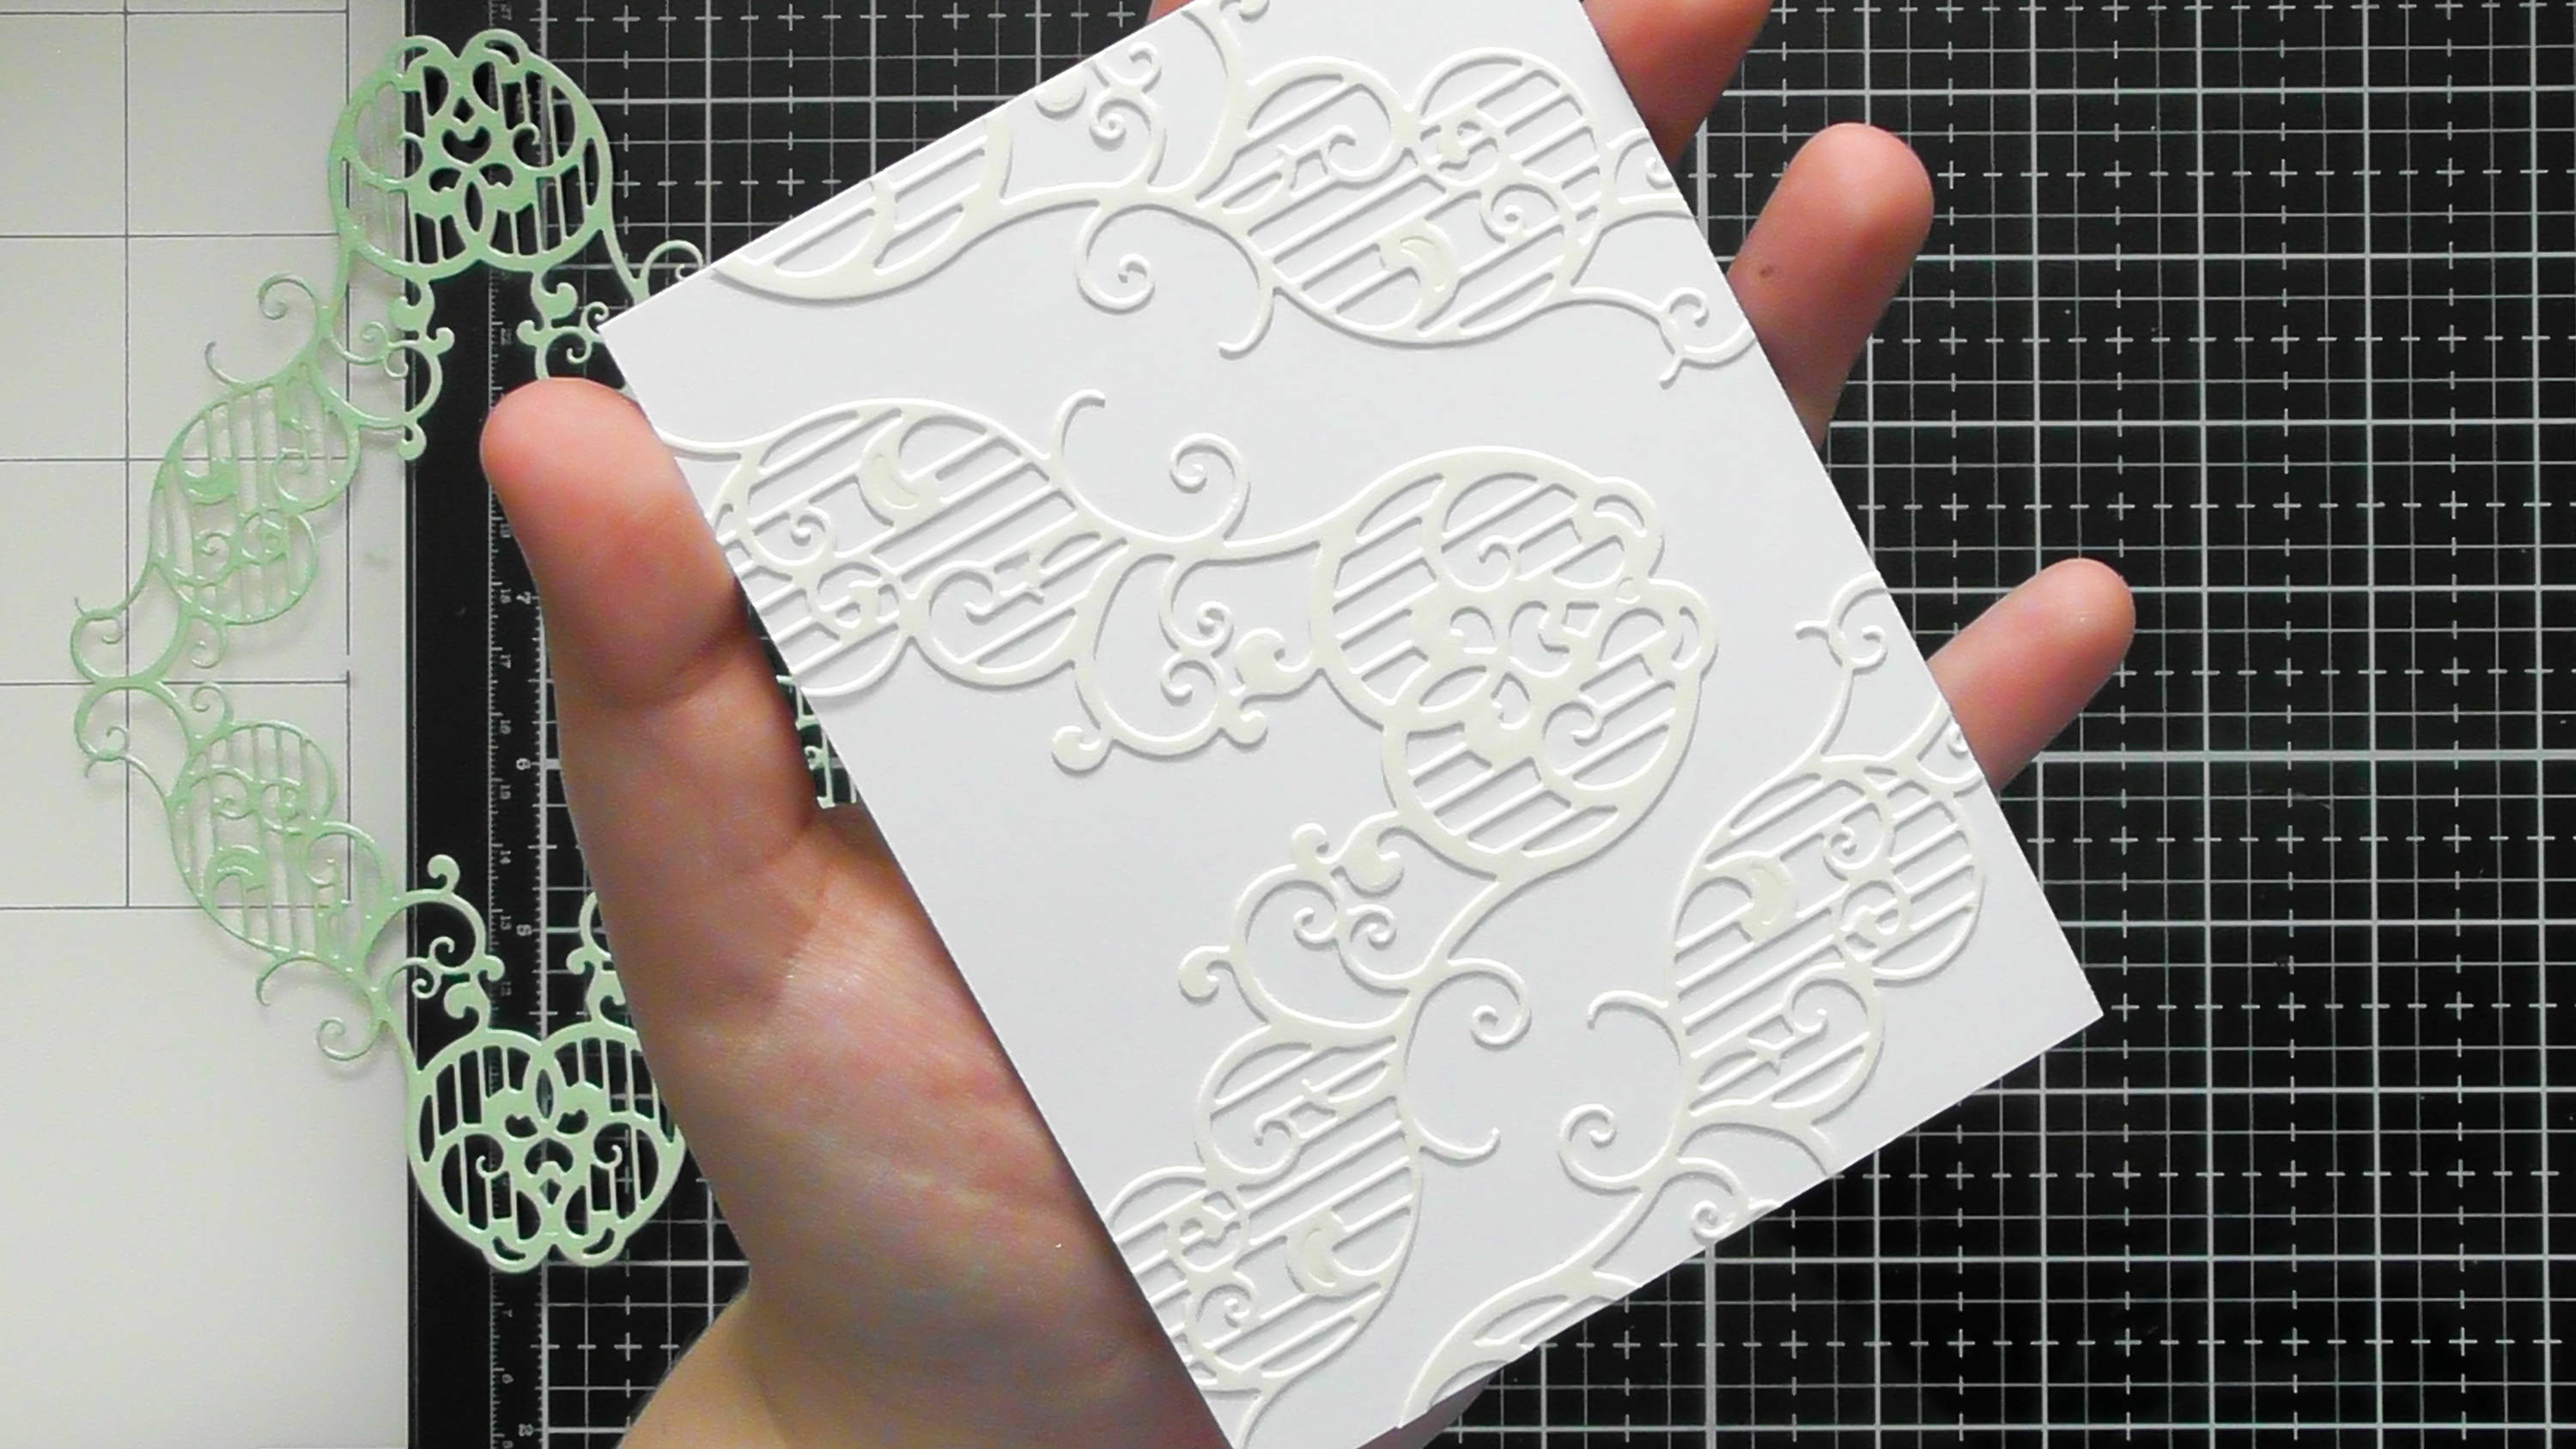
…to give you a lovely full background like this
Step 5
![](https://ucarecdn.com/833a796f-3200-4538-972b-da640a898170/-/format/auto/-/preview/3000x3000/-/quality/lighter/Large%20Layering%20dies%20Blog%20SBS%20-%20Christine%20Smith%20%20_6_-2.jpg)
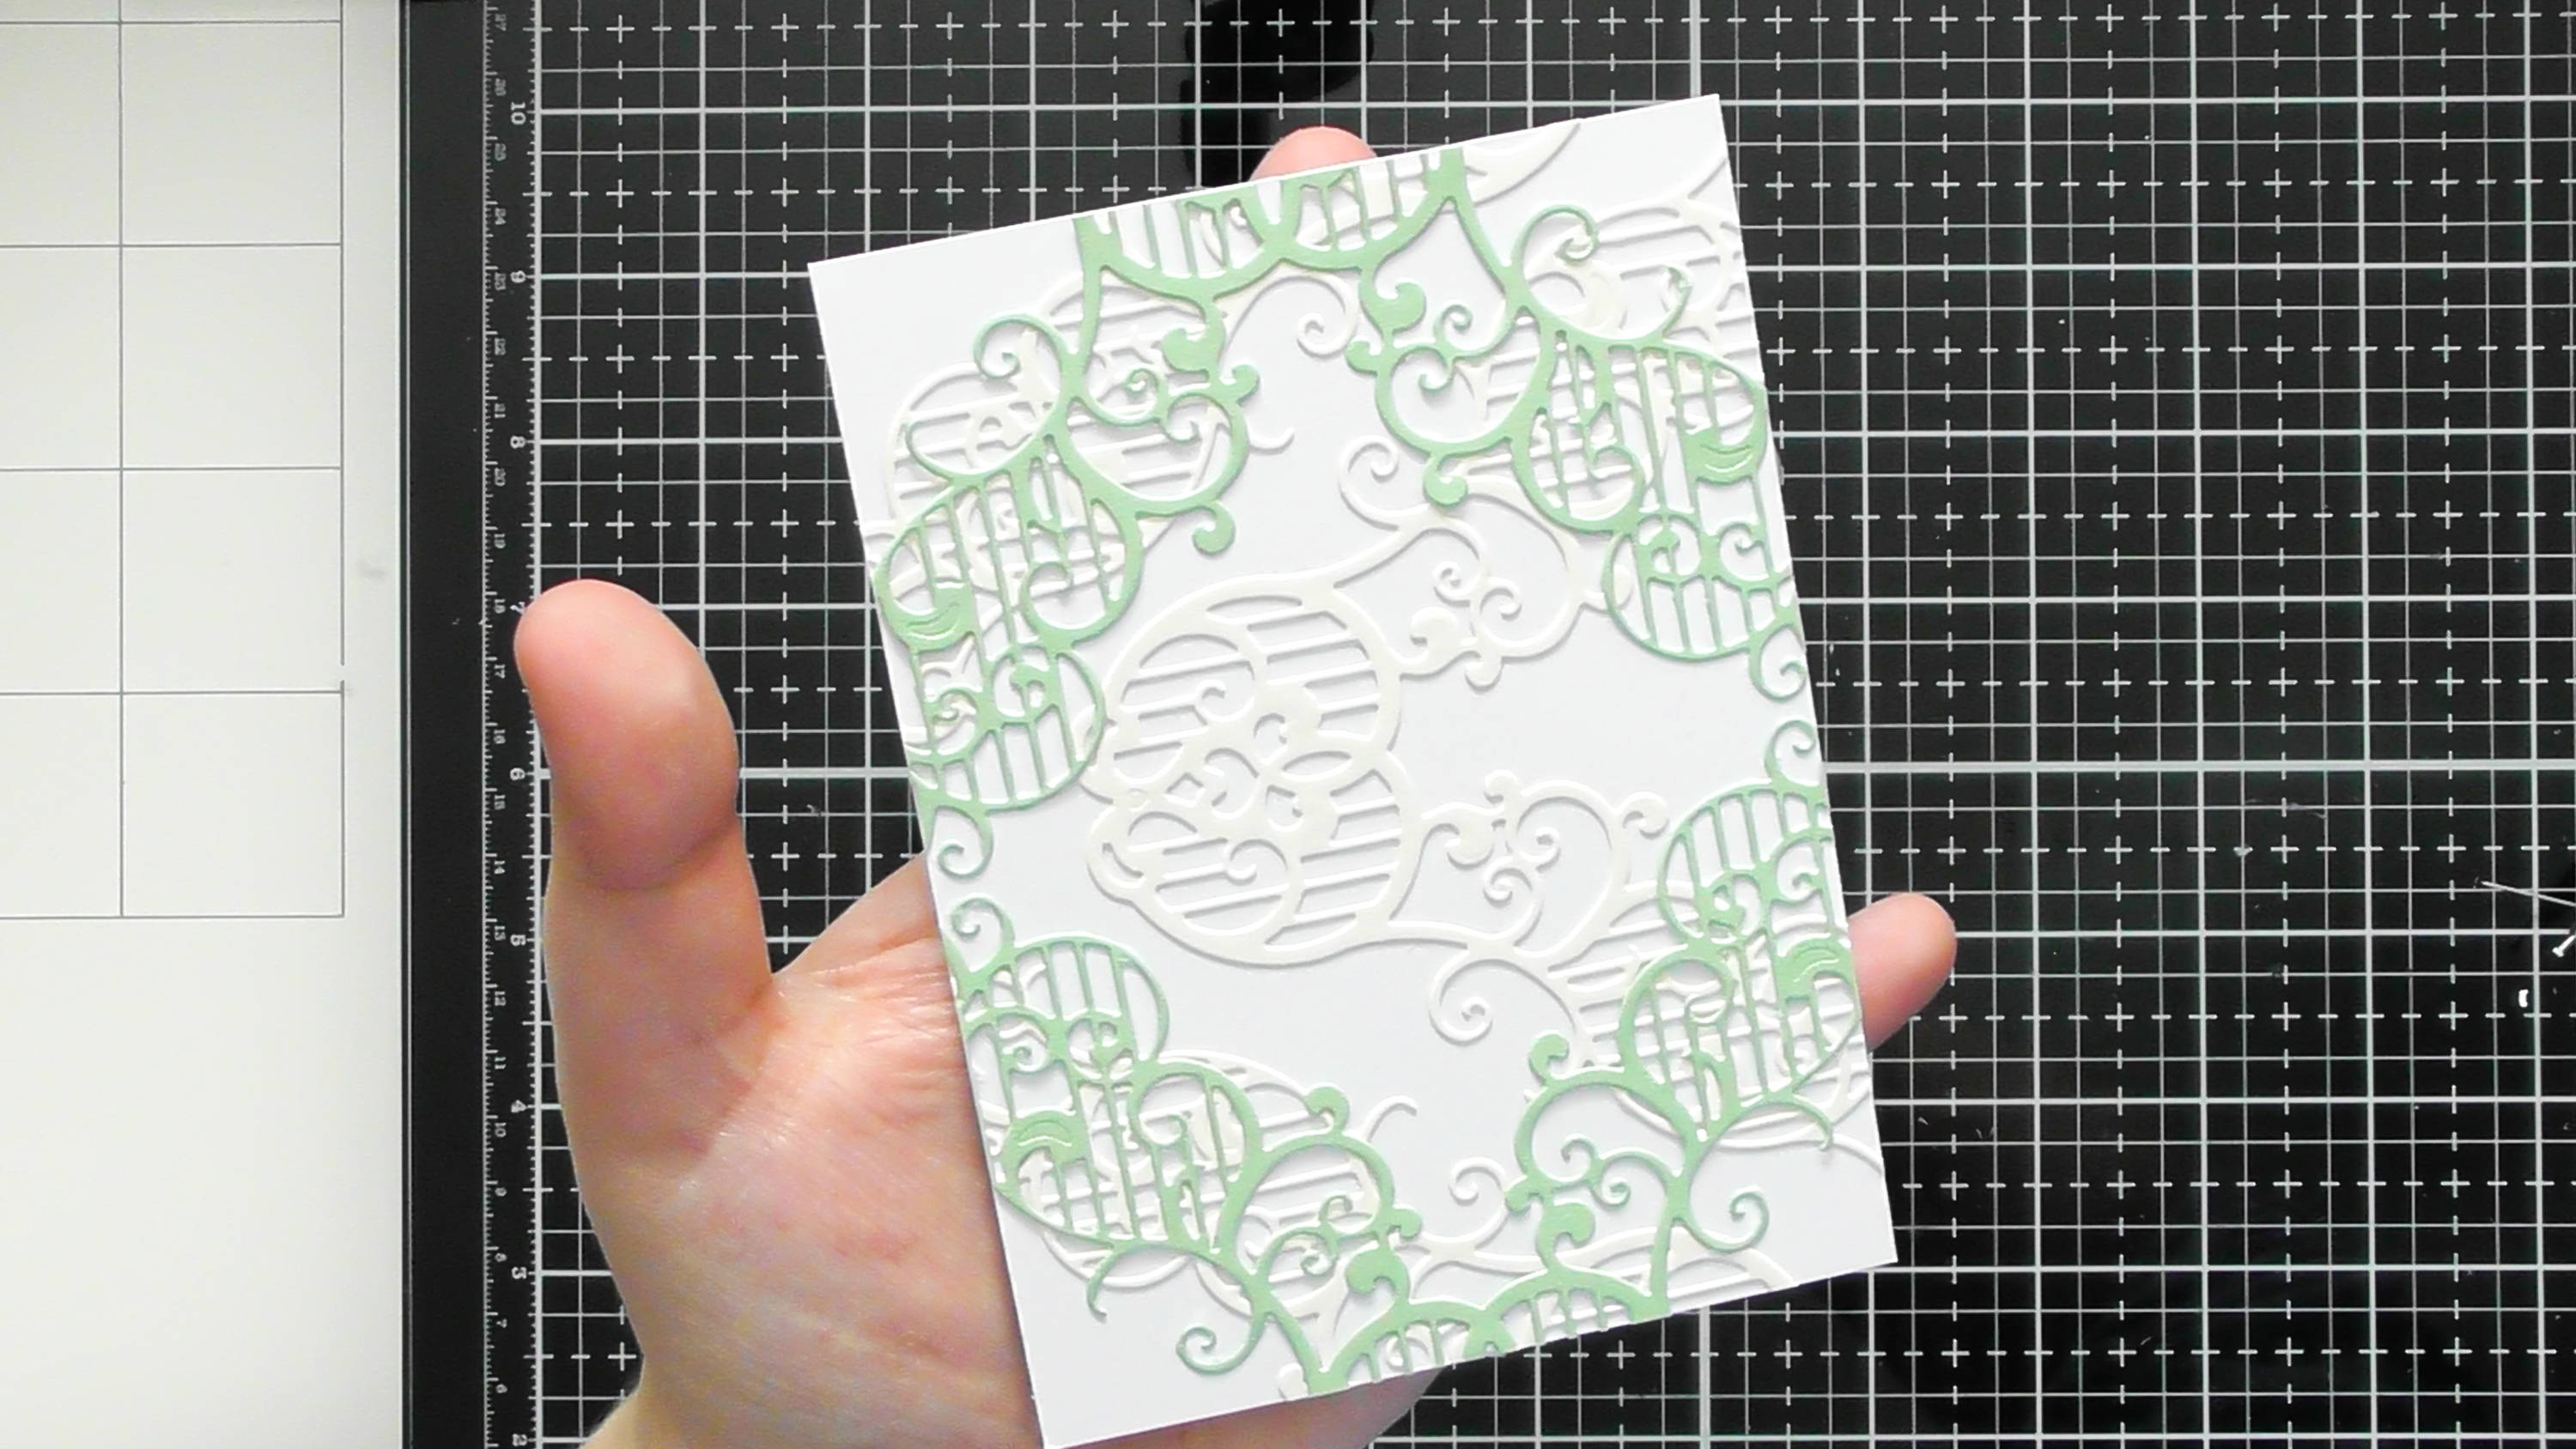
Then add the pearl mint one over the top to build up the background even more.
Step 6
![](https://ucarecdn.com/52e5ba7a-d1d8-49b3-8d1f-596869d7ea81/-/format/auto/-/preview/3000x3000/-/quality/lighter/Large%20Layering%20dies%20Blog%20SBS%20-%20Christine%20Smith%20%20_7_-2.jpg)
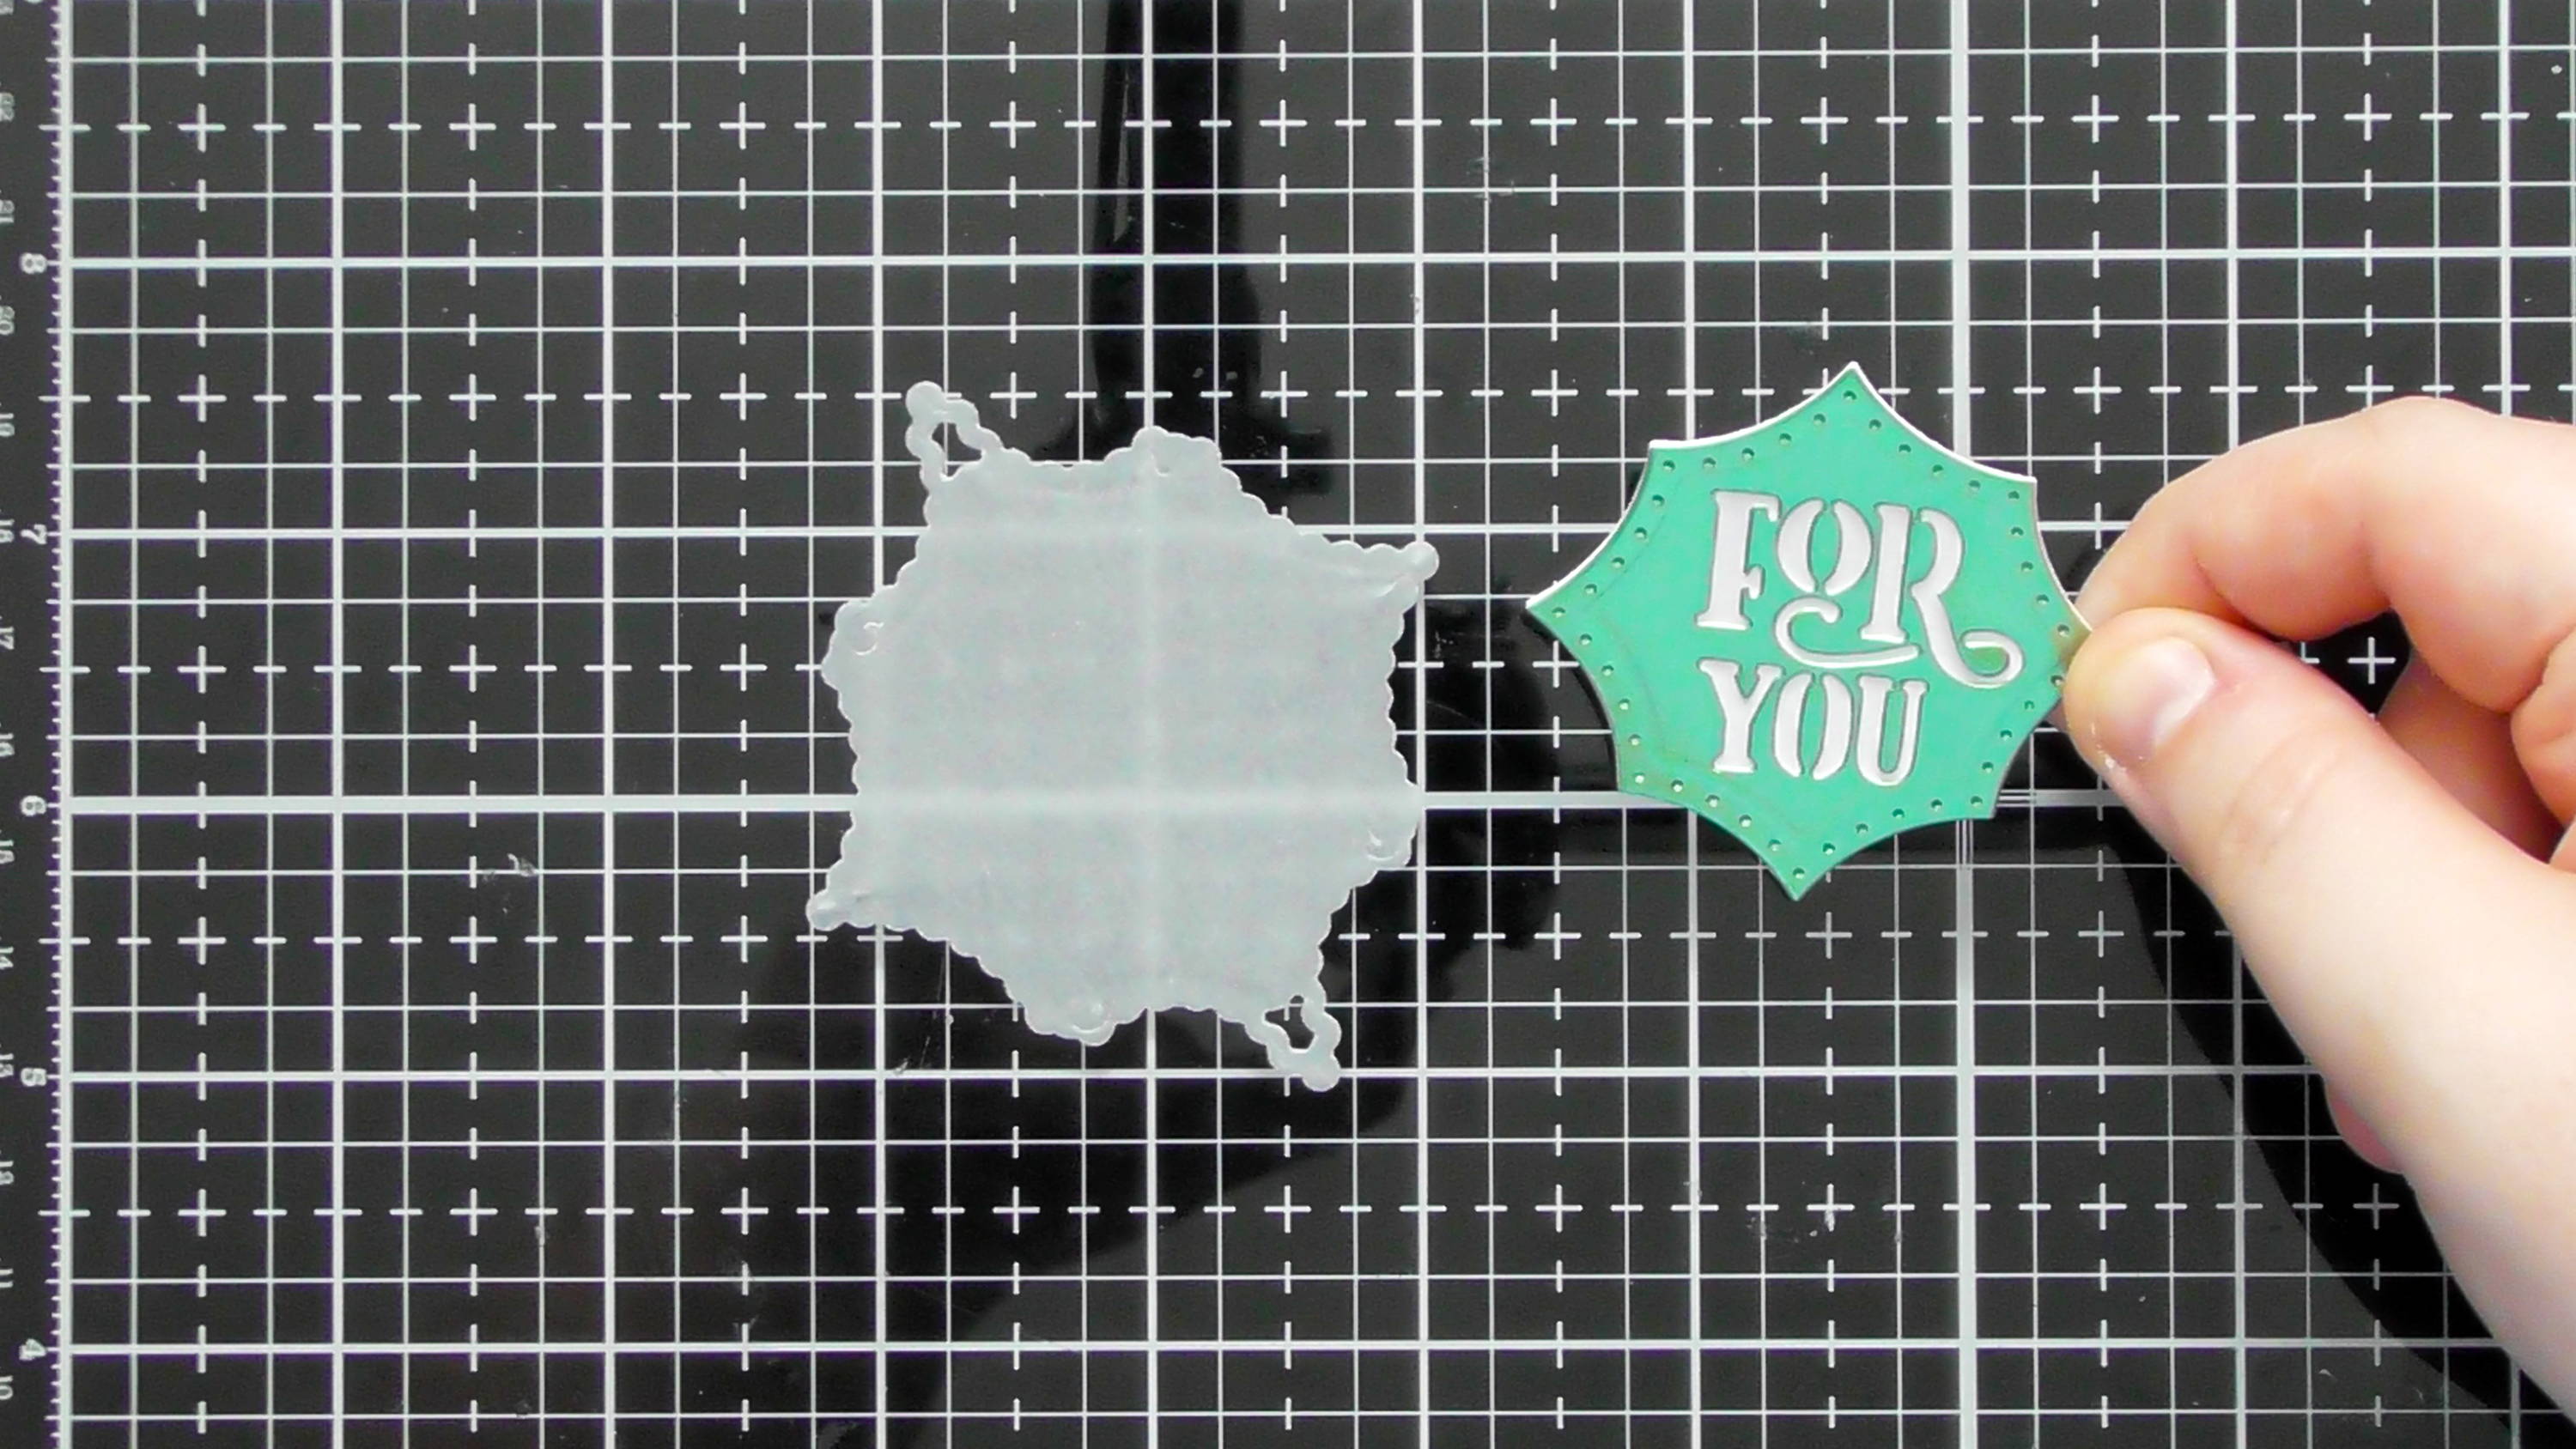
For your sentiment, layer the satin mint one with the ‘For You’ die cut out on top of a solid white one, this will allow us to add it to the card with 3D foam :D And matt this onto the larger vellum layer too
Step 7
![](https://ucarecdn.com/65f624f1-9526-4b37-853b-3d6bdbb50169/-/format/auto/-/preview/3000x3000/-/quality/lighter/Large%20Layering%20dies%20Blog%20SBS%20-%20Christine%20Smith%20%20_8_-2.jpg)
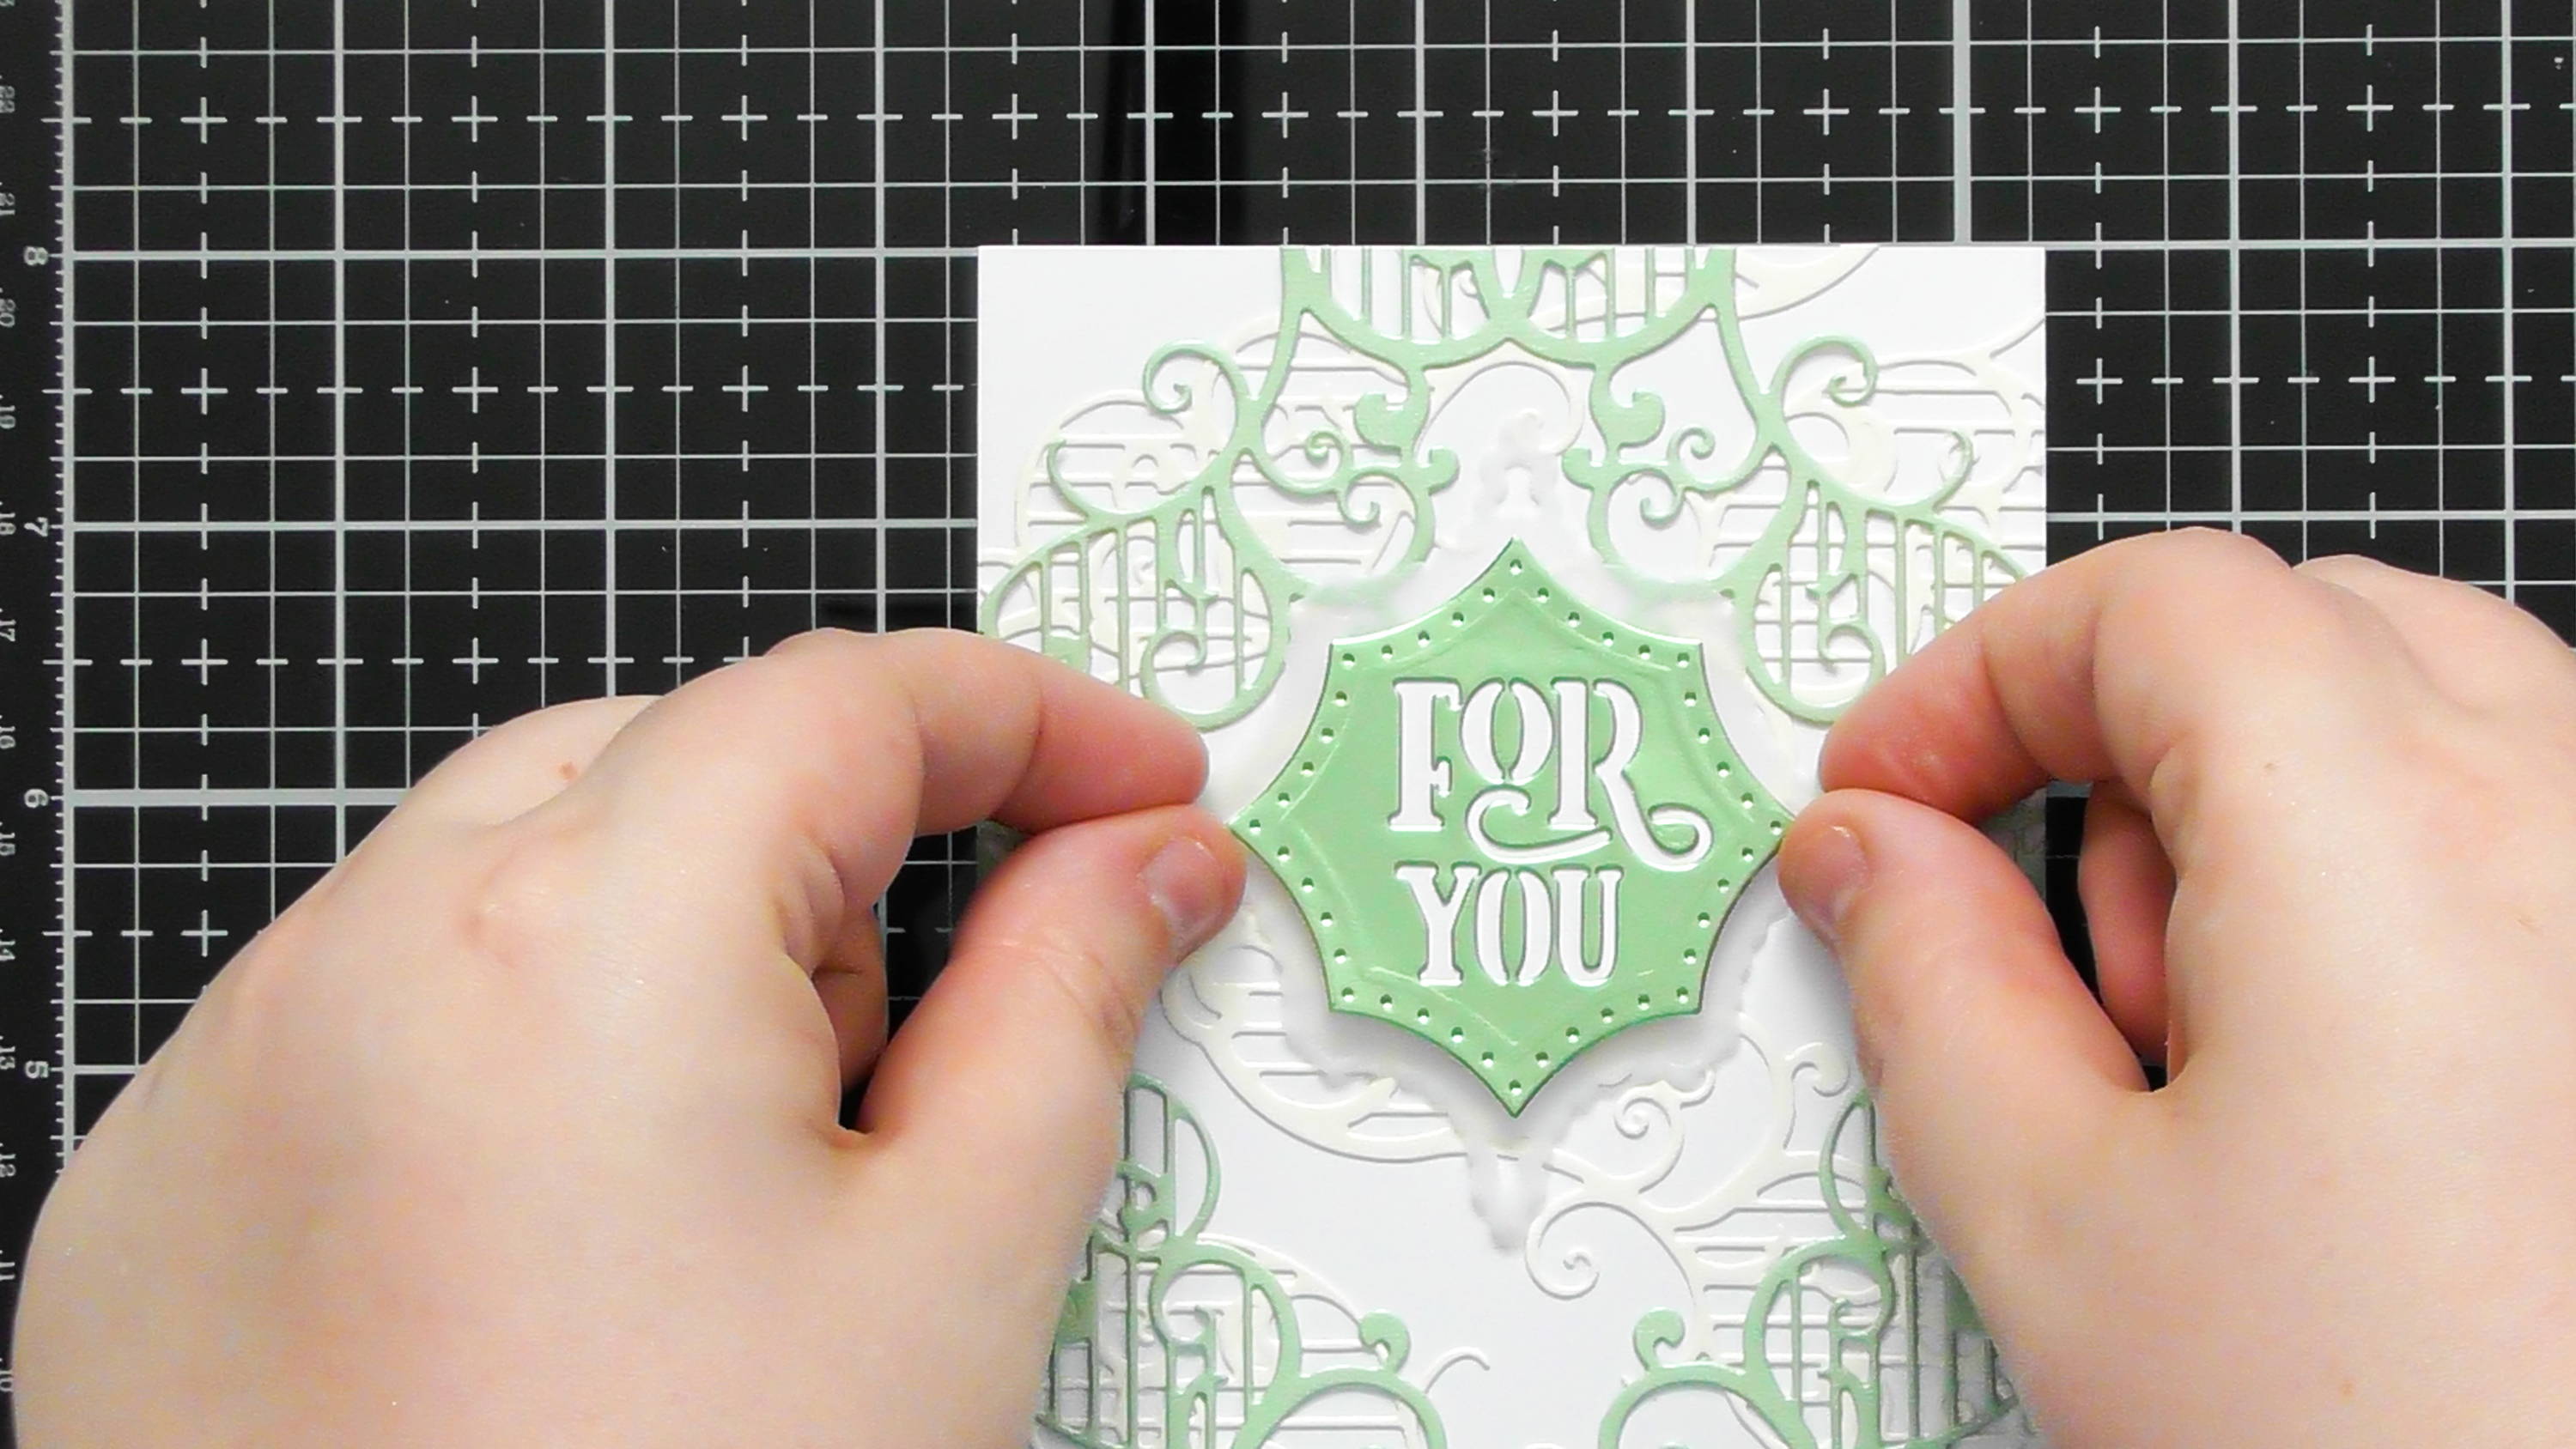
Position the sentiment slightly more towards the top of your card panel, you can play around with the sentiment placement too so give a different look, and I think this card would look lovely with a butterfly or two as well!
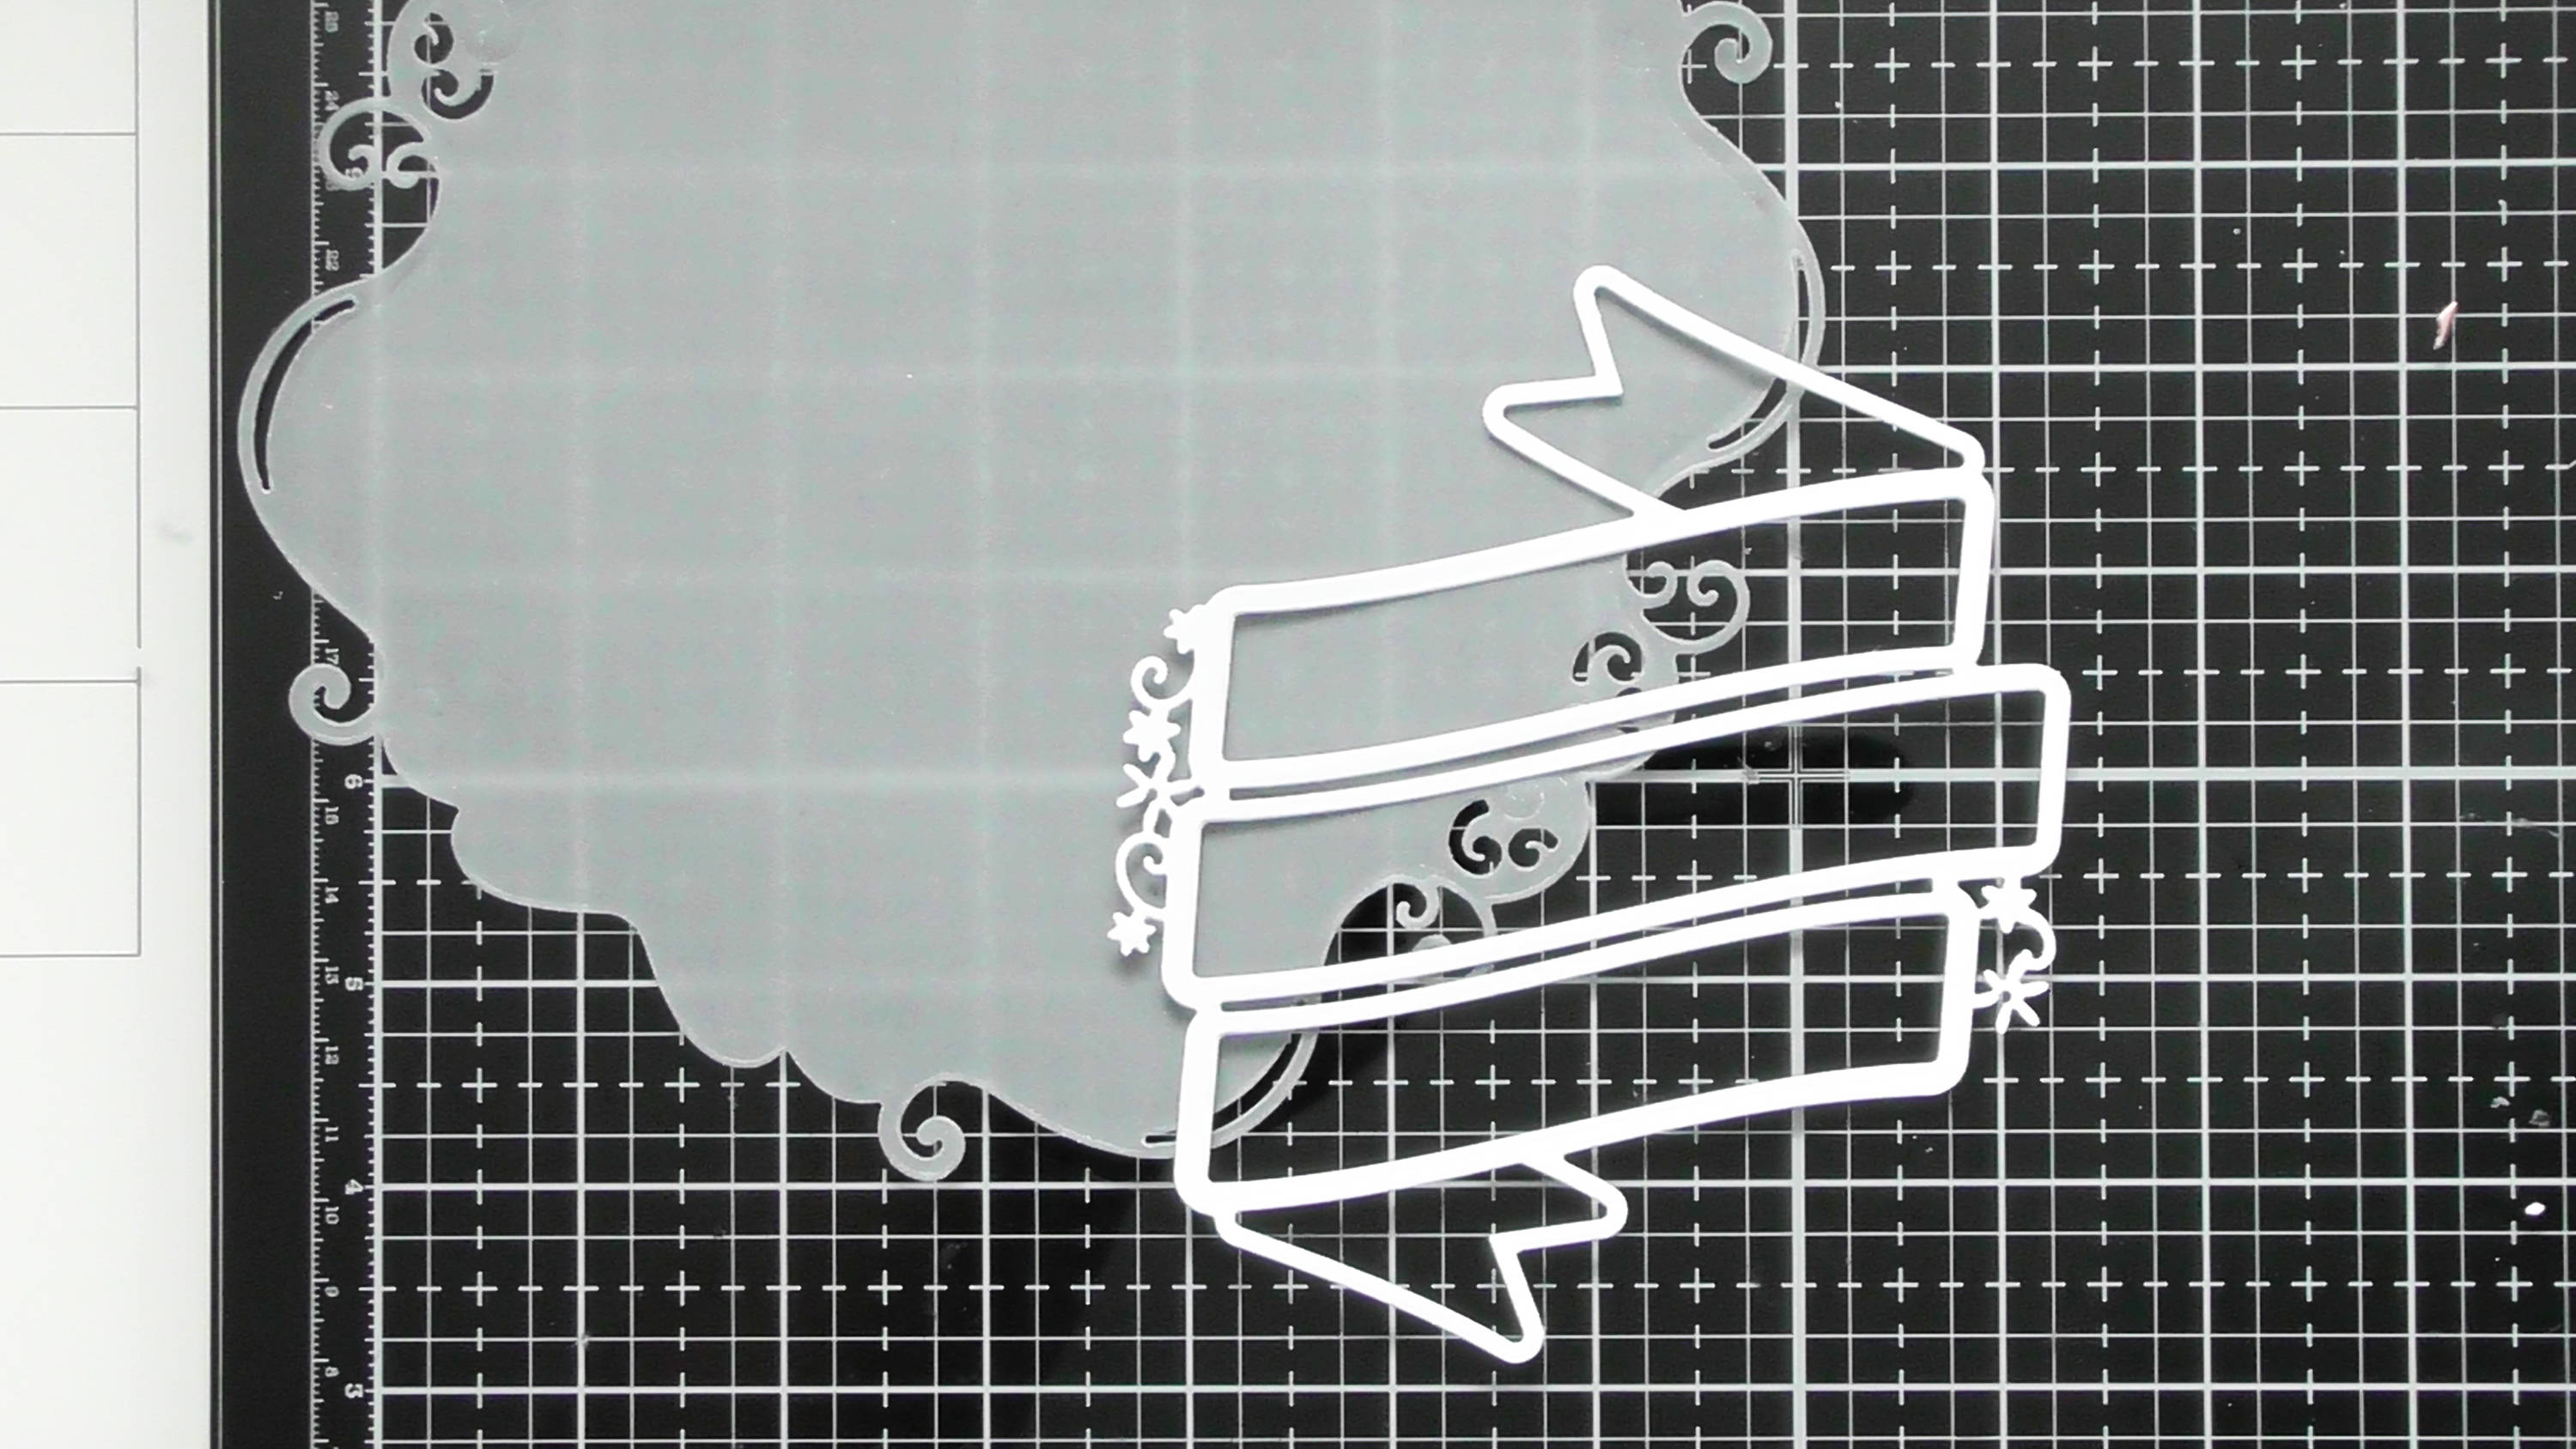
Step 8
![](https://ucarecdn.com/c8b4a400-67e3-4711-ba87-1c337b382811/-/format/auto/-/preview/3000x3000/-/quality/lighter/Large%20Layering%20dies%20Blog%20SBS%20-%20Christine%20Smith%20%20_9_-2.jpg)
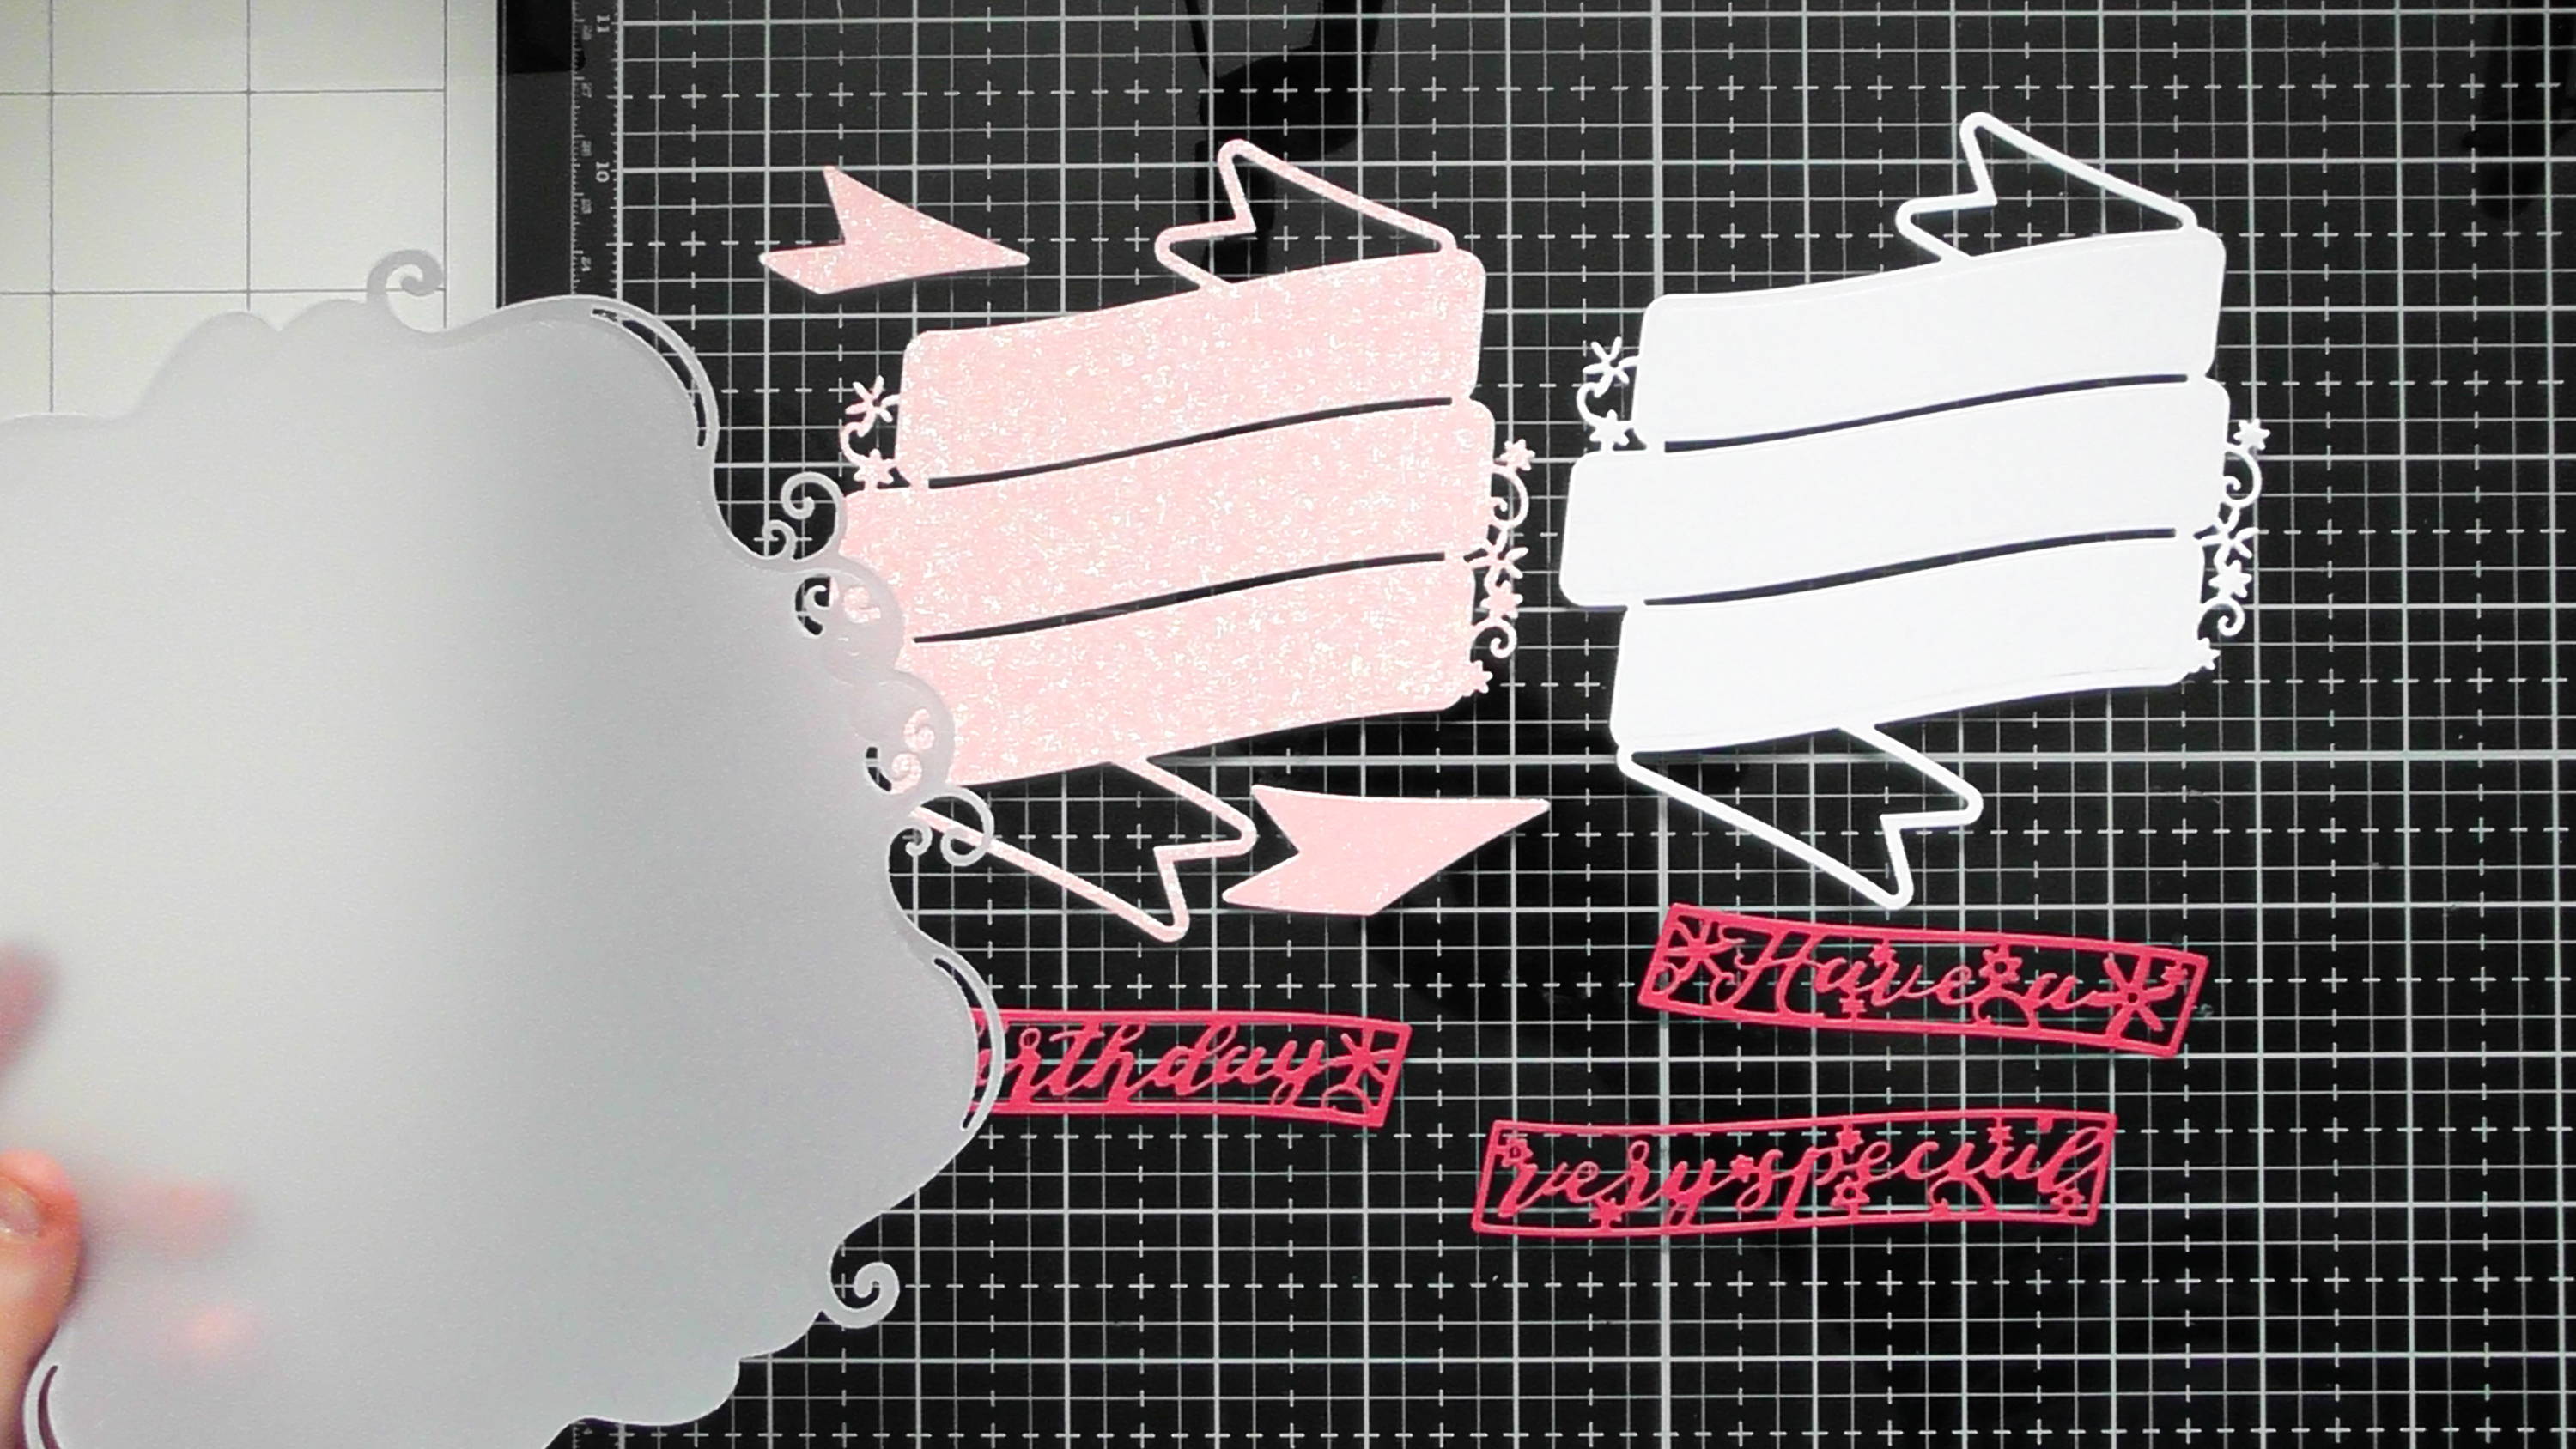
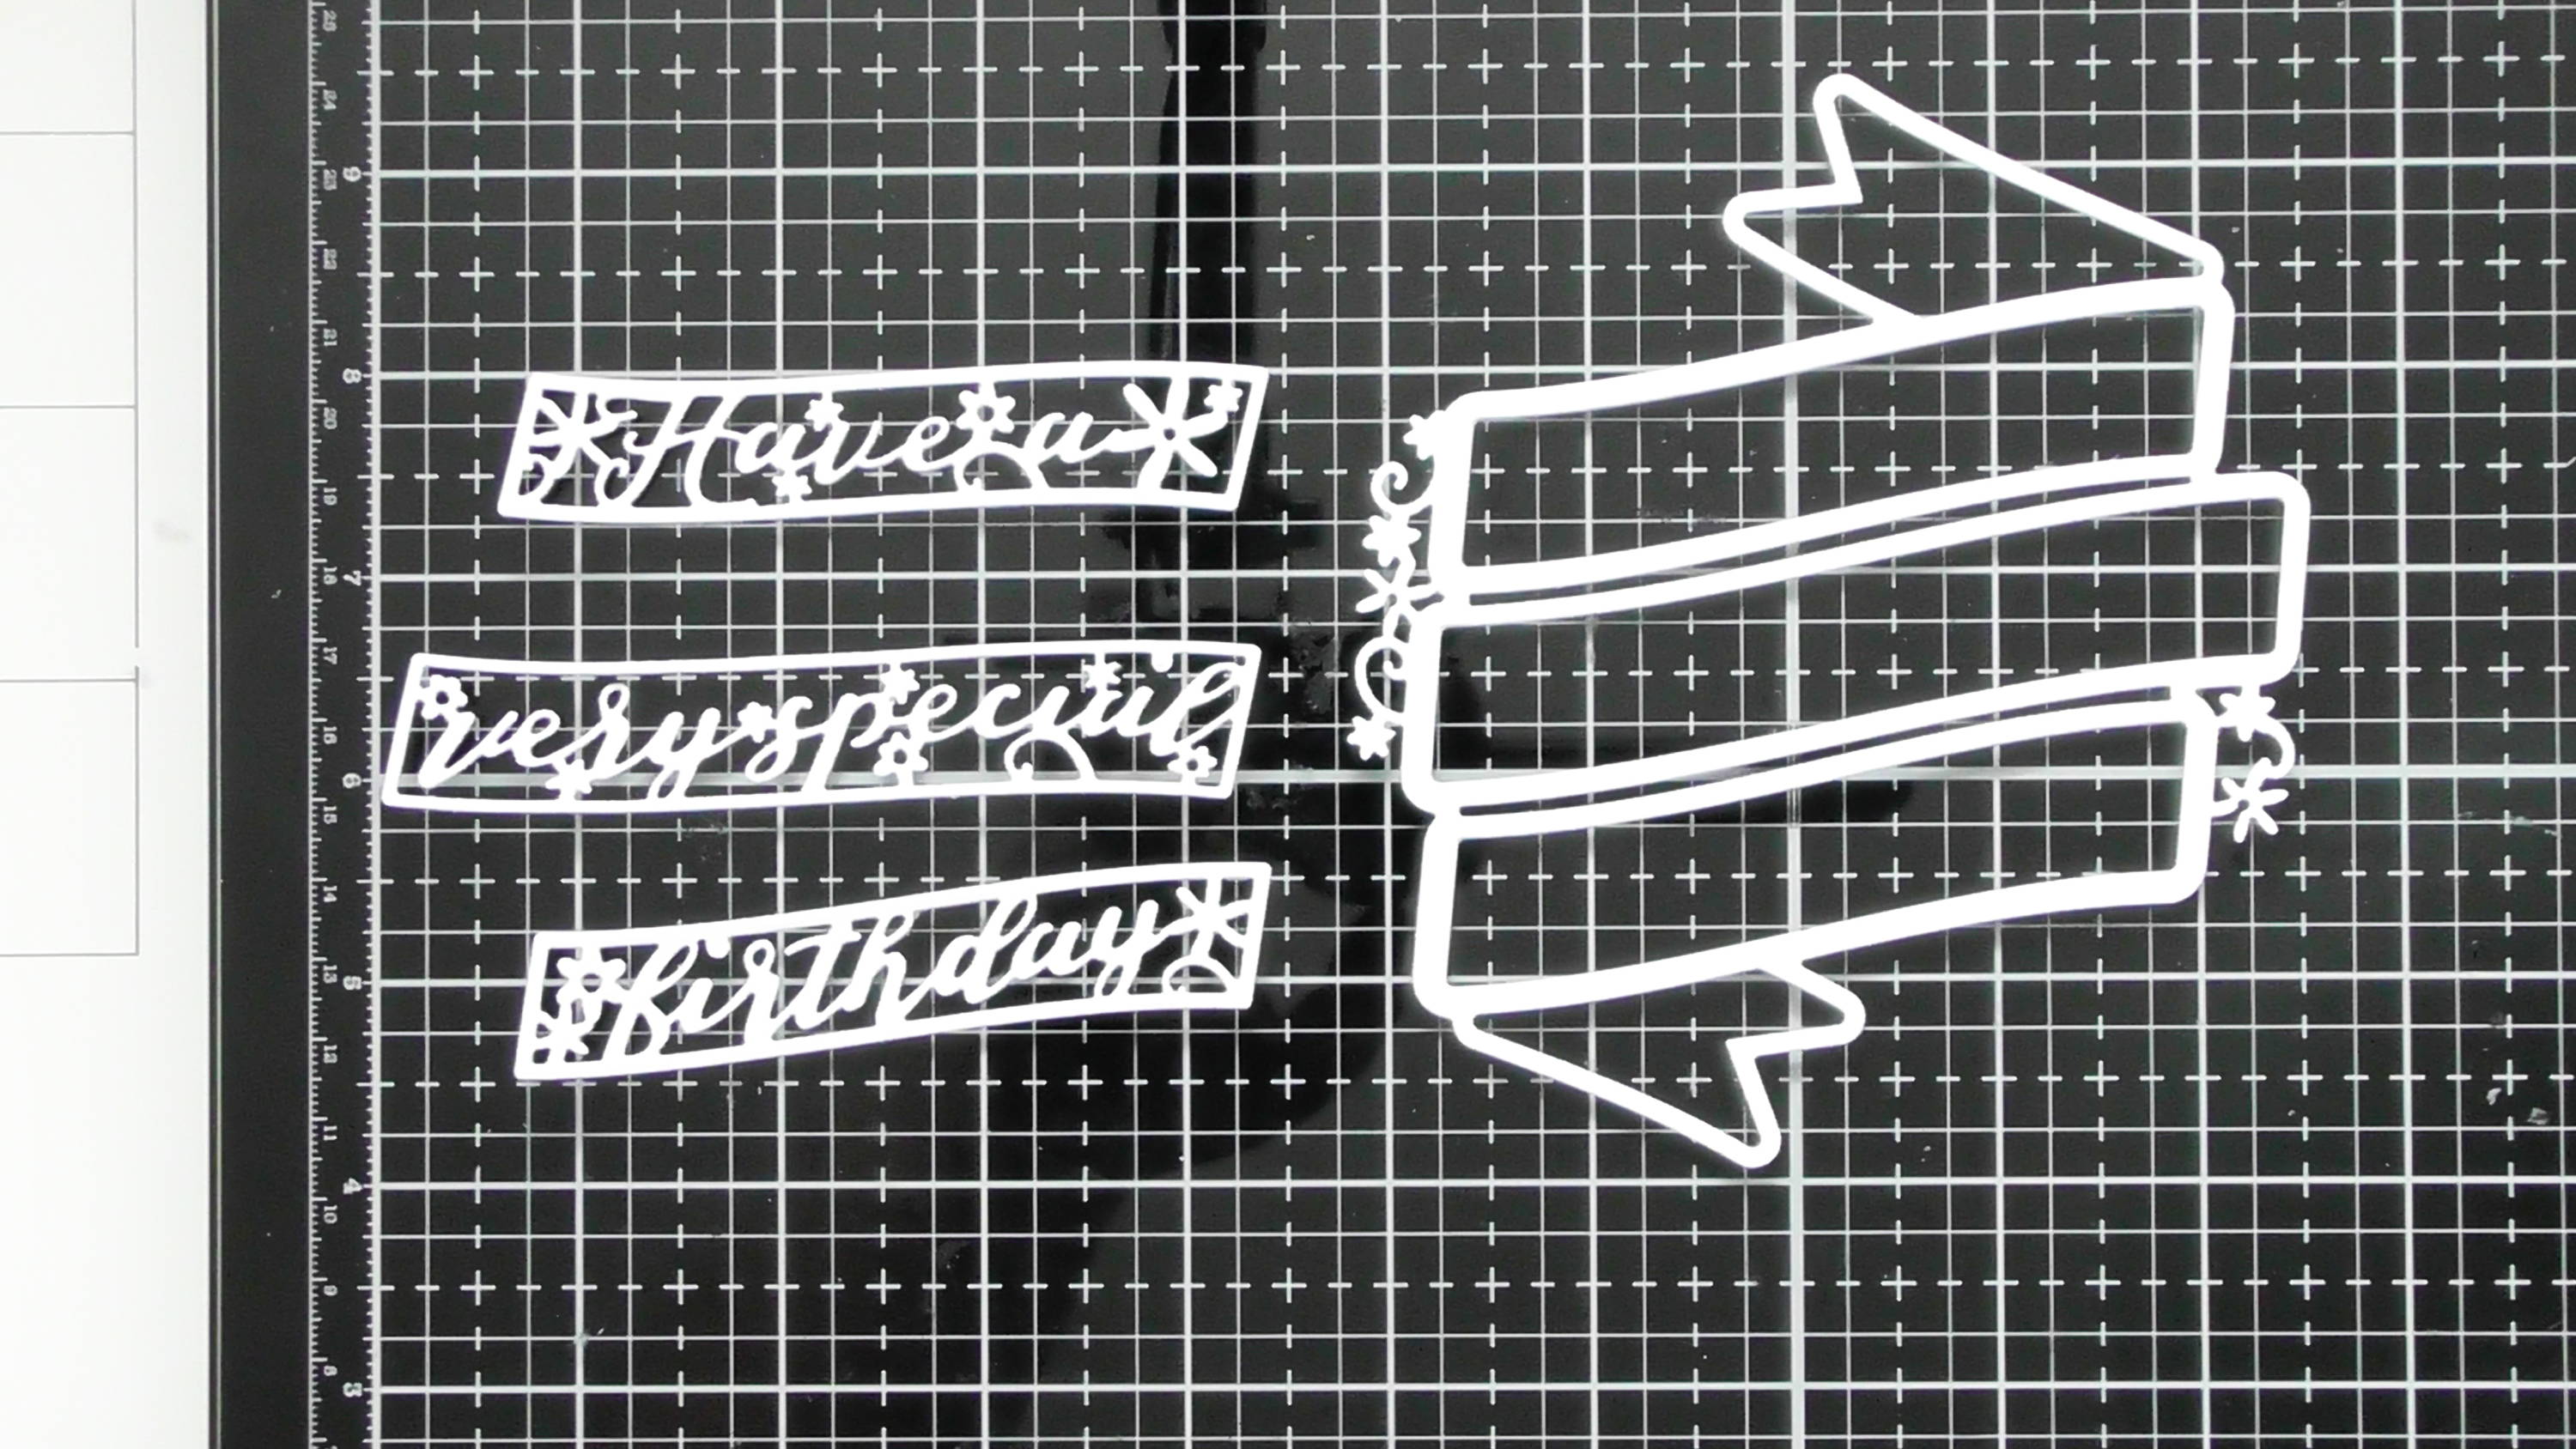
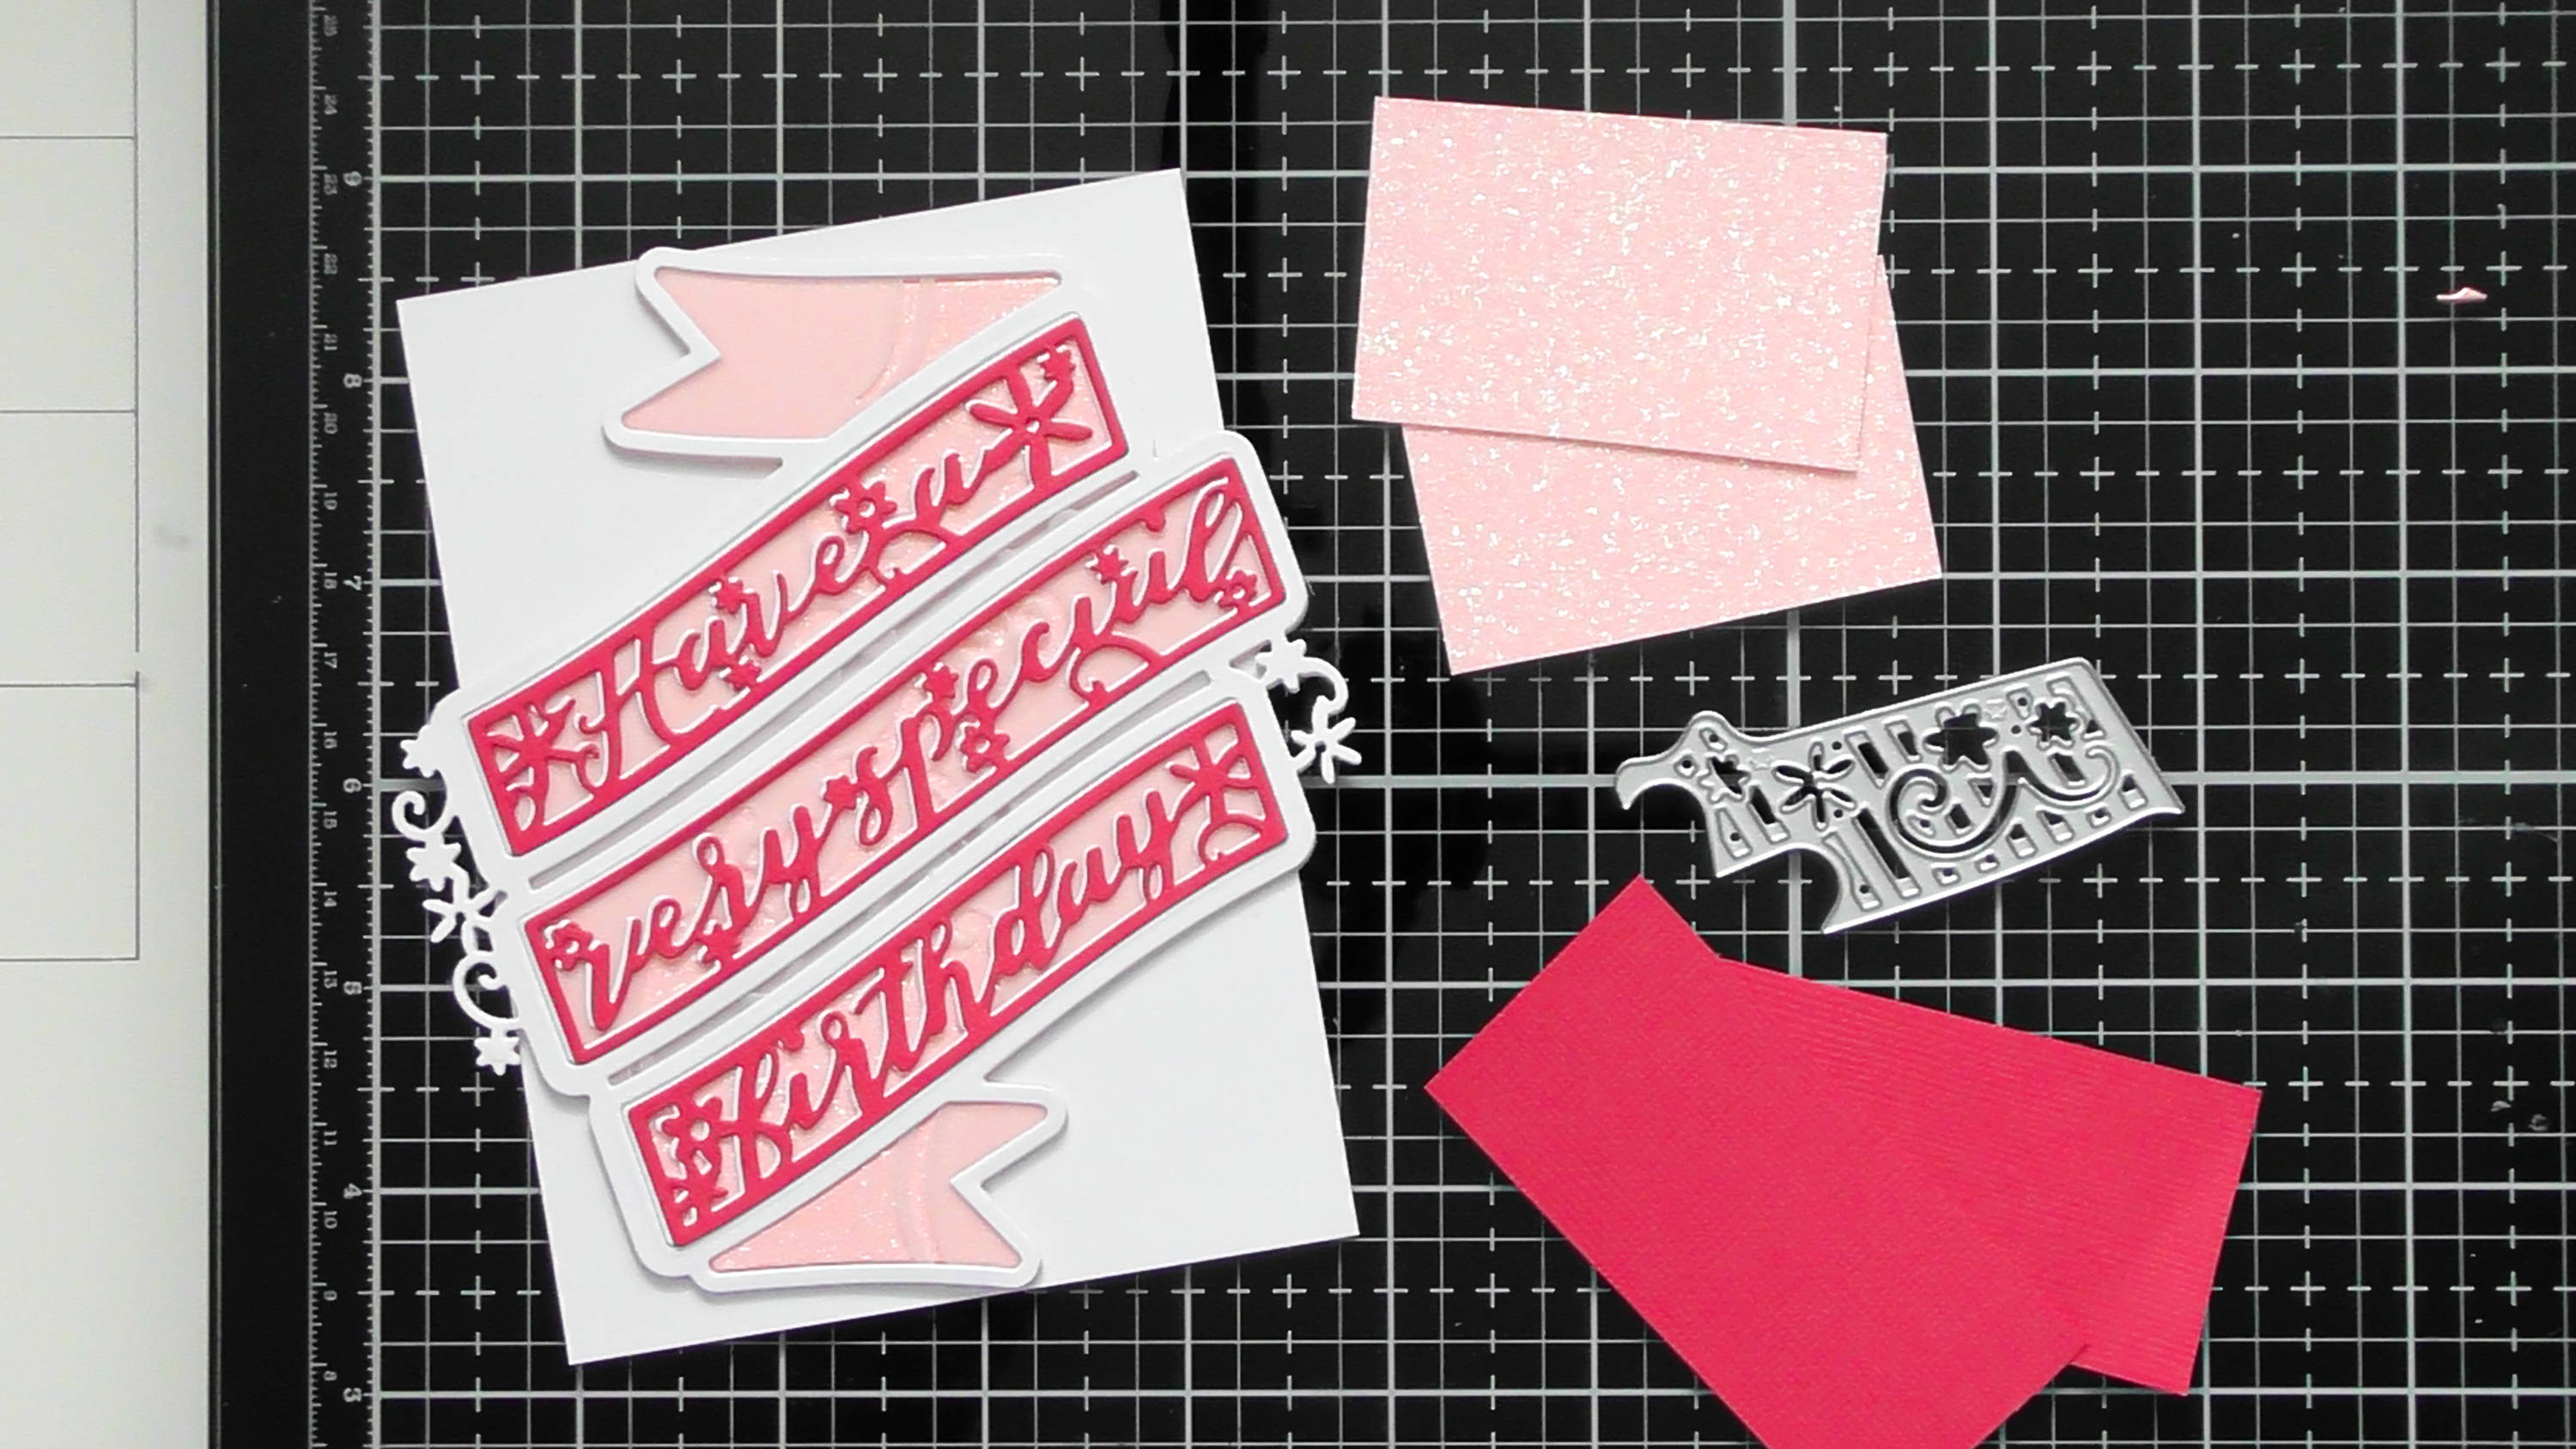
Now for a simple small card using ‘Special Birthday Beautiful Banner’ Firstly I’ve cut a few pieces, the large swirly shape from vellum, the main banner from white card and pink glitter card (make sure to keep the 2 fall away pieces from this cut) and the sentiments from deep pink.
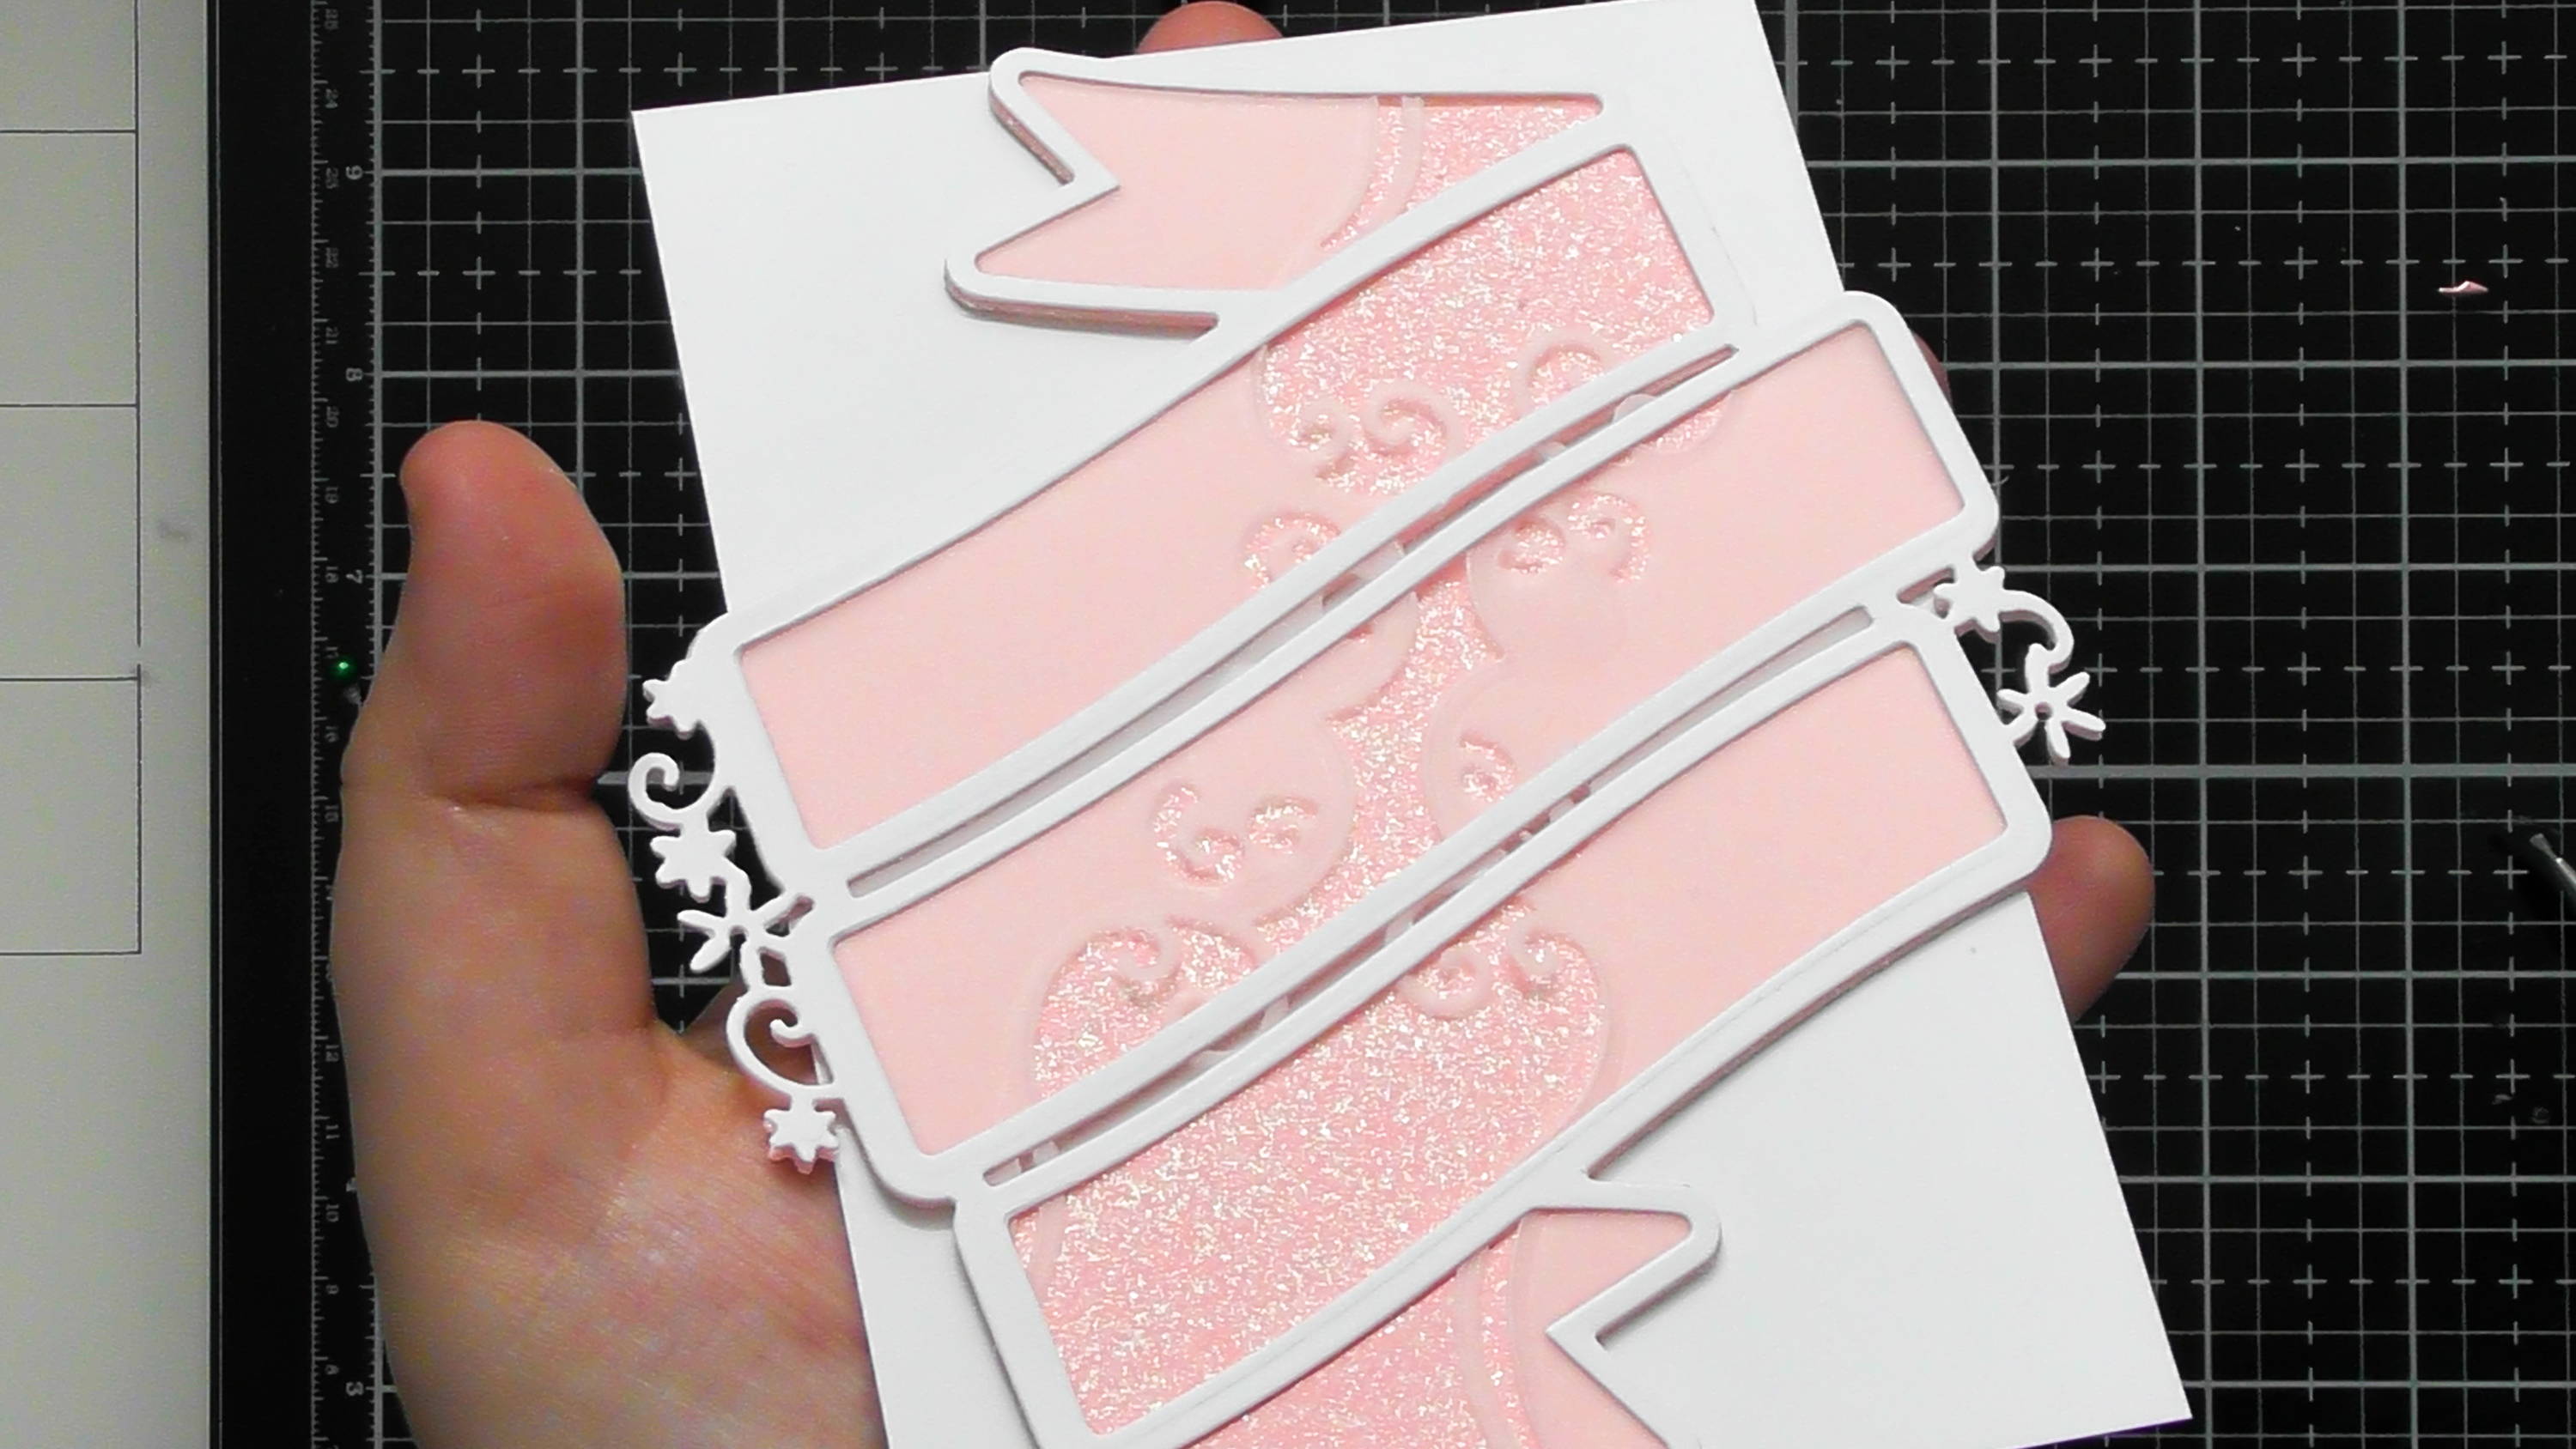
Step 9
![](https://ucarecdn.com/eb122e73-efbf-4c6b-a300-ef0341adfb63/-/format/auto/-/preview/3000x3000/-/quality/lighter/Large%20Layering%20dies%20Blog%20SBS%20-%20Christine%20Smith%20%20_10_-2.jpg)
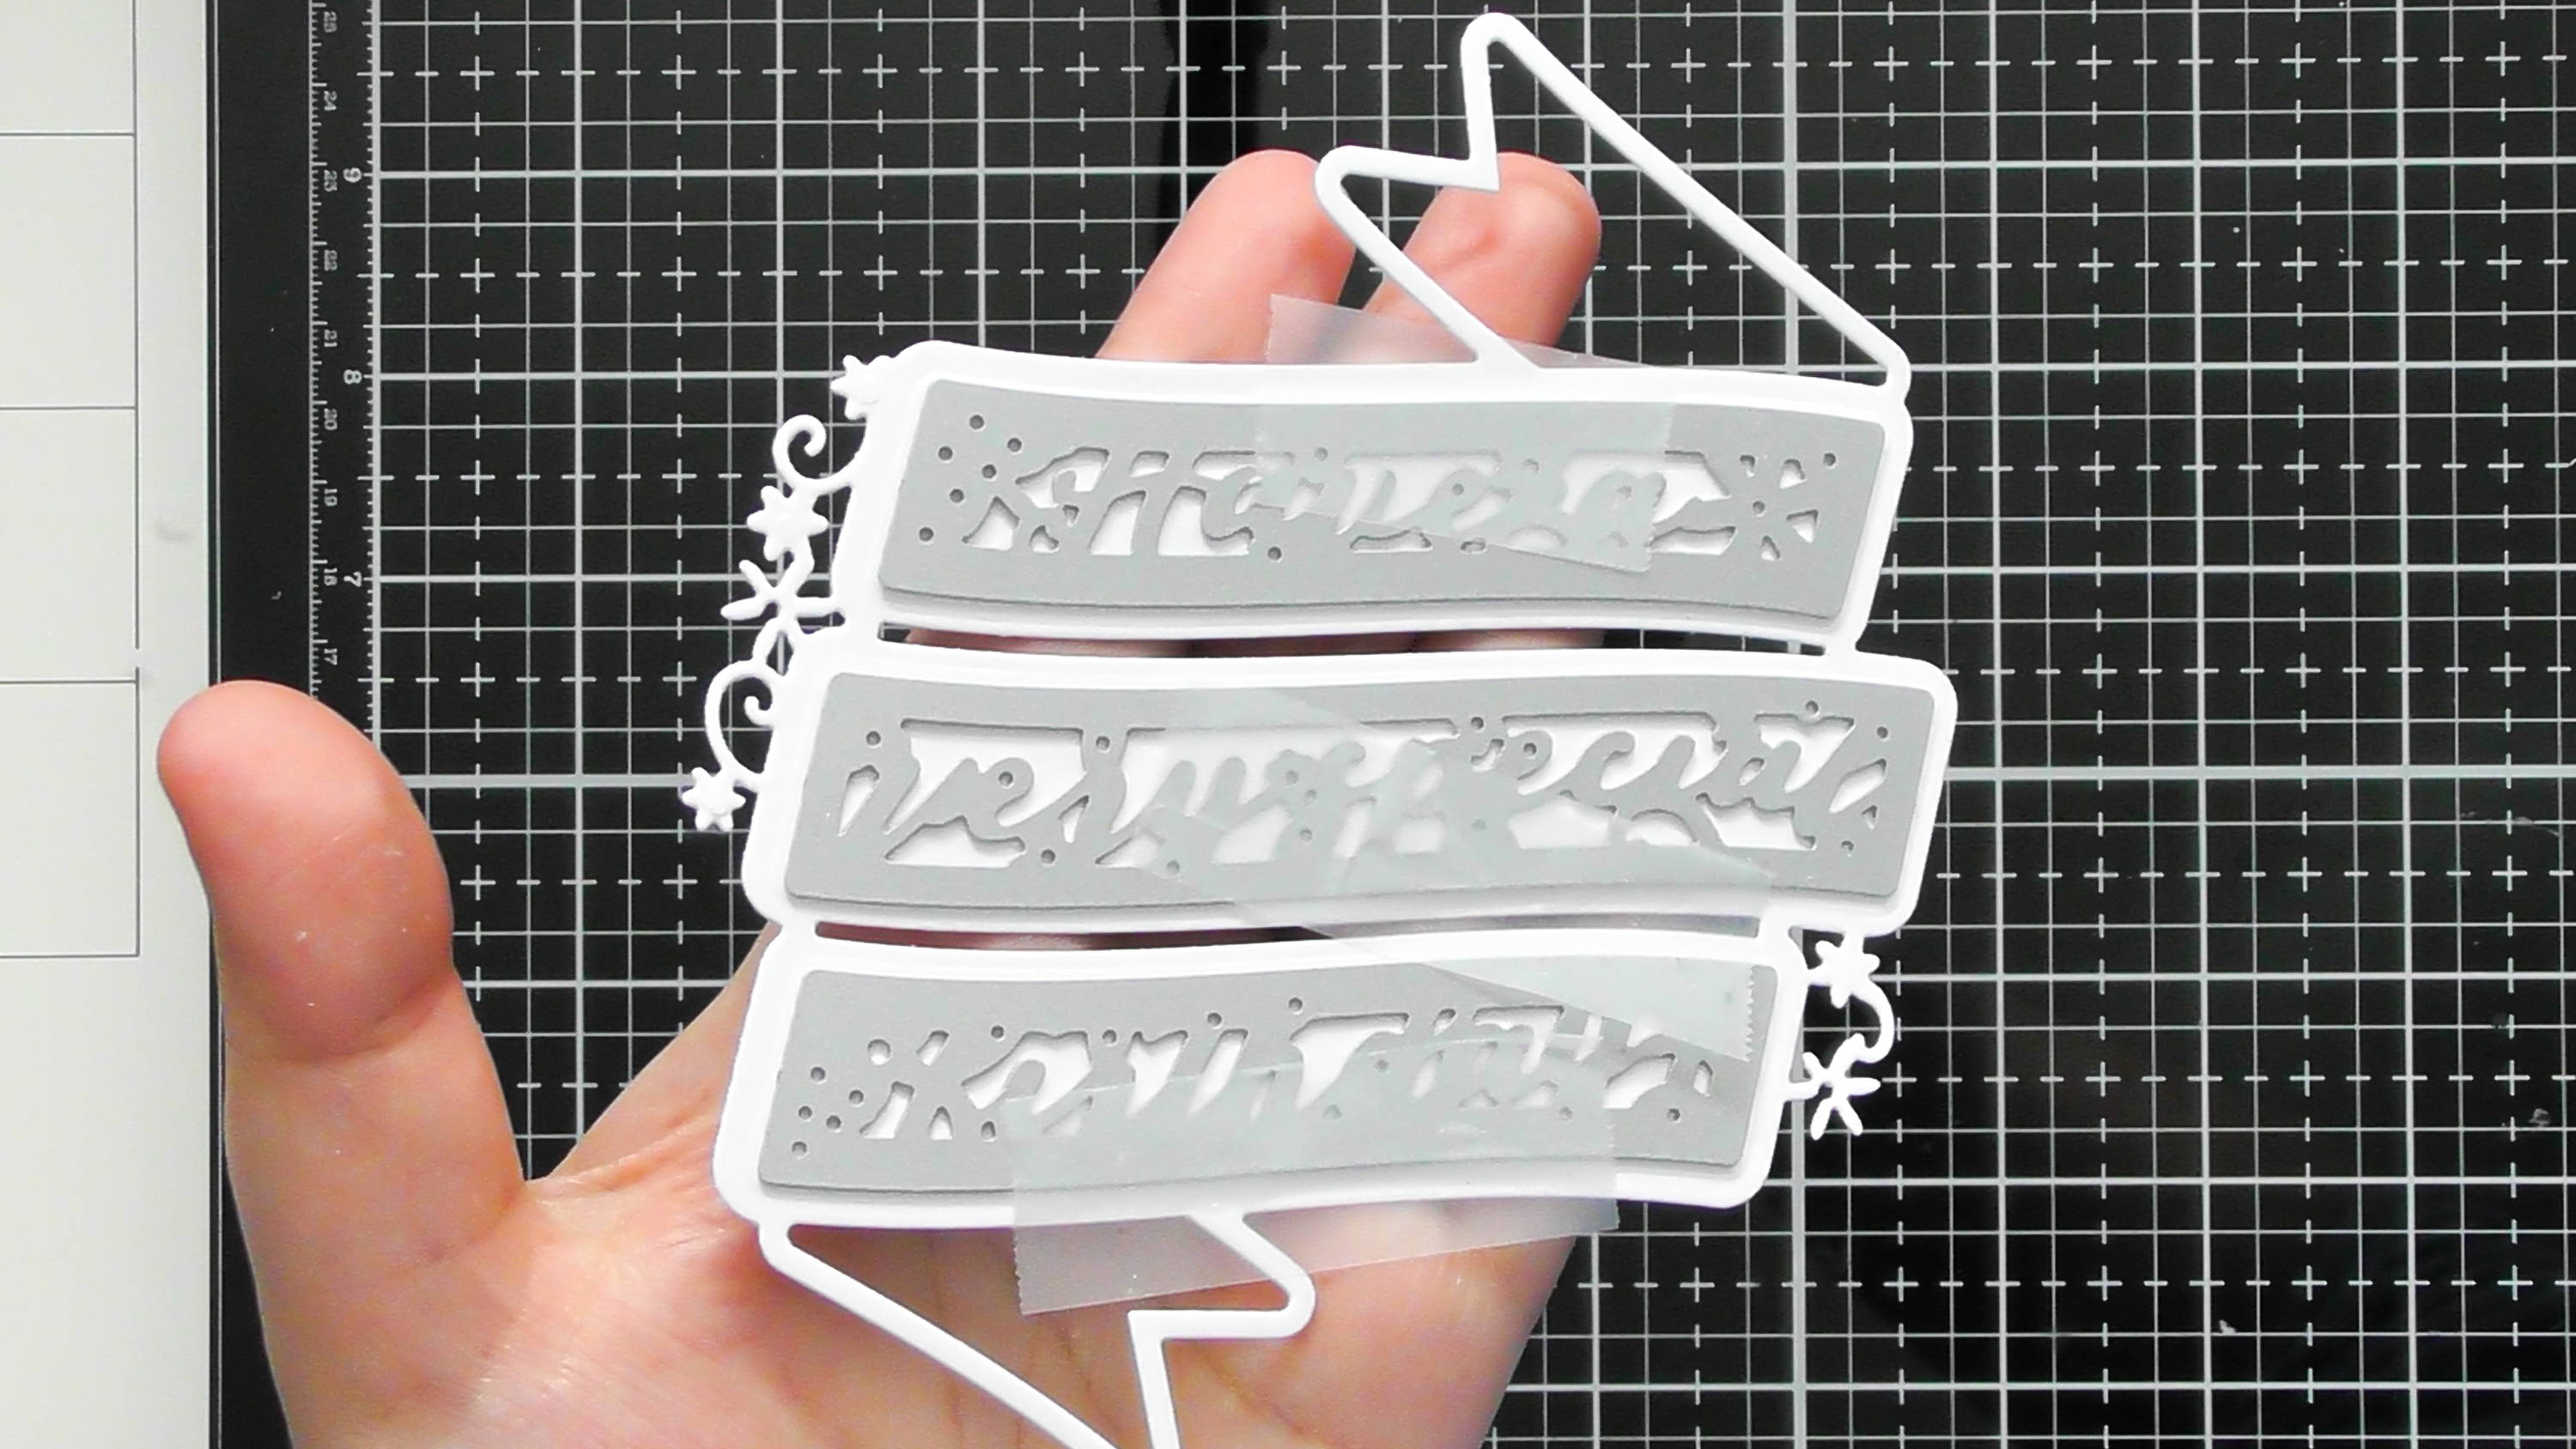
Now we want to make the whole white banner into an outline, so to do this you just cut the 3 sentiment dies into the solid banner piece, and from this you also get the 3 sentiments in white too which we will use as drop shadows later
Step 10
![](https://ucarecdn.com/e25ab3cb-15eb-4071-aeb6-8d964d8f05da/-/format/auto/-/preview/3000x3000/-/quality/lighter/Large%20Layering%20dies%20Blog%20SBS%20-%20Christine%20Smith%20%20_11_-2.jpg)
You’re not left with this…
Step 11
![](https://ucarecdn.com/d1cc16d7-9ff3-4eae-9058-ae89a3bb6032/-/format/auto/-/preview/3000x3000/-/quality/lighter/Large%20Layering%20dies%20Blog%20SBS%20-%20Christine%20Smith%20%20_12_-2.jpg)
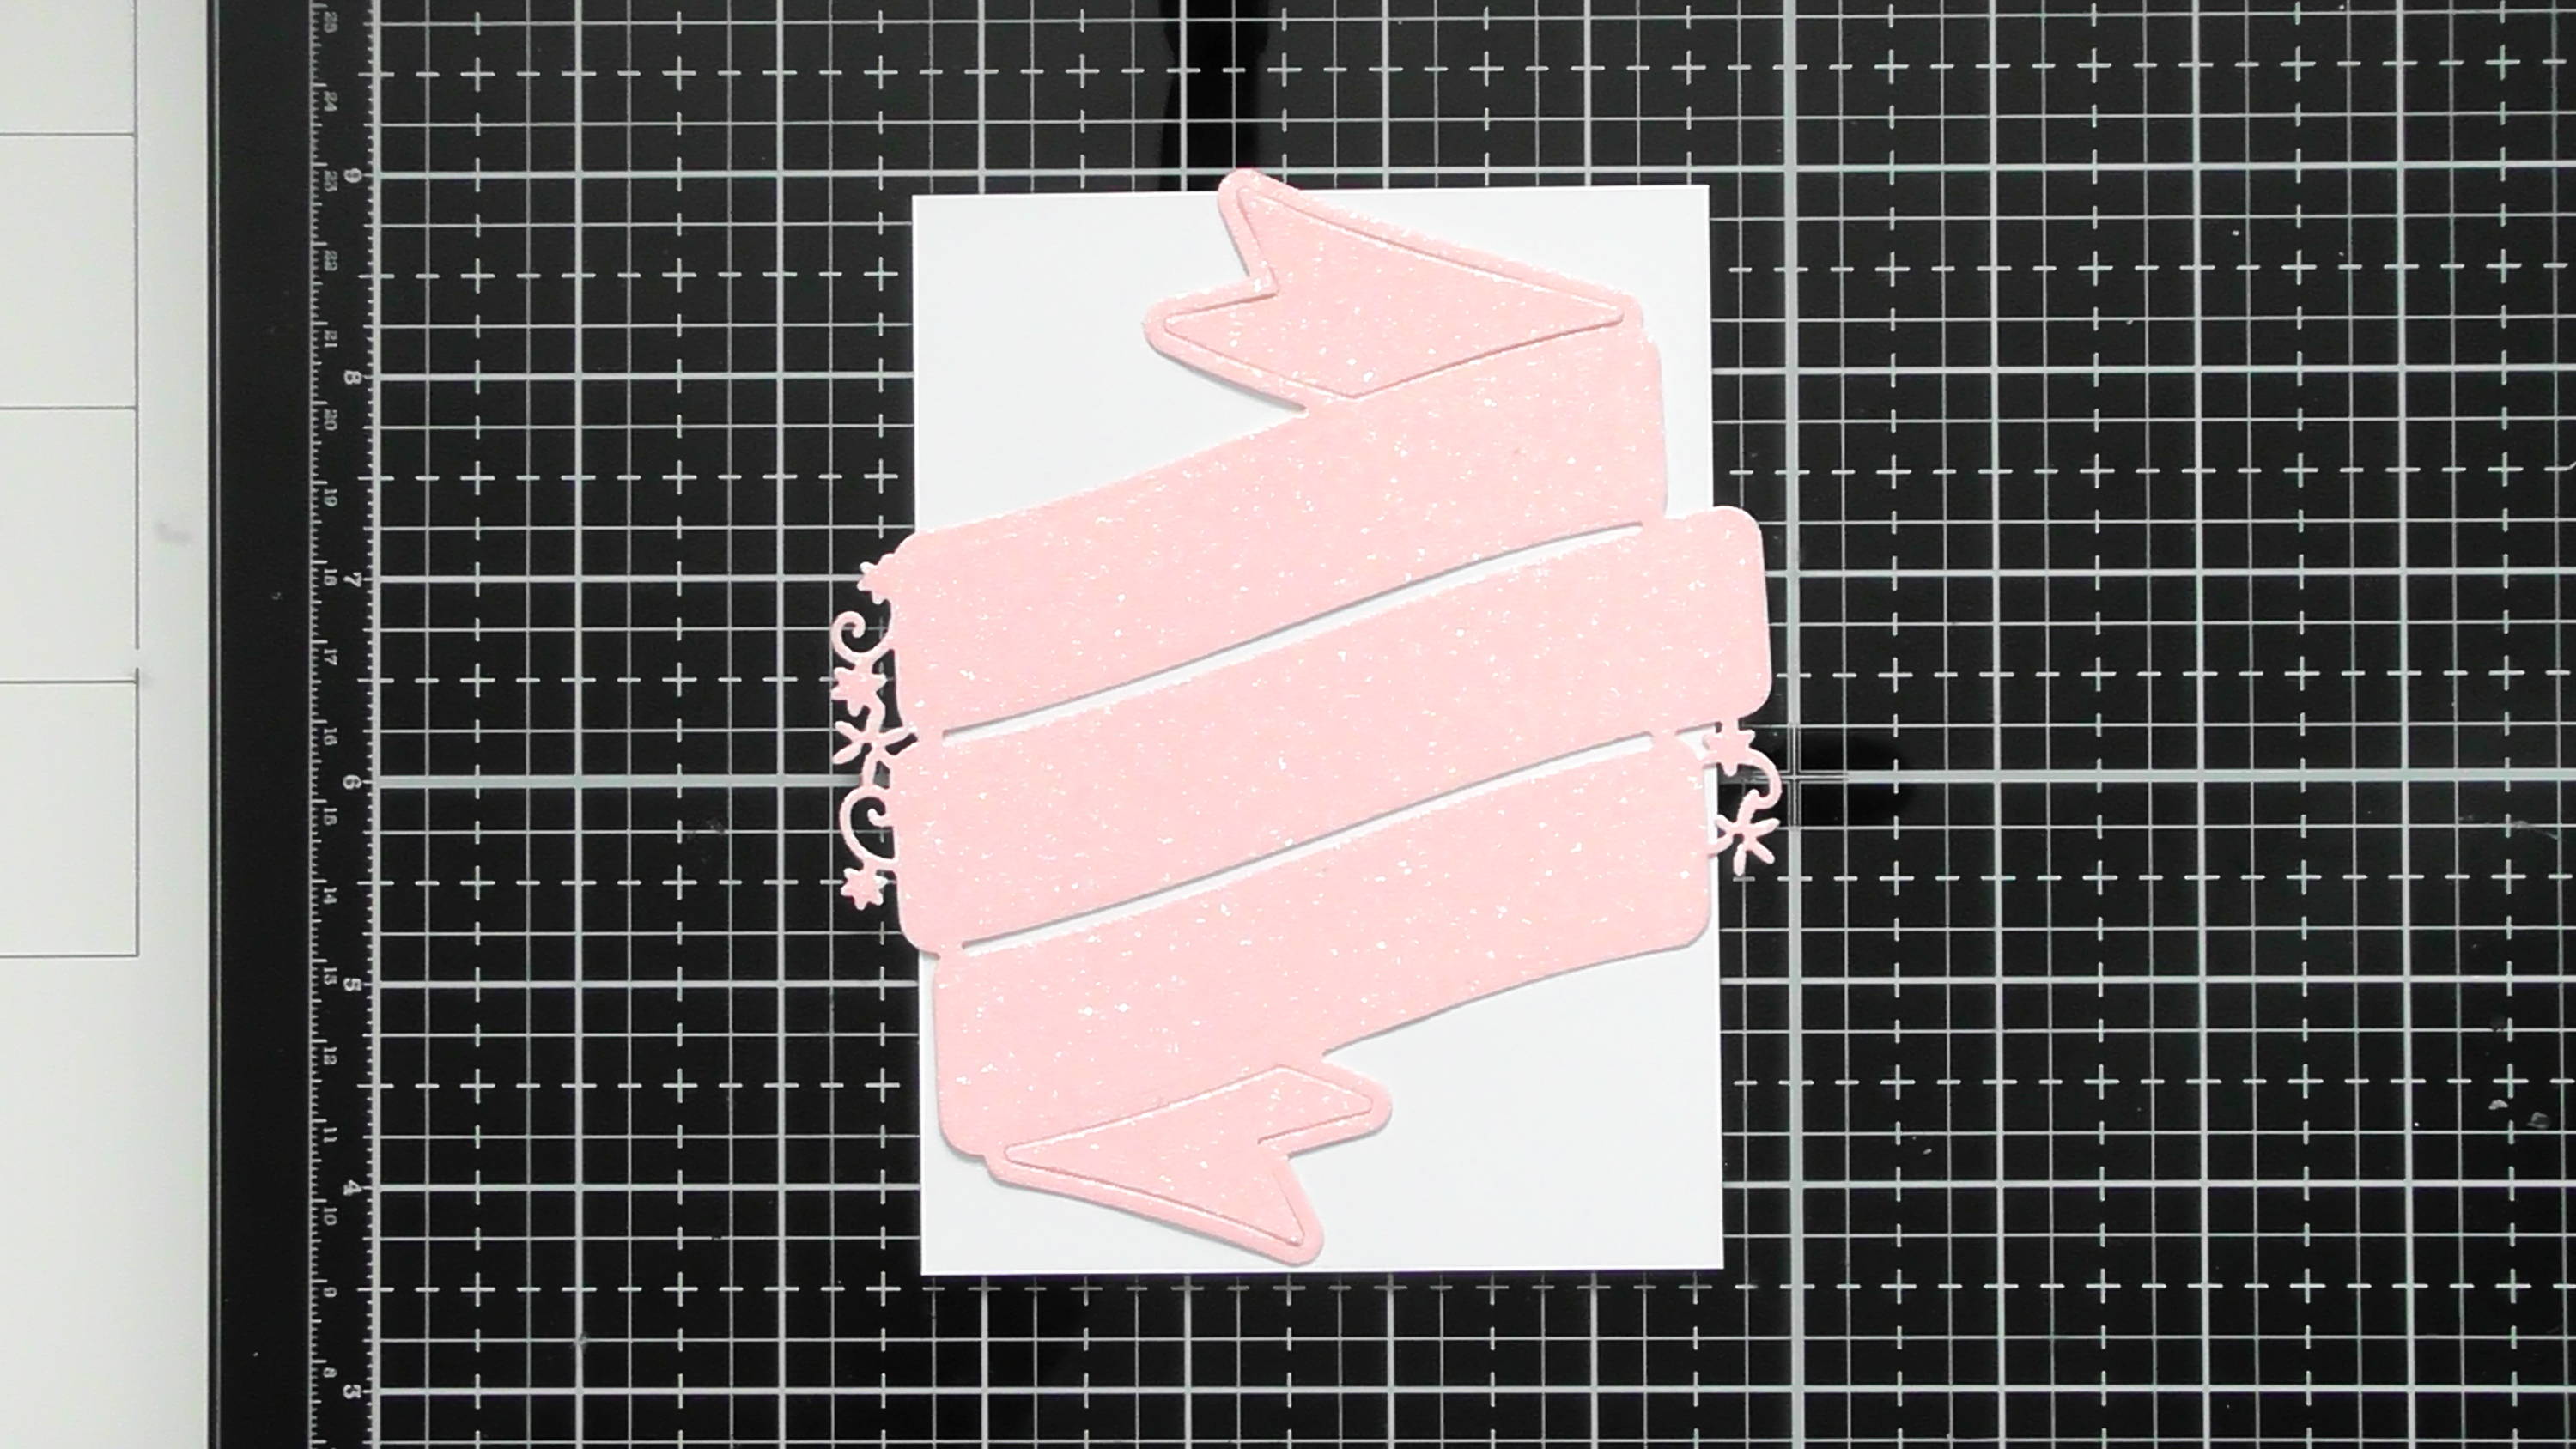
Add your solid glitter banner to your small card panel (10x13 cm) using 3D foam to give some dimension.
Step 12
![](https://ucarecdn.com/4cf7dbe5-dea0-4c05-bfdf-b64cdea22a50/-/format/auto/-/preview/3000x3000/-/quality/lighter/Large%20Layering%20dies%20Blog%20SBS%20-%20Christine%20Smith%20%20_13_-2.jpg)
Then I thought it’d be nice to soften some of the glitter that will show through later, so I decided to take that large swirly vellum die-cut and use portions of it behind the white banner outline.
Step 13
![](https://ucarecdn.com/9dfca1d8-91ee-4835-88ca-3974be310817/-/format/auto/-/preview/3000x3000/-/quality/lighter/Large%20Layering%20dies%20Blog%20SBS%20-%20Christine%20Smith%20%20_14_-2.jpg)
Repeat on the other side with the remaining piece and trim off any excess…
Step 14
![](https://ucarecdn.com/bb7fef4c-adde-4b03-a550-b24fc26875f9/-/format/auto/-/preview/3000x3000/-/quality/lighter/Large%20Layering%20dies%20Blog%20SBS%20-%20Christine%20Smith%20%20_15_-2.jpg)
You can then stick this on top of the pink glitter one to give this lovely subtle result.
Step 15
![](https://ucarecdn.com/cbefb3ed-5ba3-46ac-8139-f89a606e70e2/-/format/auto/-/preview/3000x3000/-/quality/lighter/Large%20Layering%20dies%20Blog%20SBS%20-%20Christine%20Smith%20%20_16_-2.jpg)
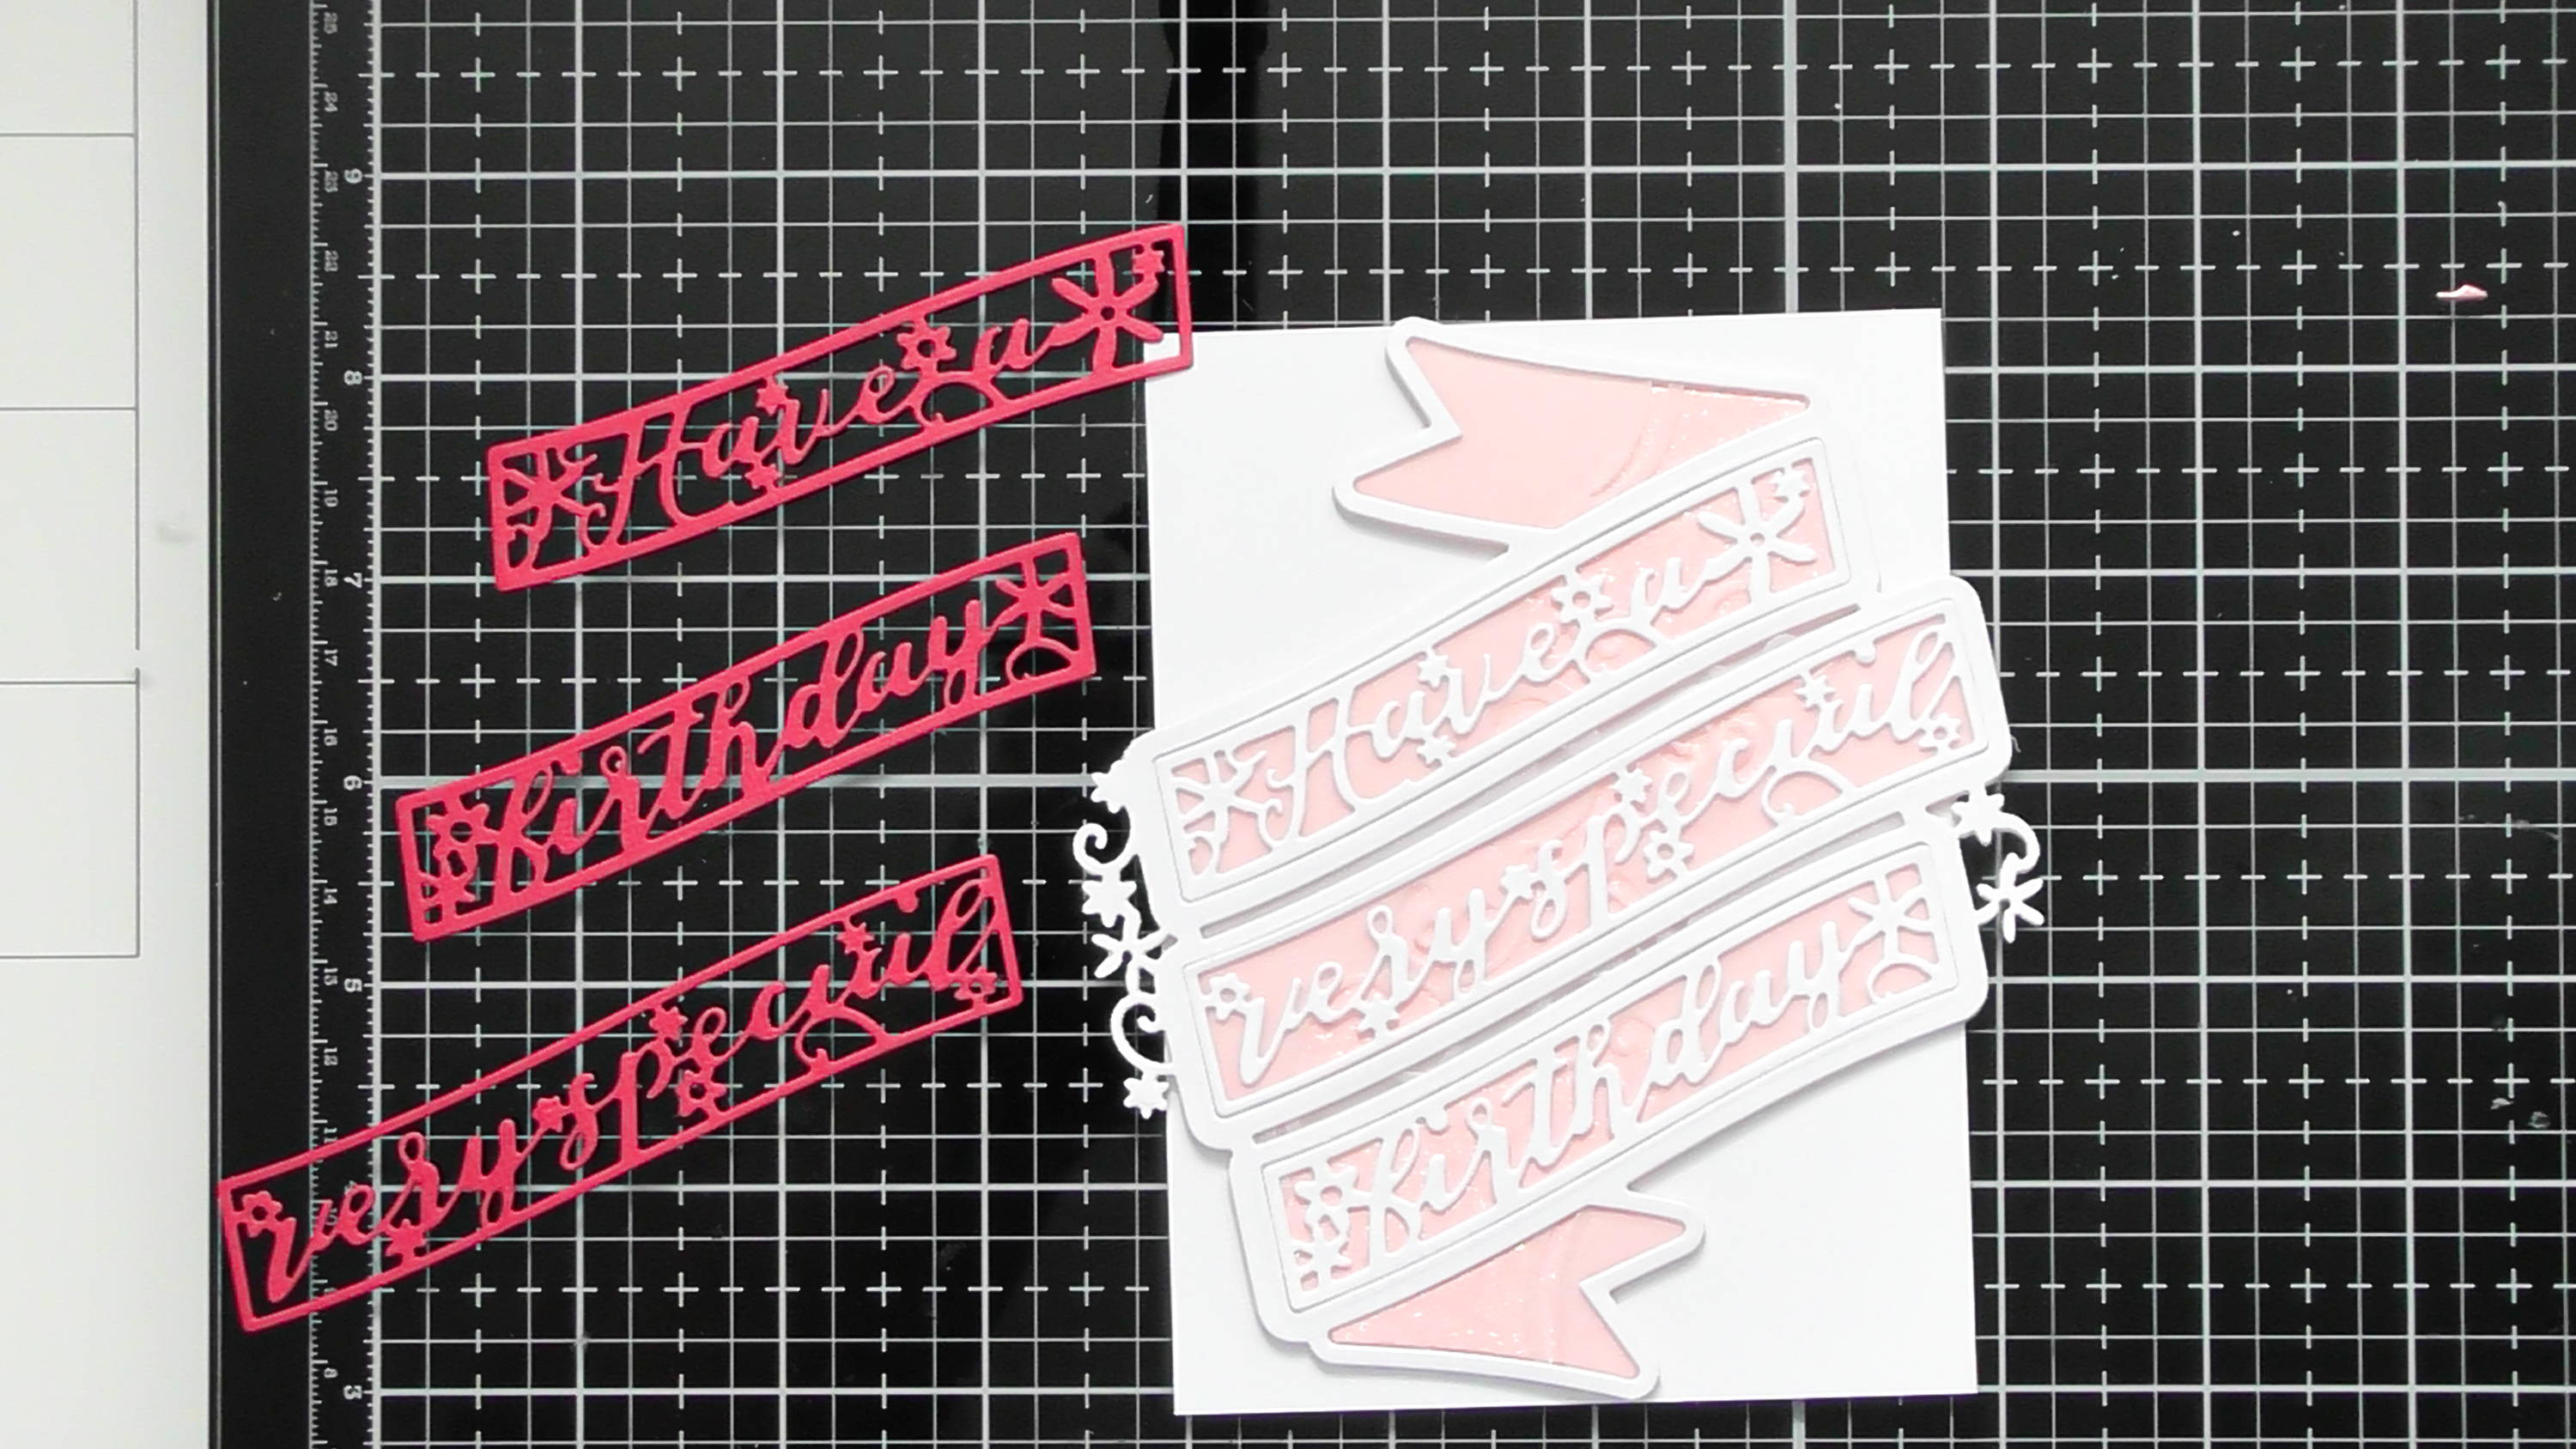
Now for the main sentiments, firstly I recessed the white die-cuts back in…
Step 16
![](https://ucarecdn.com/fc1064f3-ba2d-47db-b62b-641ab486e040/-/format/auto/-/preview/3000x3000/-/quality/lighter/Large%20Layering%20dies%20Blog%20SBS%20-%20Christine%20Smith%20%20_17_-2.jpg)
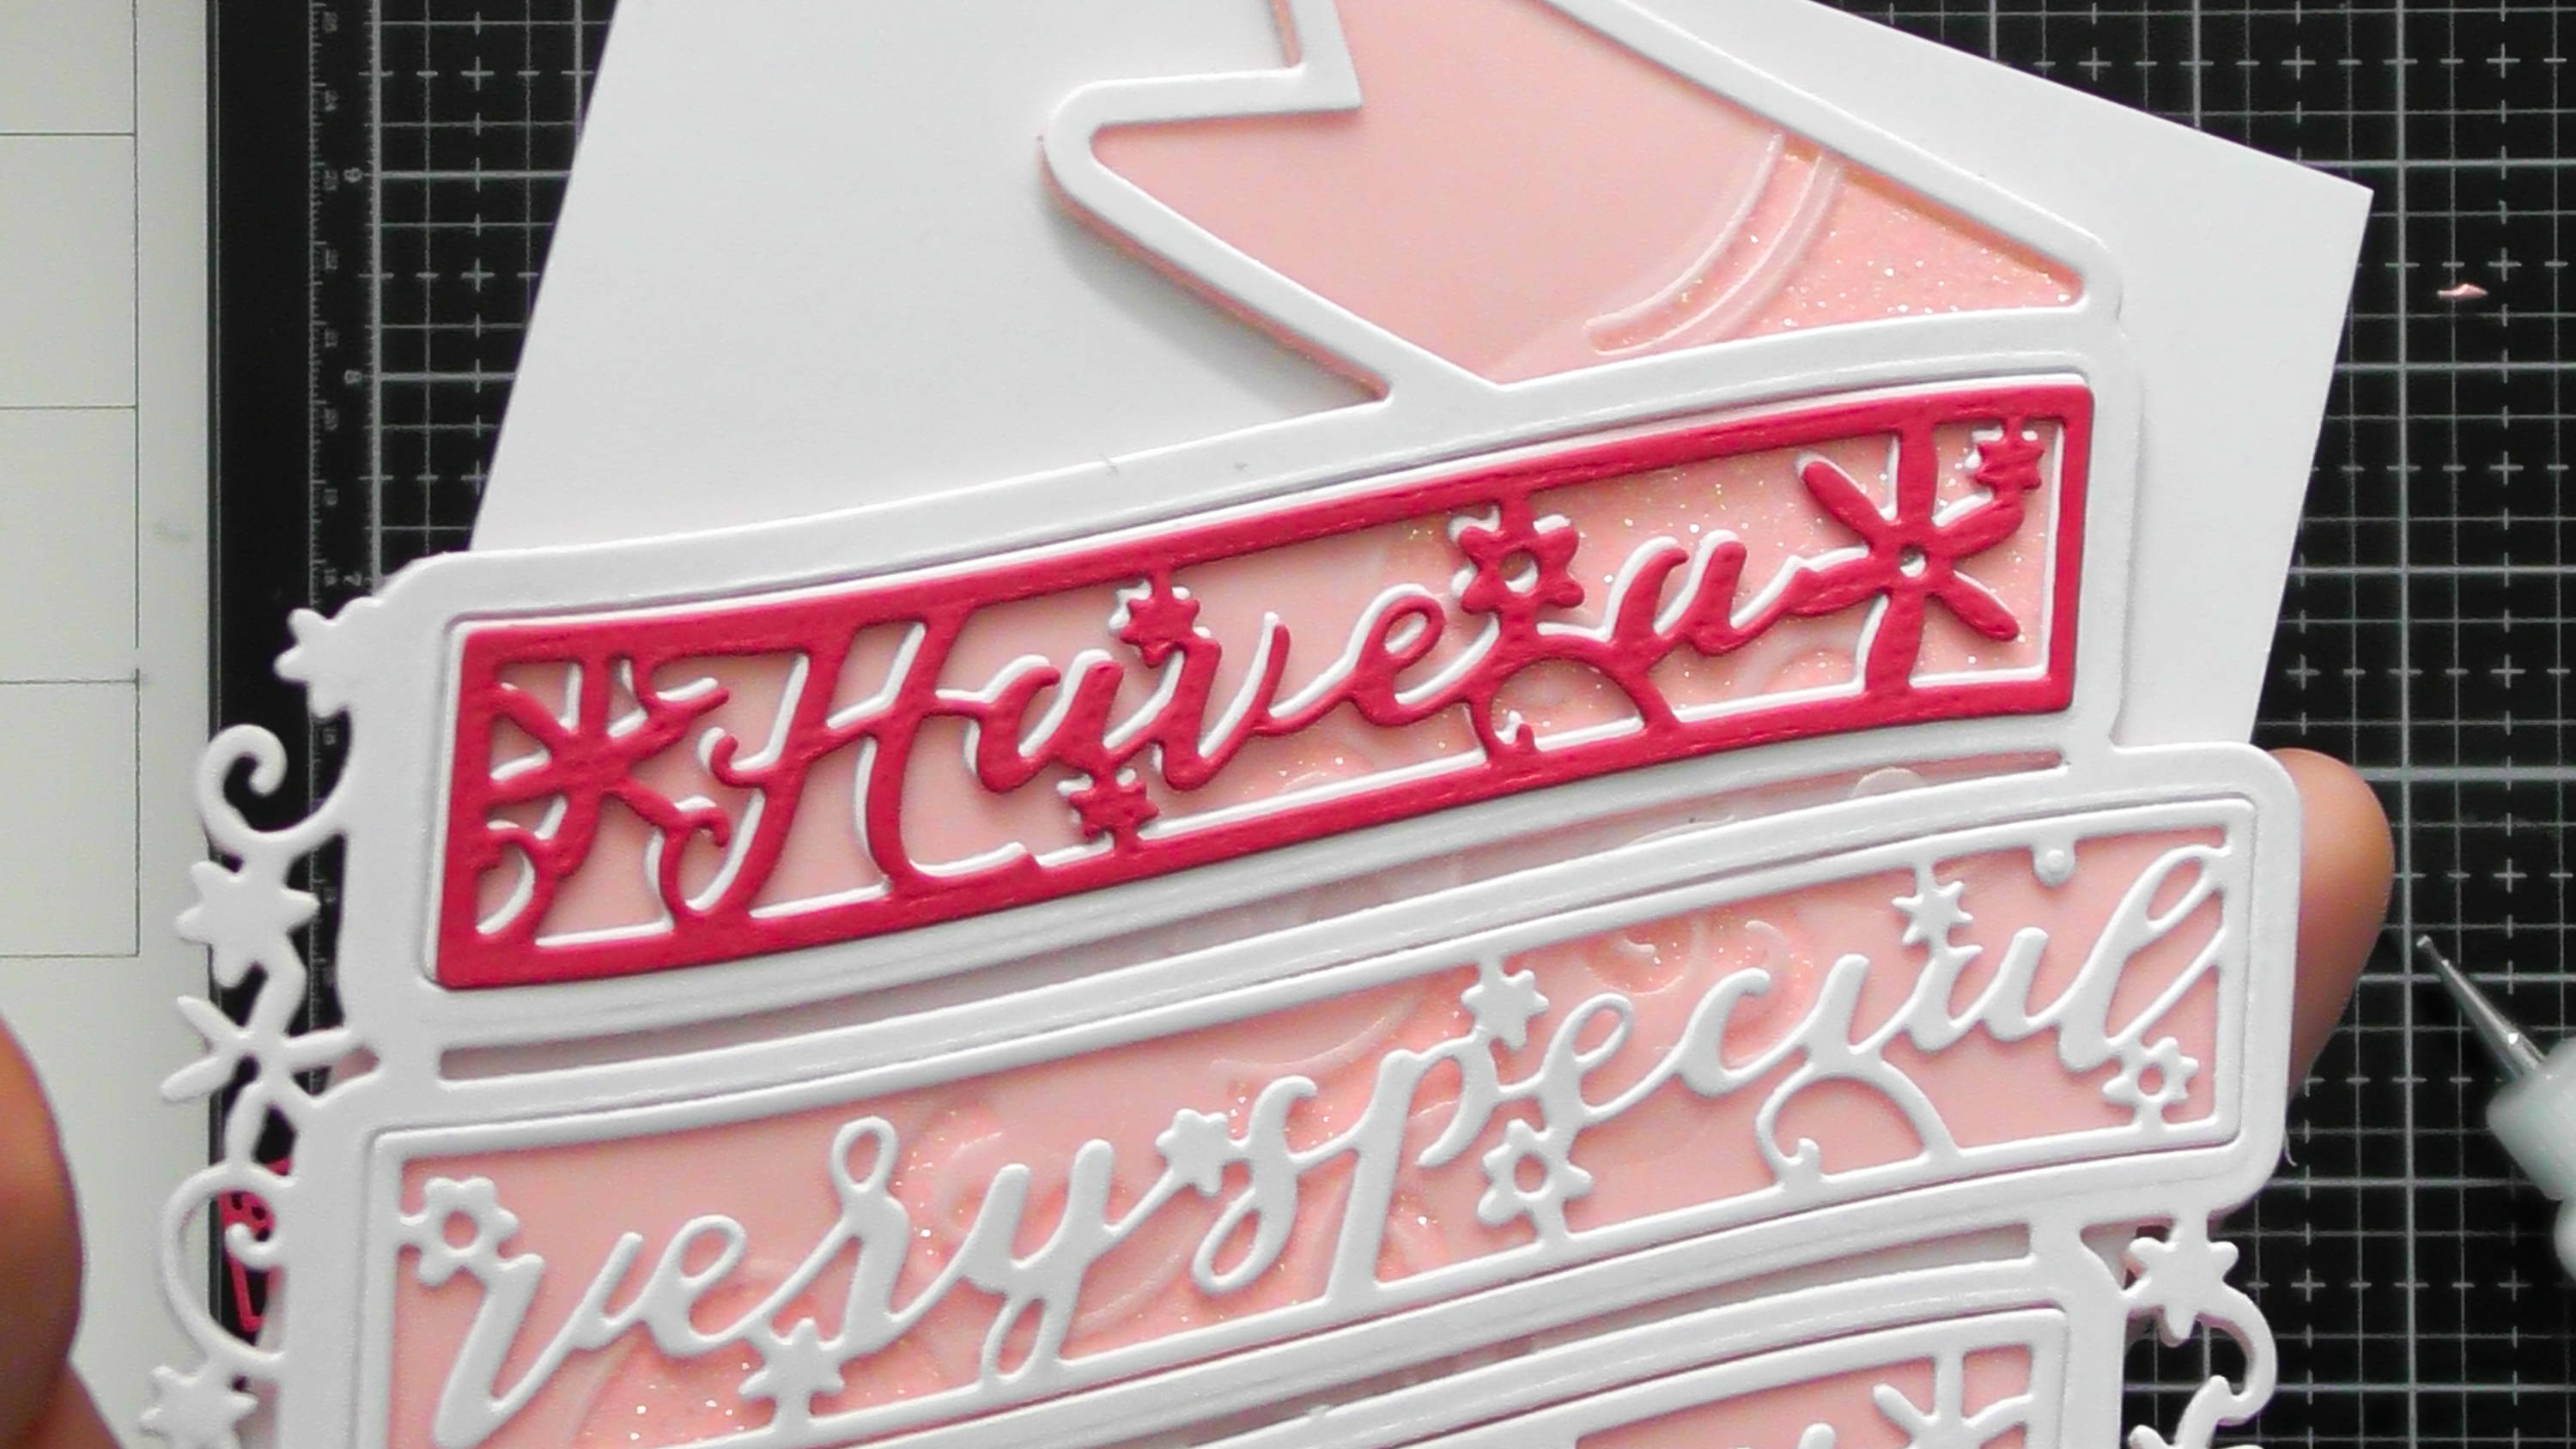
…then I added the pink die-cuts shifting them slightly so the white acts as a drop shadow :D
Step 17
![](https://ucarecdn.com/7e7bff62-678a-4416-9f28-4c635f4eb539/-/format/auto/-/preview/3000x3000/-/quality/lighter/Large%20Layering%20dies%20Blog%20SBS%20-%20Christine%20Smith%20%20_18_-2.jpg)
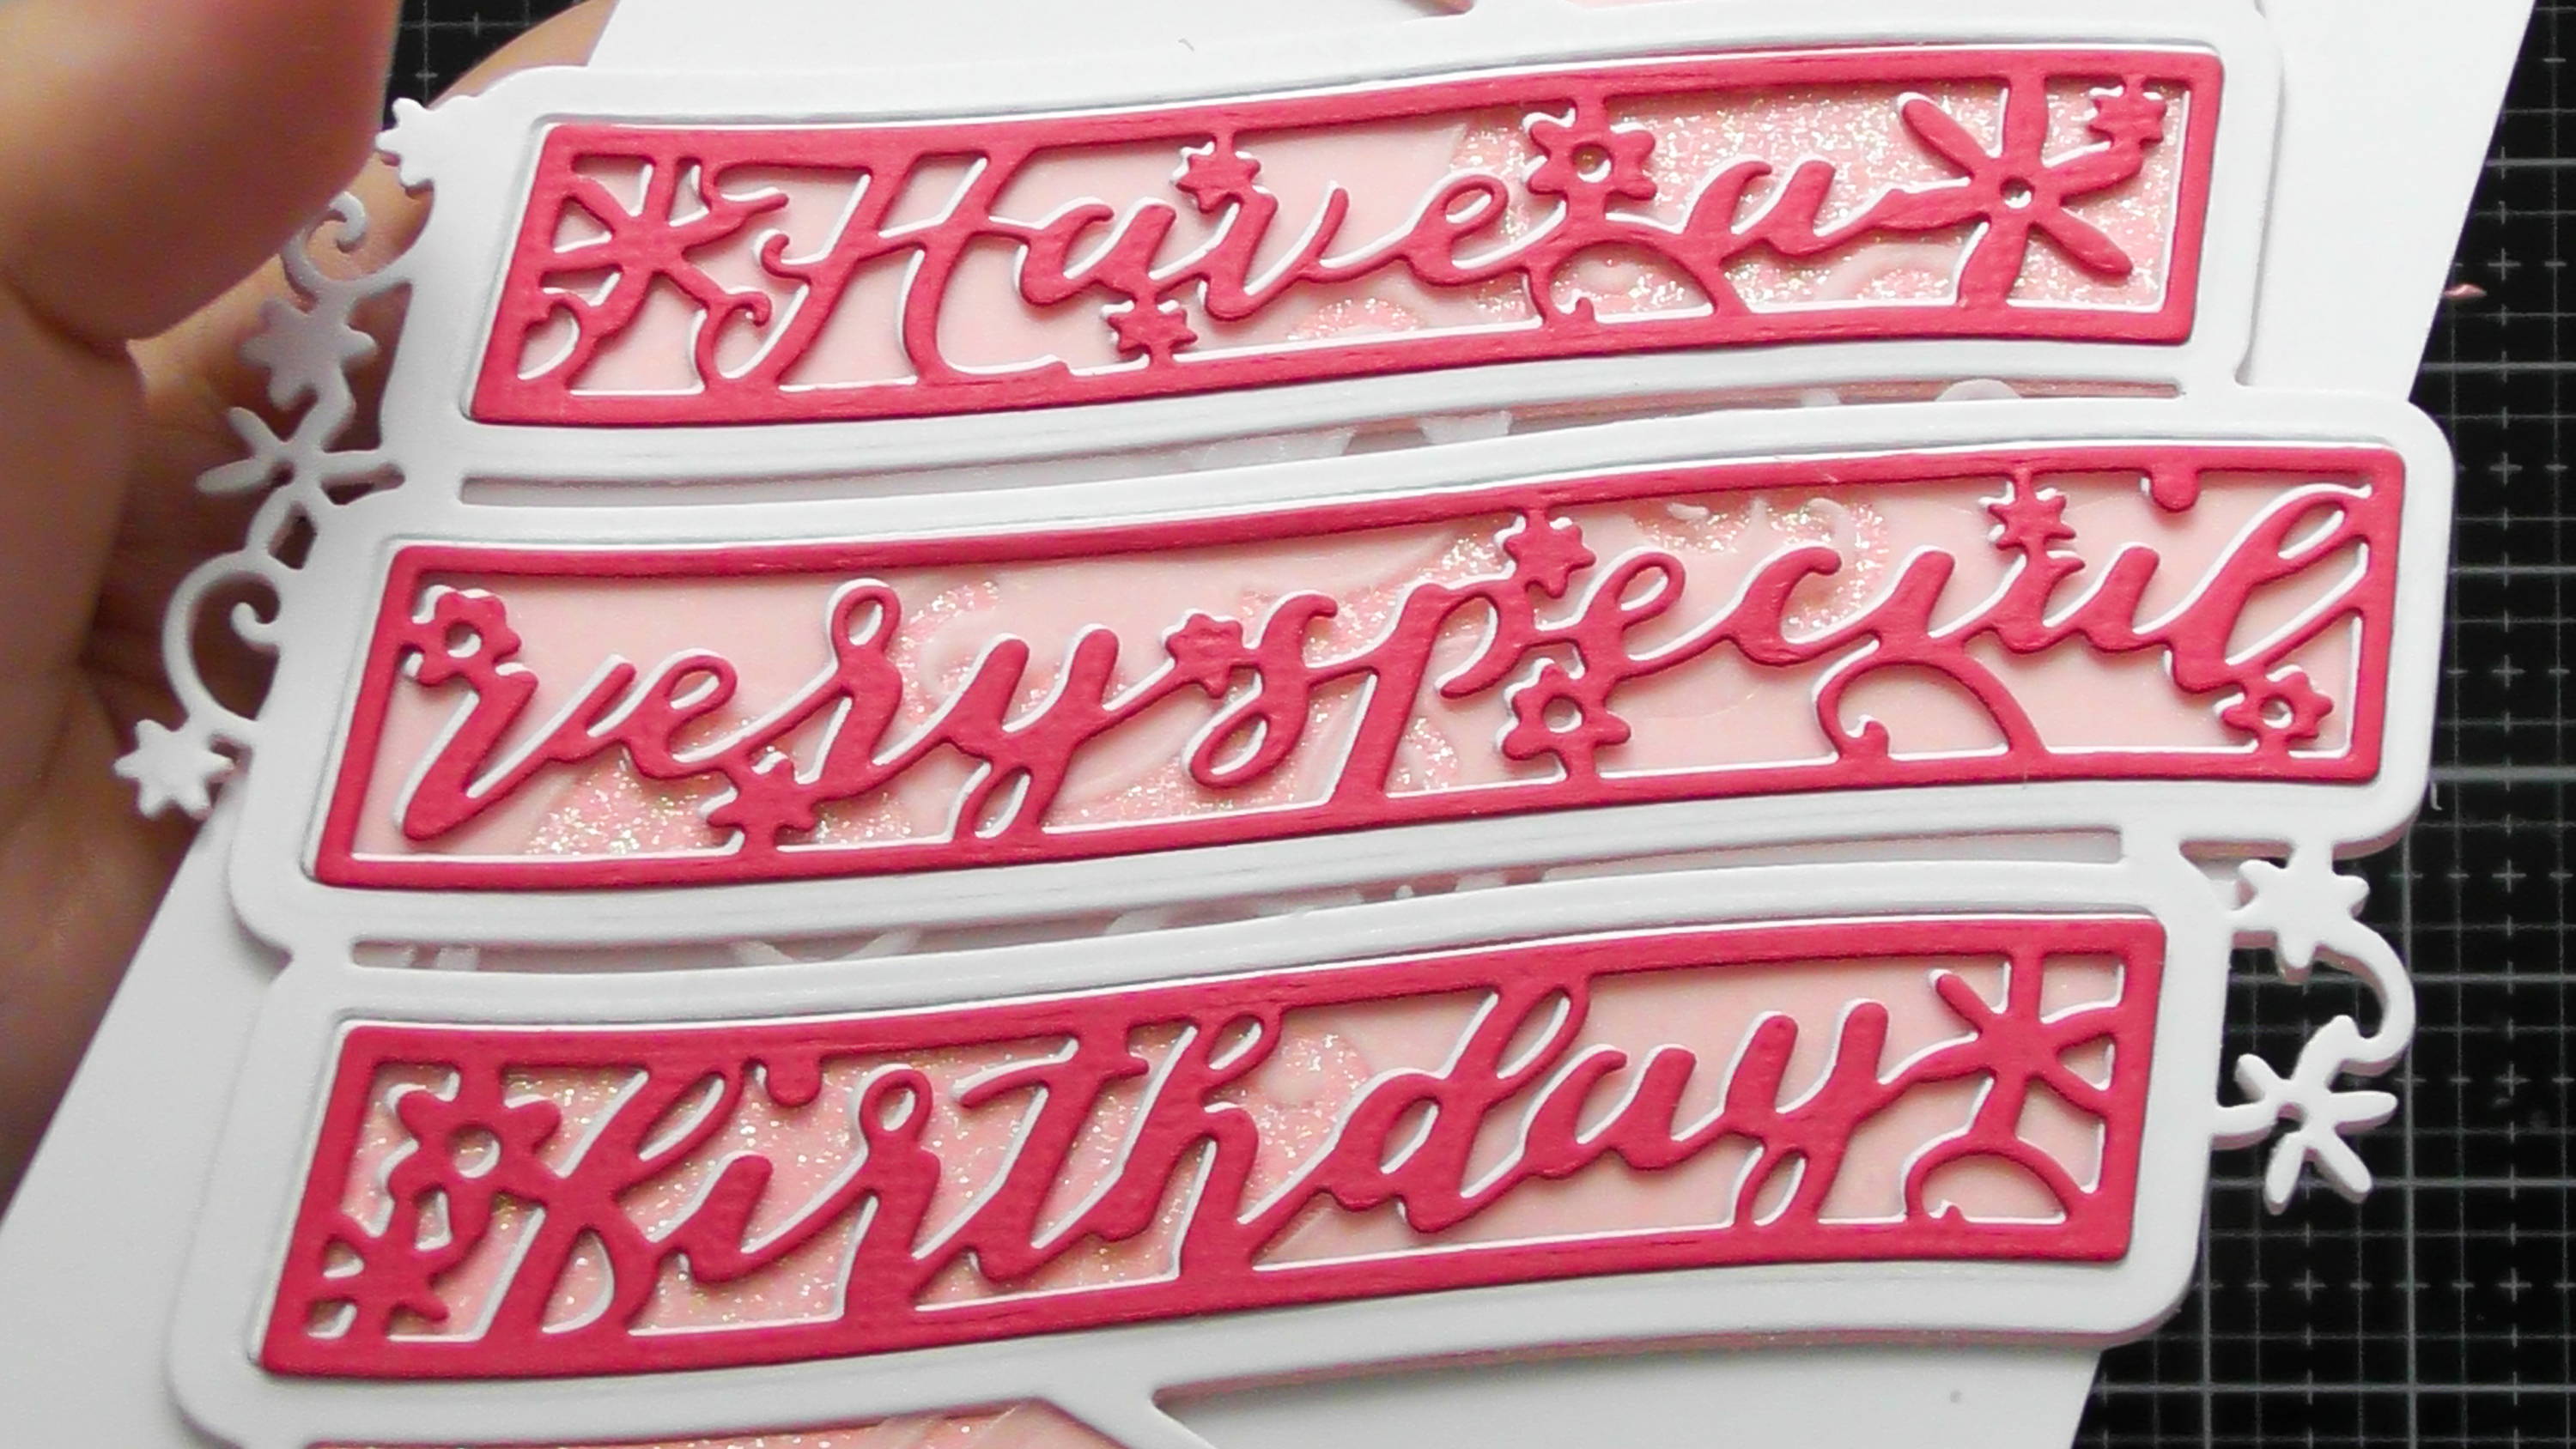
Do this for all 3 parts of the sentiment.
Step 18
![](https://ucarecdn.com/f9d66f9b-255c-4d99-8b34-306f1edf8d3f/-/format/auto/-/preview/3000x3000/-/quality/lighter/Large%20Layering%20dies%20Blog%20SBS%20-%20Christine%20Smith%20%20_19_-2.jpg)
Once I got to this stage I felt like the white background was too empty, if I hadn’t already stuck the banner to the panel I might have embossed a die into the background or even used an embossing folder, but in the end I decided to use one of the pattern dies from the set that had a selection of small flower fall away pieces in, and I cut it a couple of times from the glitter card and deep pink card too.
Step 19
![](https://ucarecdn.com/c4448a52-beda-4a14-b015-f932b19f0a2d/-/format/auto/-/preview/3000x3000/-/quality/lighter/Large%20Layering%20dies%20Blog%20SBS%20-%20Christine%20Smith%20%20_20_-2.jpg)
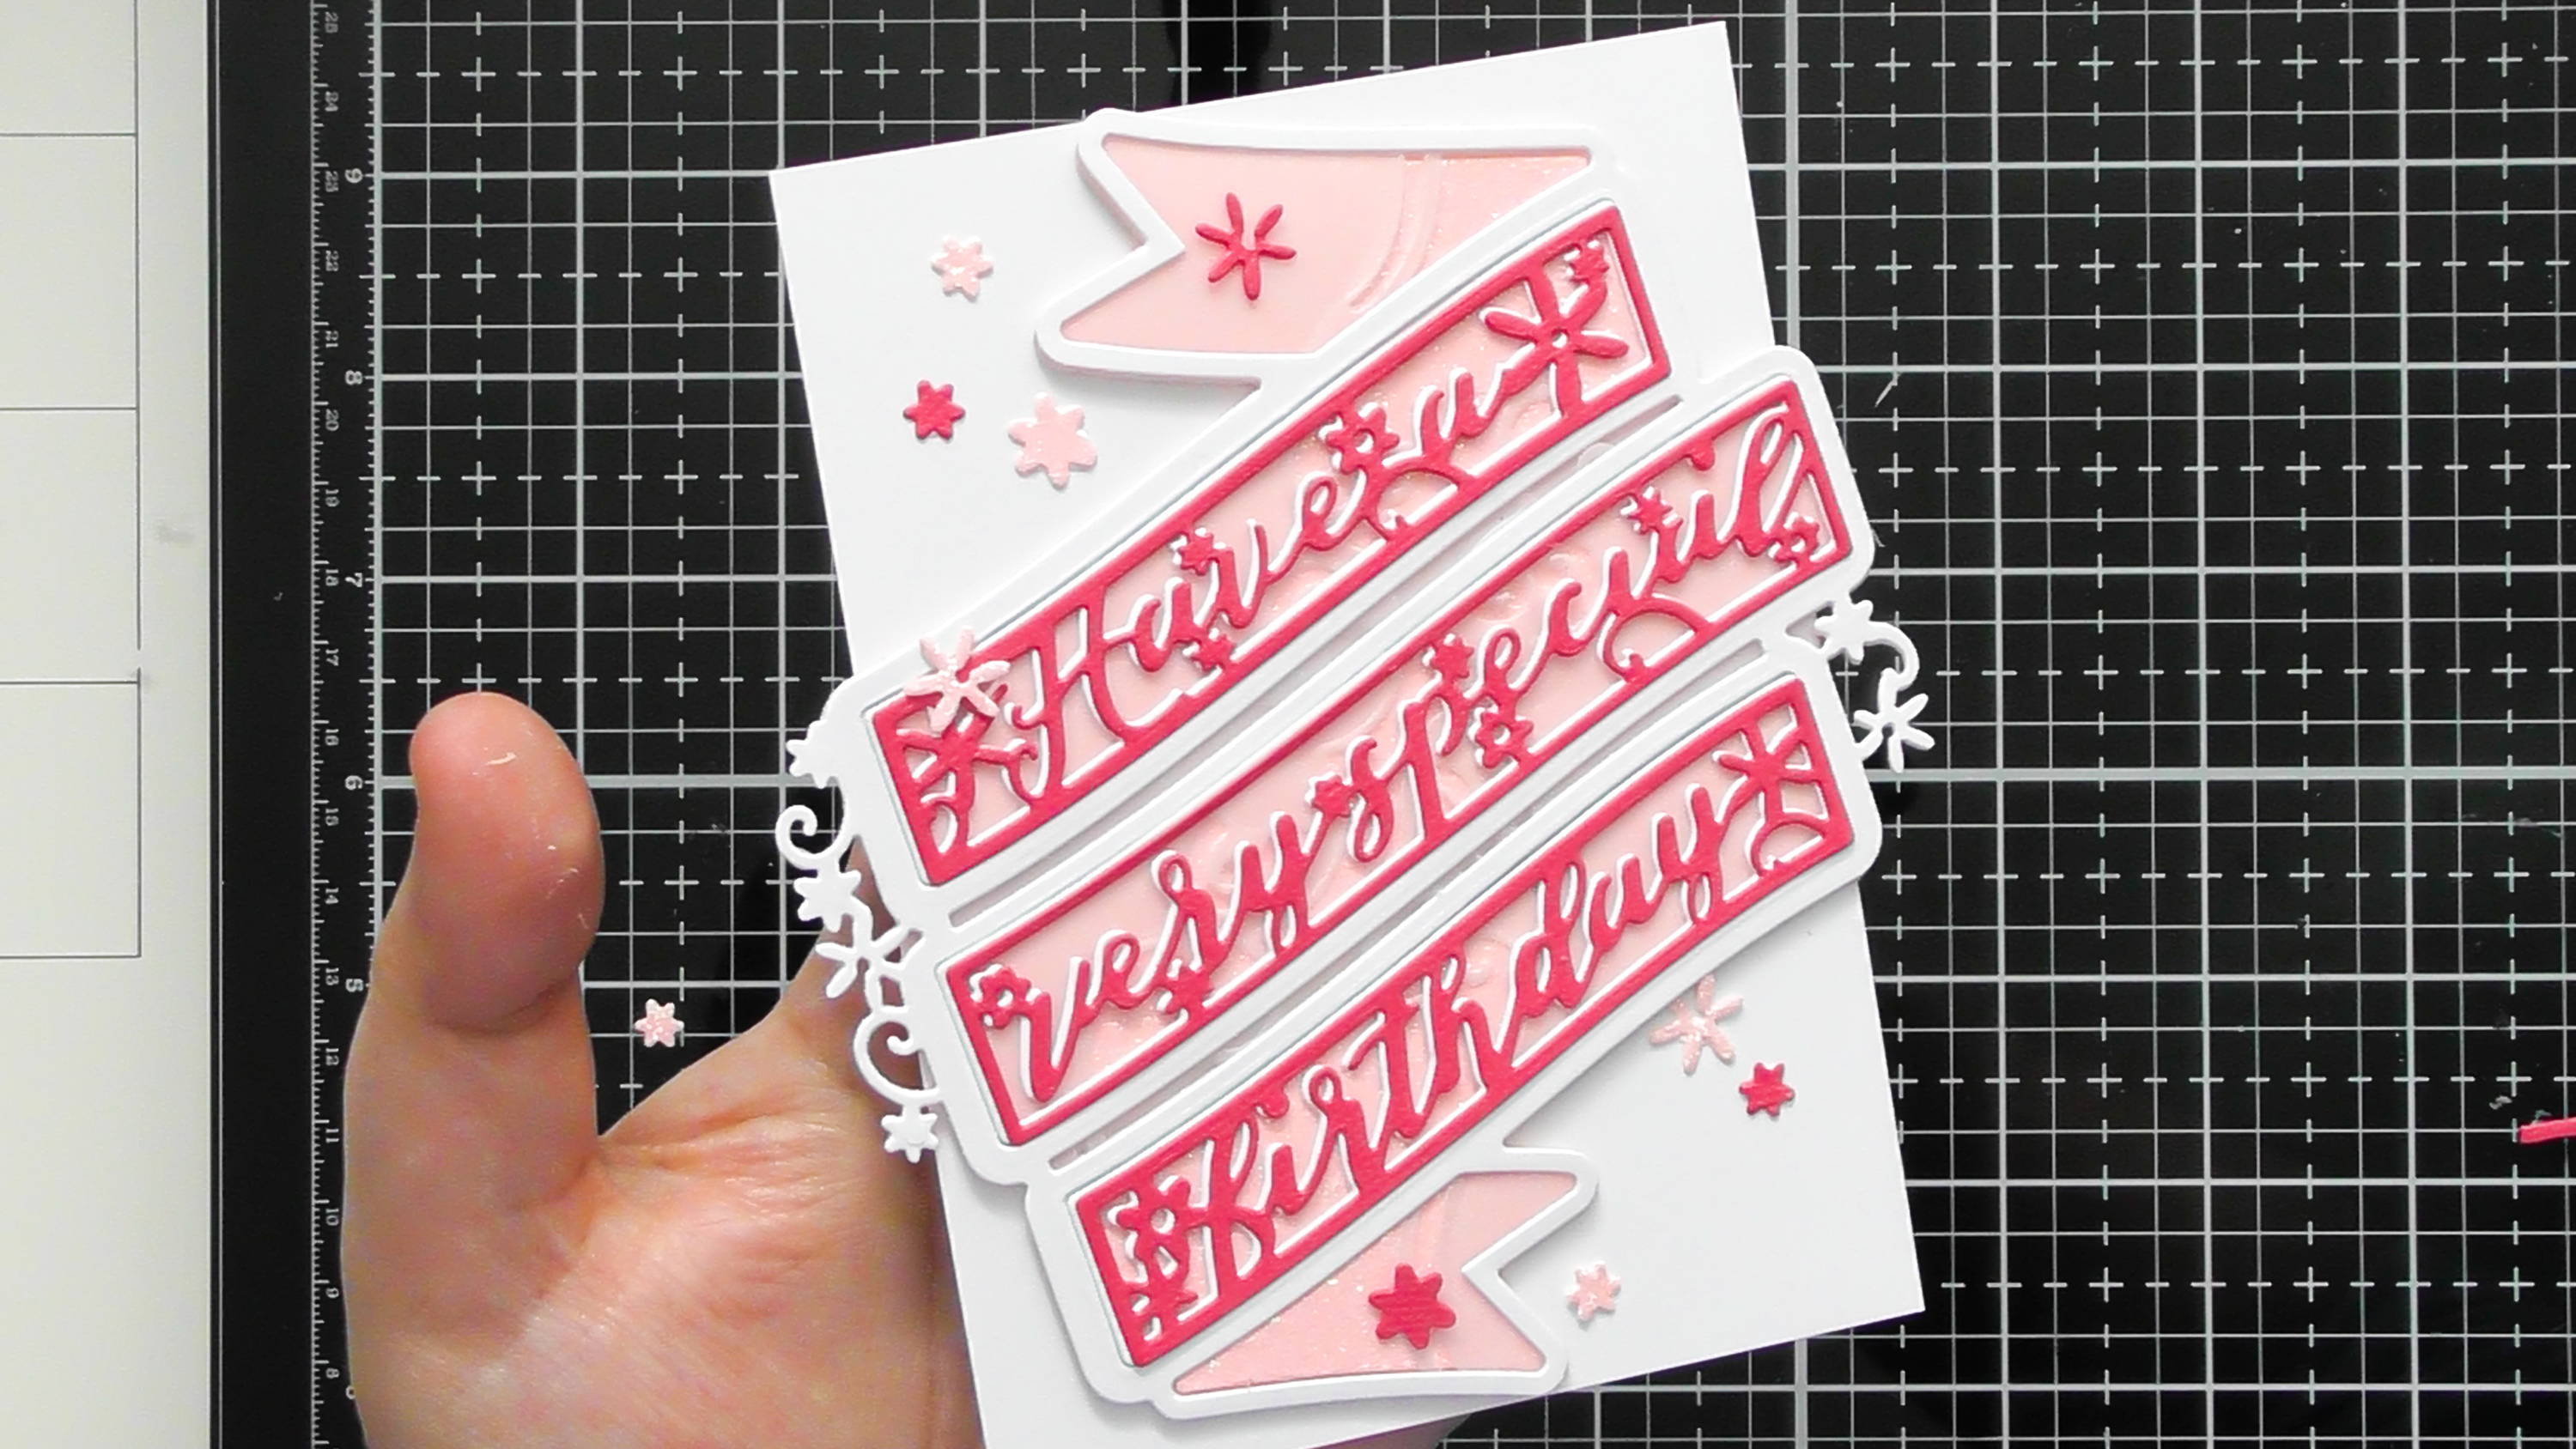
Then I simply scattered them across the card focusing in those two empty corners
Step 20
![](https://ucarecdn.com/64dc2976-d22e-4398-a6e7-19e7019c8e5e/-/format/auto/-/preview/3000x3000/-/quality/lighter/Large%20Layering%20dies%20Blog%20SBS%20-%20Christine%20Smith%20%20_21_-2.jpg)
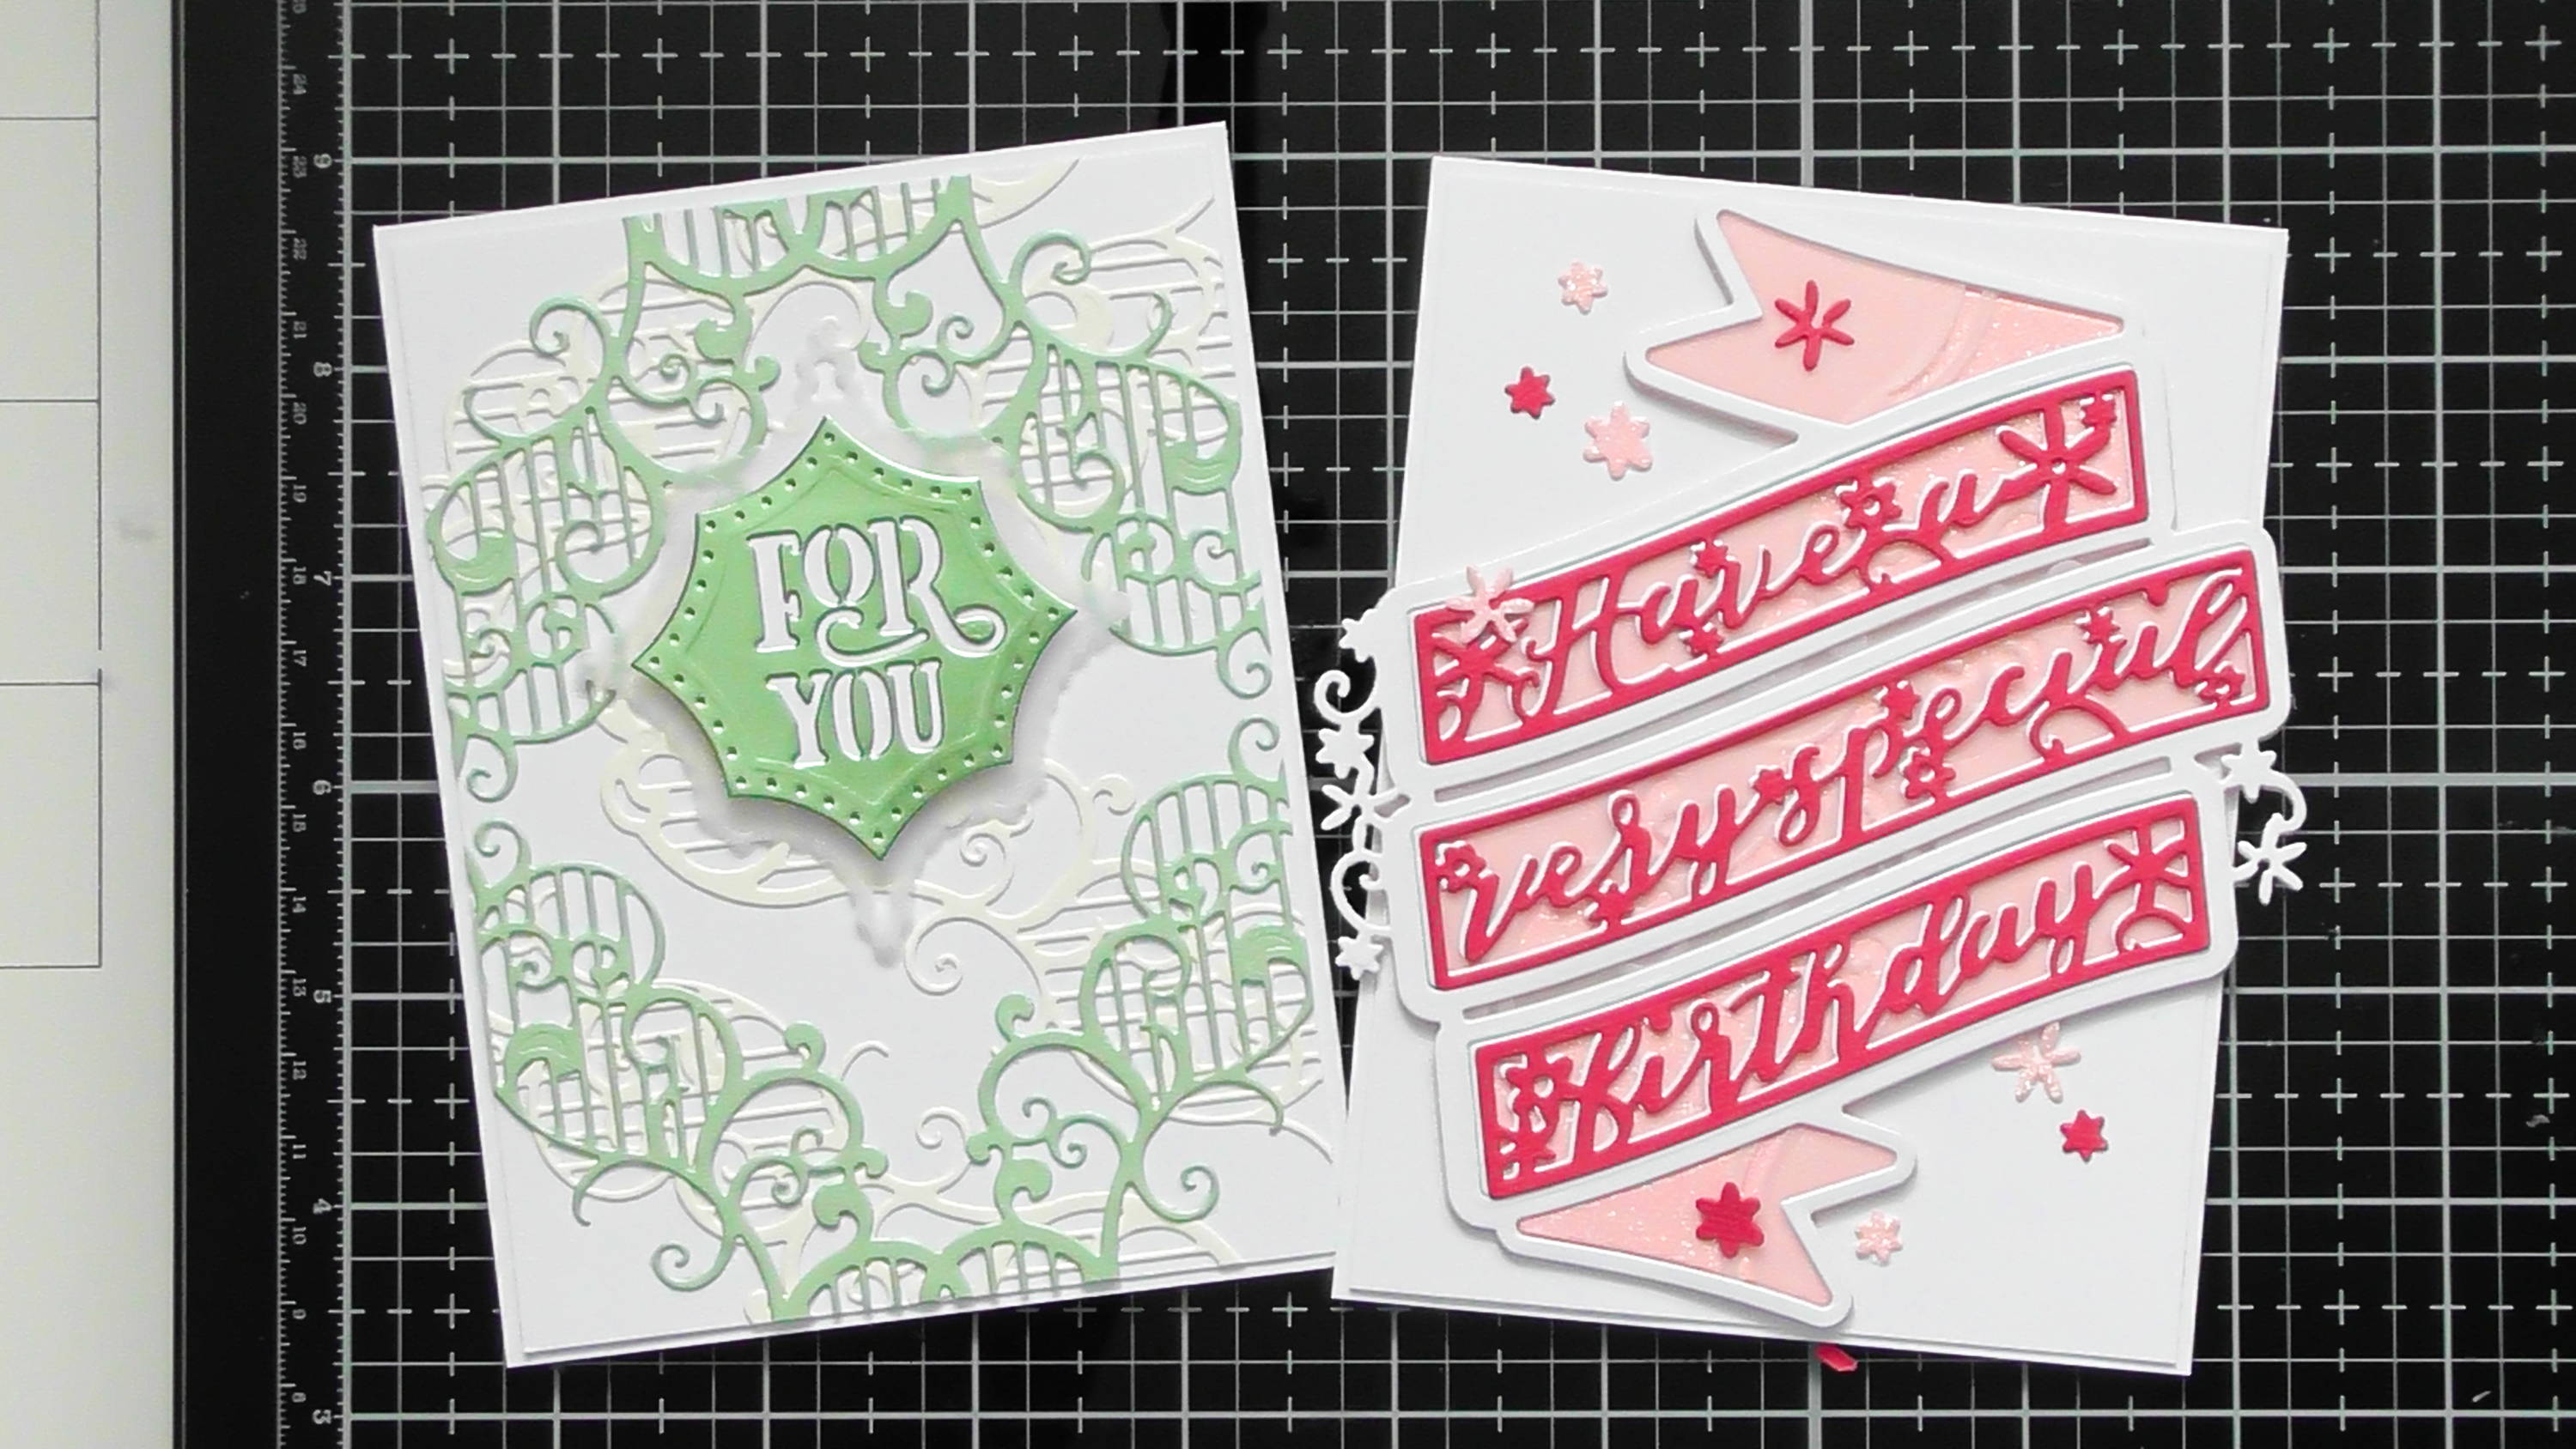
And here you have your 2 cards, I think you’d get some fab results mixing up the sets too
Hope you enjoyed these quick and simple card ideas for smaller cards using Large Layering die sets :D Christine xxx
Buy The Craft Project