 Gem Rewards


What you will need

Step 1

Grab the ivory white 4”x5” card and lemon drops marker. Using the chiseled side of the marker, color the top 3rd of the card. To get rid of harsh lines just color over in same color.
Step 2

Next, use the bright sunflower in the middle third of the card and color.
Step 3
To blend the two colors together, grab the lighter marker in lemon drops, and color over the top part of the bright sunflower a few times.
Step 4

For the remainder of the card, color the bottom with Indian Saffron. Blend with bright sunflower.
Step 5

Using a spatula, grab a small amount of glacier paste and apply it at an angle and slide it across the paper. Continue to scrape lightly all over the paper to help pick up excess product and spread at the same time.
Step 6
When the card is completely covered with a light layer of paste, set the card aside to let dry.
Step 7
Die cut using the love word die in the jet black card and Venetian gold card.
Step 8
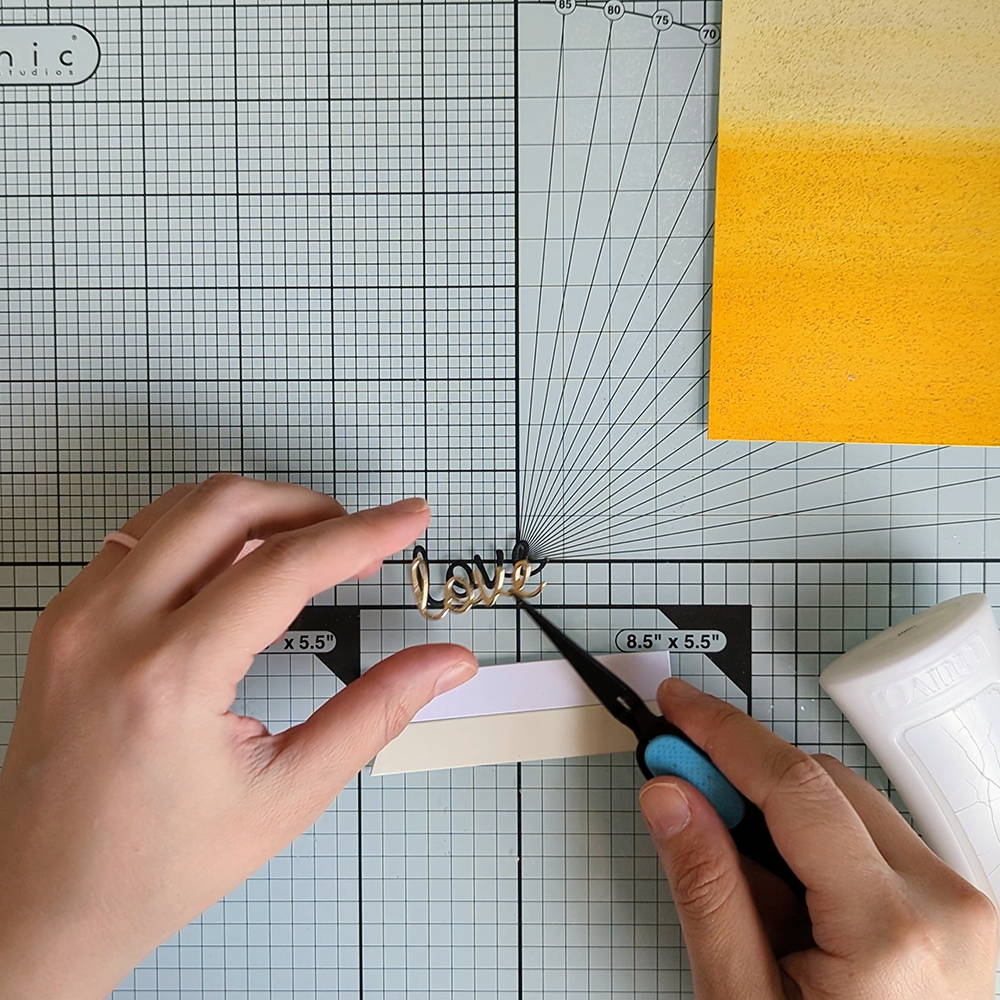
Glue the Venetian gold love die on top of the black piece and center it so you cannot see any of the edges showing. This will help lift the word slightly on the card.
Step 9

Die cut using the large banner, on the smooth white card and smooth ivory white card. With the white banner, use a pencil to write sending. Trace with a black marker and erase pencil marks You can cut after the word now or wait.
Step 10

With the ivory white banner, write your way in pencil, then trace in marker and erase pencil marks.
Step 11

Using the soft taupe marker, lightly trace behind the words to give a slight shadow to the words.
Step 12
Grab your black card 8.5” x 6.5” and fold it in half to create a card measuring: 4.25” x 6.5”
Step 13

Now open the card and grab the white 4”x5” and on the right side of the fold, glue it onto the card. There should be a thin black border on all 3 sides.
Step 14

Grab your “your way” banner and place foam tape behind it. Then place it below the white card leaving a space between the card and the banner.
Step 15

At the bottom of the white card, decorate with sequins by placing a few glue dots and adding the sequins to the top. It doesn’t have to be a lot just how much you think is best.
Step 16

Set the card aside and grab your ombre card. It should be completely dry. Using your guillotine, measure at 1 inch increments and cut. Place cut pieces in order as its cut.
Step 17

Starting with the top piece that you have cut, place foam tape on the backside, and with the card base closed, center it closest to the top leaving a small space between the top.
Step 18

Repeat the process for the remainder of the cut pieces, leaving small gaps between each.
Step 19
Now grab your “sending” banner and glue it just beneath the last ombre piece with the word being close to the right edge. Cut off the excess piece.
Step 20
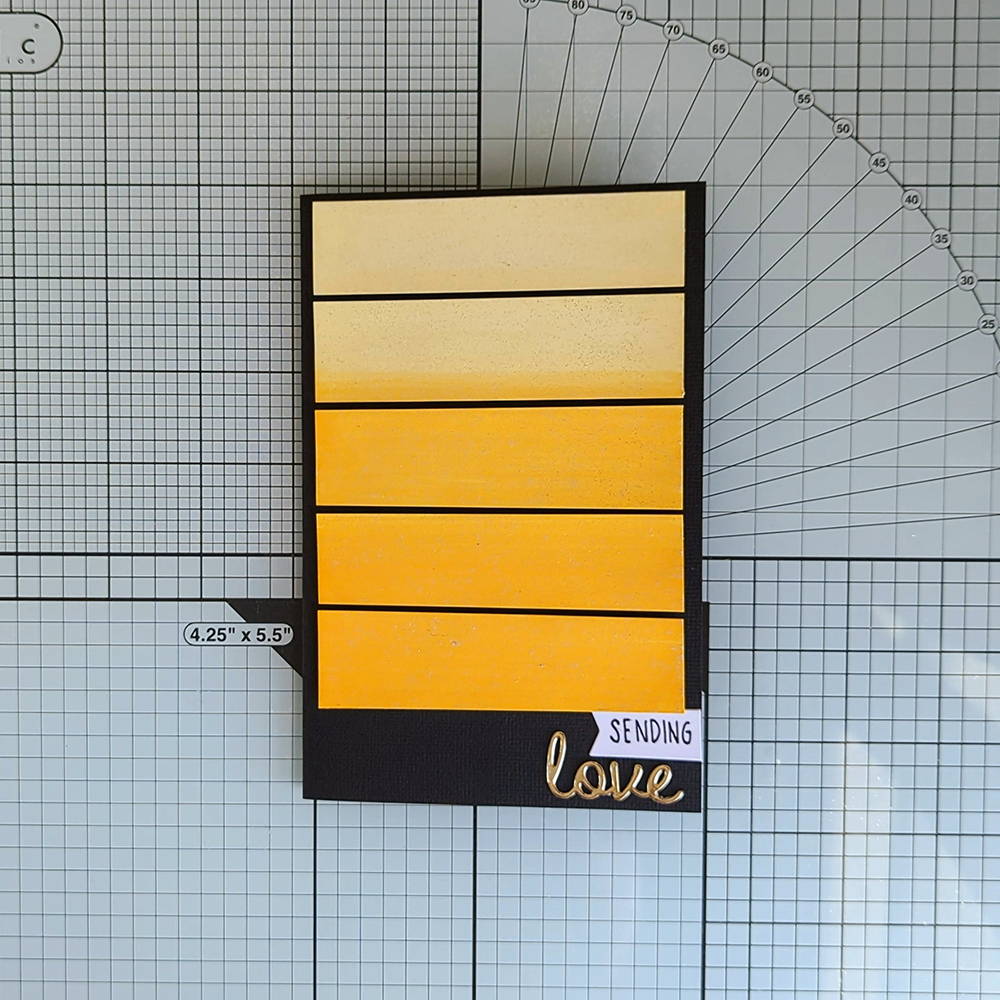
Grab the love die and glue the back, place just below the banner.


Buy The Craft Project