


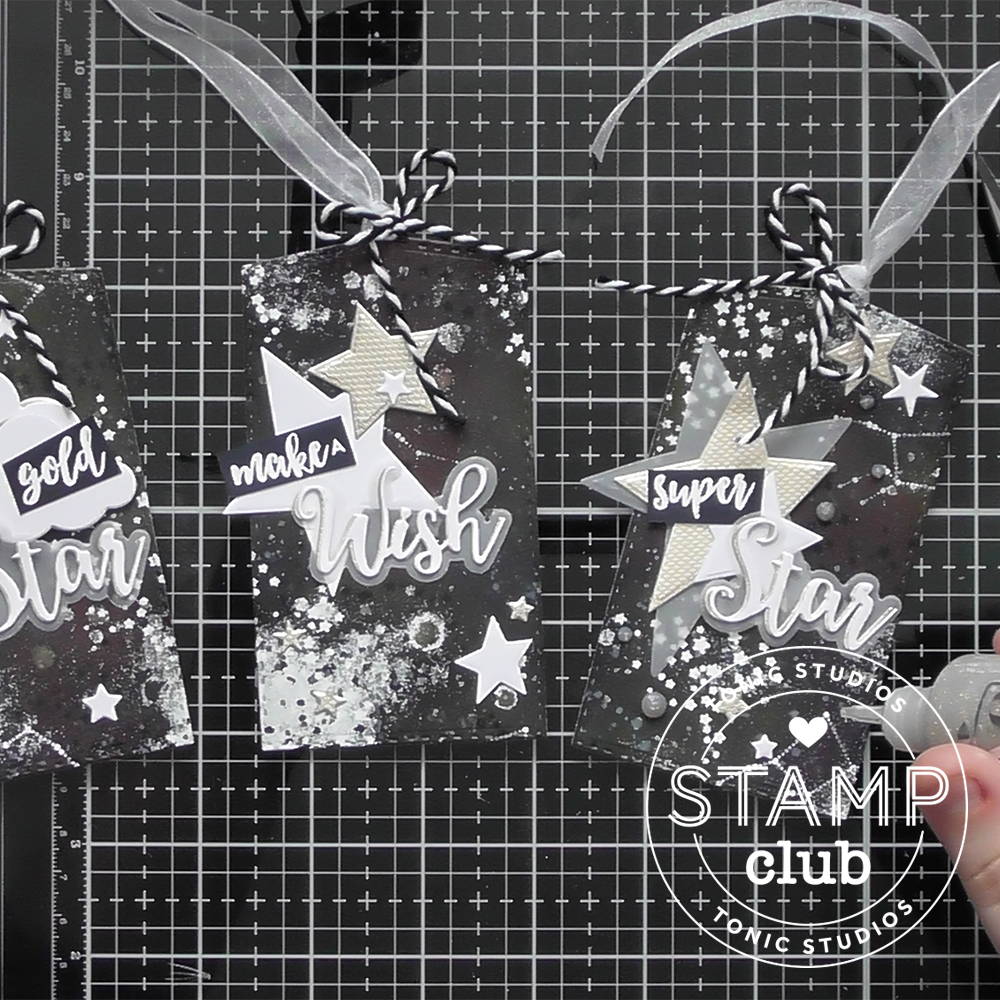
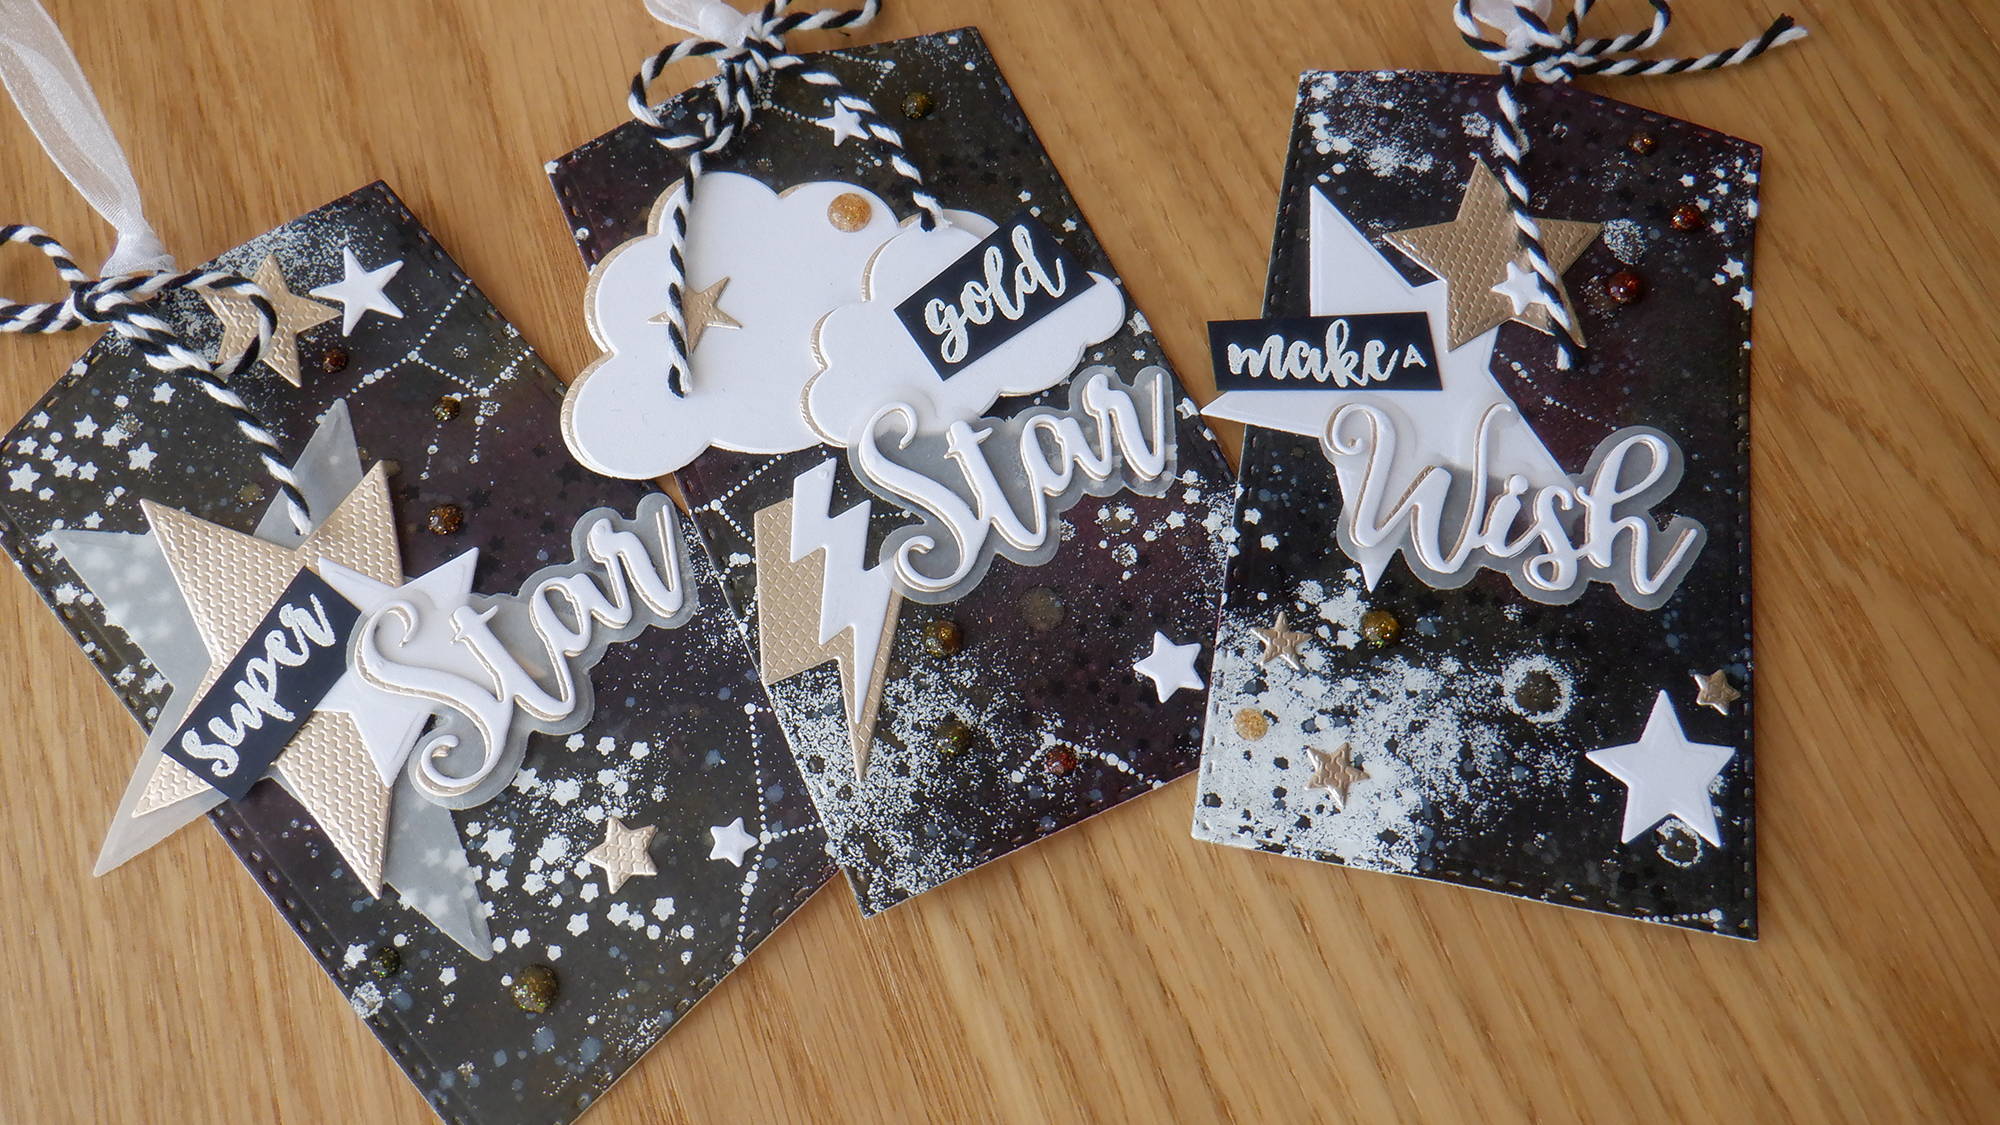
This month’s Stamp Club goes absolutely perfectly with Stamp Club #4 from a few months back, so if you were lucky enough to get that set (Shoot For The Moon) before it sold old, this new ‘Shoot For The Stars’ set is the perfect partner :D However it’s also a fantastic standalone set as well :D For this step by step I thought I’d show you a quick and easy galaxy background using Aqua Flows and Black Soot Distress Ink and for something a little different I thought we’d turn the background into some galaxy tags :D And the tag die is actually from Tonic Craft Kit #44 which those of you who have already ordered it will be receiving very soon :D Or if you’re quick you should still have a couple of days left to get it provided it hasn’t sold out :D
What you will need
What you will need
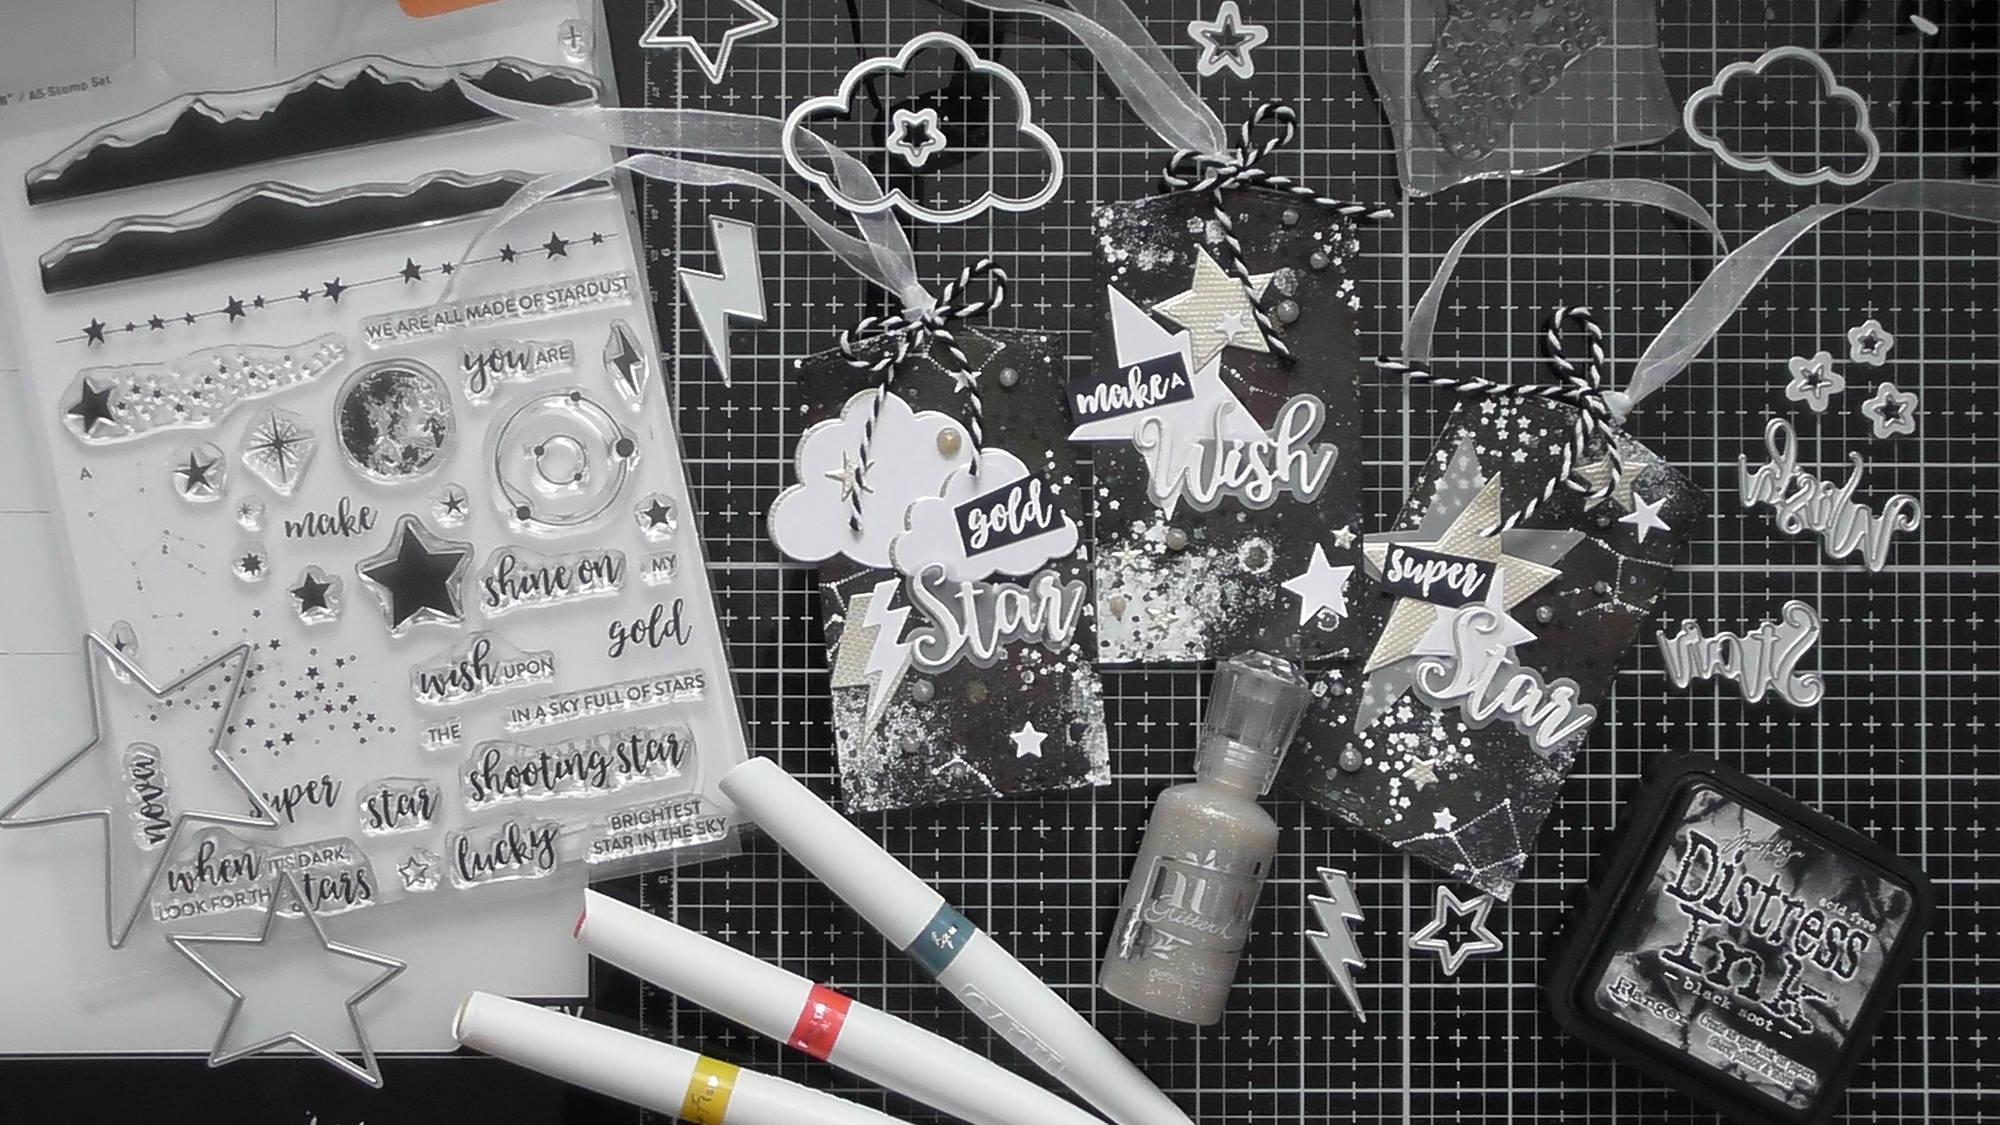
- Stamp Club #9
- White card
- Nuvo Aqua Flows - Surprise Party
- Nuvo Light Mist Spray Bottle
- Black Soot Distress Ink
- Nuvo Large Ink Blending Brush
- Nuvo Mica Mist - Aspen Gold
- Nuvo Glitter Drops - Honey Gold
- Nuvo Clear Mark Ink Pad
- Nuvo White Embossing Powder
- Craft Perfect Golden Mosaic Card
- Vellum
- Tonic Craft Kit #44 (or another Tag die)
- Black and White Bakers Twine
- Organza Ribbon.
Step 1
.JPG)
Pick 3 colours of Aqua Flows, something that you want to show through the galaxy, they can be analogous colours too, but I chose primary colours as they all come in the same set, Surprise Party.
Step 2
.JPG)
Start with your lightest colour and add random blobs all over your A5 piece of white card.
Step 3
.JPG)
Repeat with the next colour
Step 4
.JPG)
Then fill in the final places with the darkest colour, I know it looks like a mess, but it will all come together in the end.
Step 5
.JPG)
Spray your background with water to help the colours moved and meld together a little.
Step 6
.JPG)
Once dry, cover the whole background with a light layer of Black Soot Distress Ink. The Large Nuvo Ink Blending brushes are fabulous for applying Distress Inks and for coving large areas too.
Step 7
.JPG)
Take small paint brush and some water and splatter all over the background to create some ‘stars’. The water will react with the Distress Ink and when you blot the surface lighter speckles will appear giving that star look.
Step 8
.JPG)
You can also splatter on some Mica Mist too, I think the Apsen Gold works great as it’s a nice subtle gold colour.
Step 9
.JPG)
Repeat steps 6-8 again to deepen the bacground. Or you can leave it like step 8 if you prefer seeing more of the colours, but this picture in step 9 has a second layer of everything.
Step 10
.JPG)
Use some of the star stamps and the constellation stamp over the top of your background with some white embossing powder. And don’t worry if extra powder sticks to any slightly damp places (as mine did) as I think it adds to the galaxy look
Step 11
.JPG)
Die-cut your background using your chosen tag die, I have used the one from Kit #44 as it was a nice large size and the hole is already incorporated into the cut. Or alternatively you can cut the background into smaller rectangles and clip the corners to look like a tag if you don’t have any tag dies.
Step 12
.JPG)
Die-cut a load of elements for your tags from a mixture of White card, vellum and Golden Mosaic specialty card too.
Step 13
.JPG)
Place everything you’ve cut onto your tags to check you have all the pieces you want. Then decide what sub-sentiments you need for the scripty words and white heat emboss them onto dark card.
Step 14
.JPG)
Glue everything in place and embellish with bakers twine and organza ribbon, which ever you prefer, or both like I’ve used
Step 15
.JPG)
And for a final touch, add some Honey Gold Glitter Nuvo drops too
Step 16
You can create this same galaxy background with all sorts of different underlying colours, tailoring them to you recipient too
