


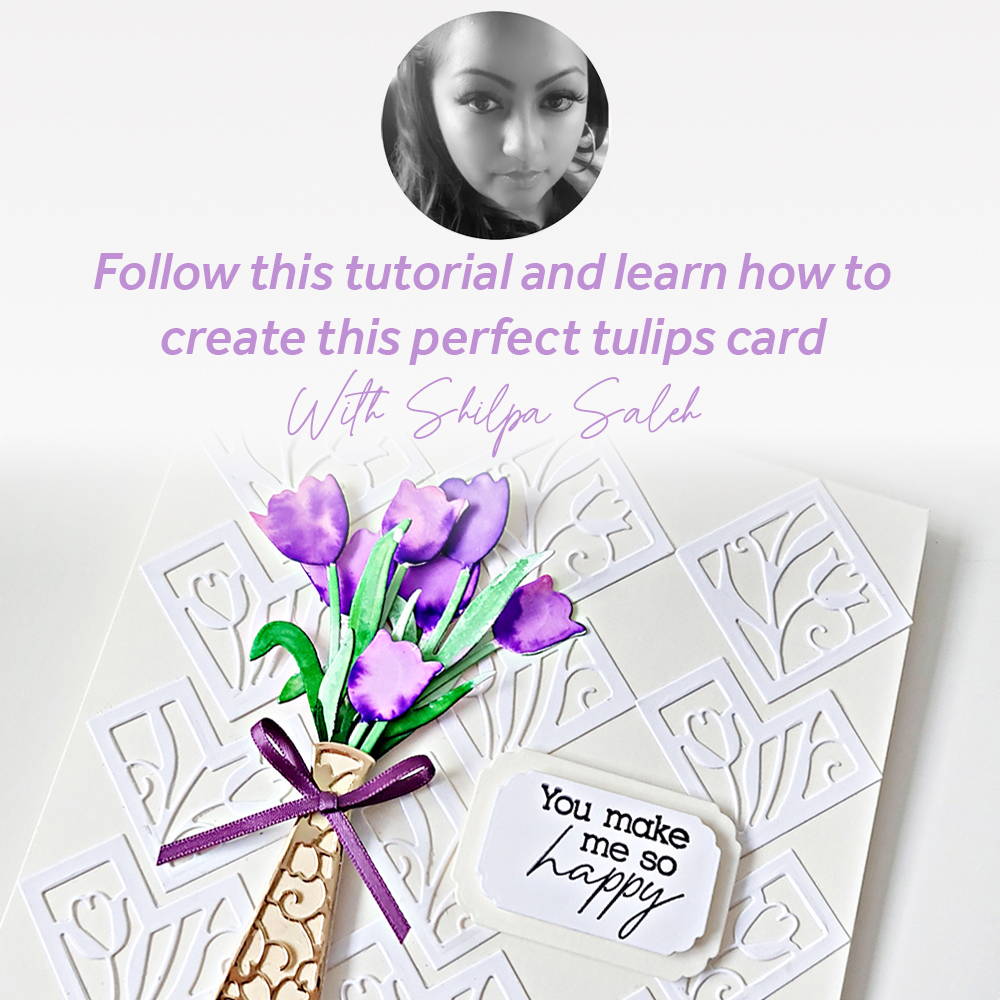

Hi my name is Shilpa, and I’m here to share with you all a card using the beautiful Perfect Tulips Stamps & Die Set.
I really enjoyed using the many different dies in this set, each section has very pretty details.
I loved the Tulip designs throughout – in the stamps and dies! Lovely set to cut out and to colour, using whatever colour combos your heart desires.
Hope you enjoy recreating the card I am sharing with you today.
Step 1
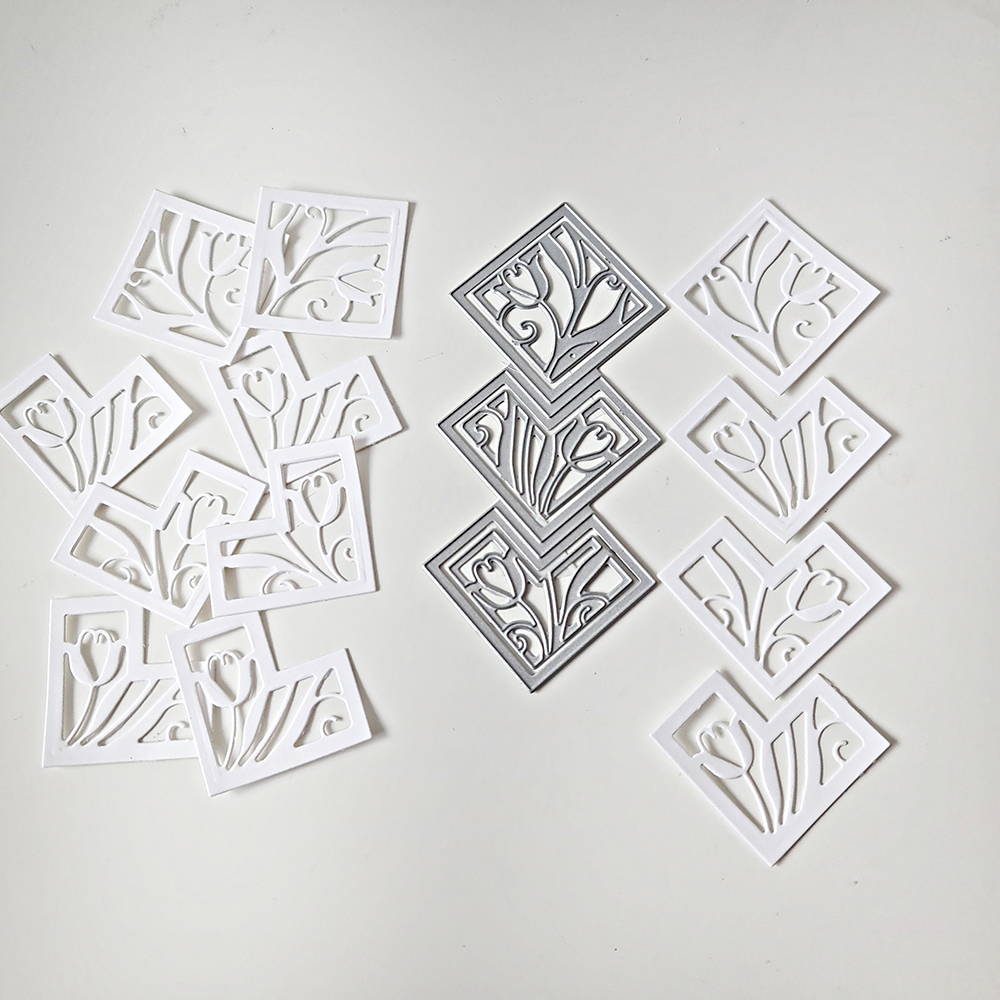
Select the dies you see in the photo. You will need to place your dies on some Craft Perfect 300gsm White Smooth Card and pass through your die cutting machine (use low tac tape to hold your dies in place). You will need to cut the full design three times and the bottom section three times, as we need four vertical panels as you see in the photo.
Step 2
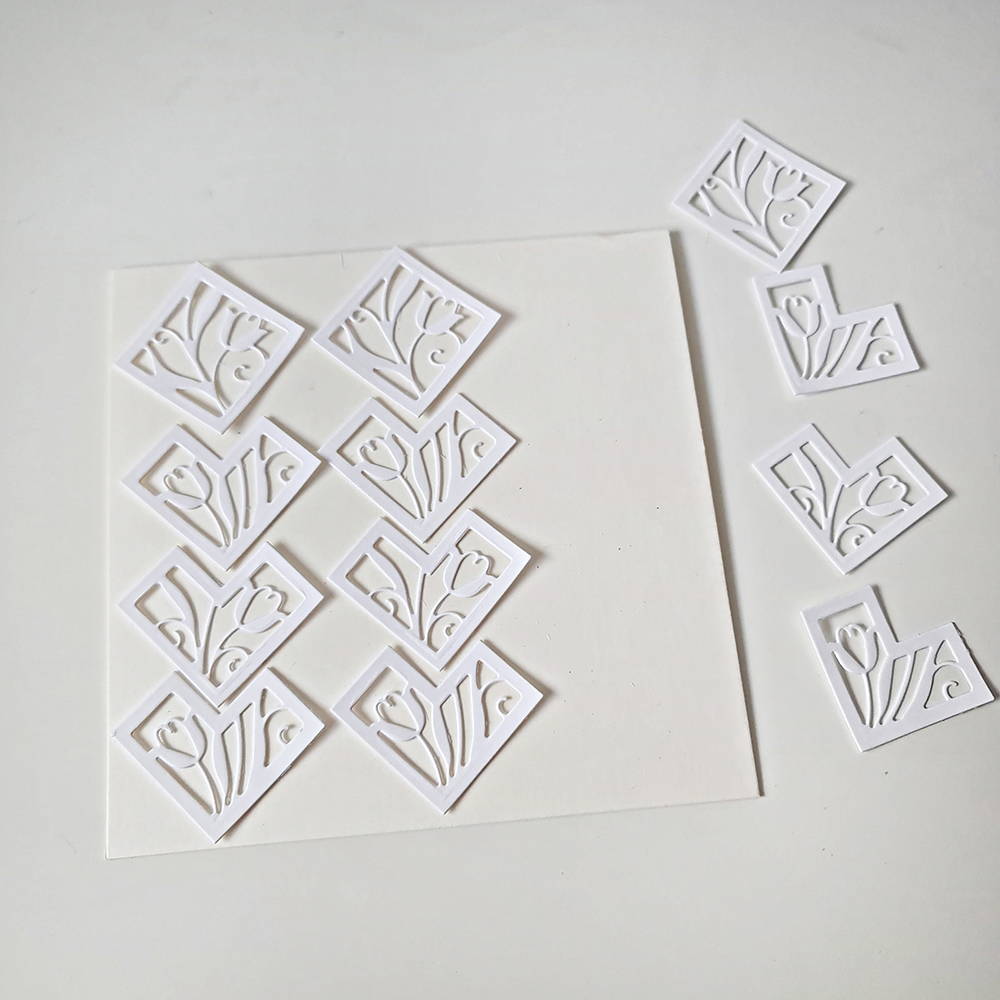
Now using Tonic Studios 6” x 6” Ivory White card blank as the base, lay down the cut tile designs as shown in the photo. You can use a ruler to measure precisely, or as do it by eye as I have done.
Step 3
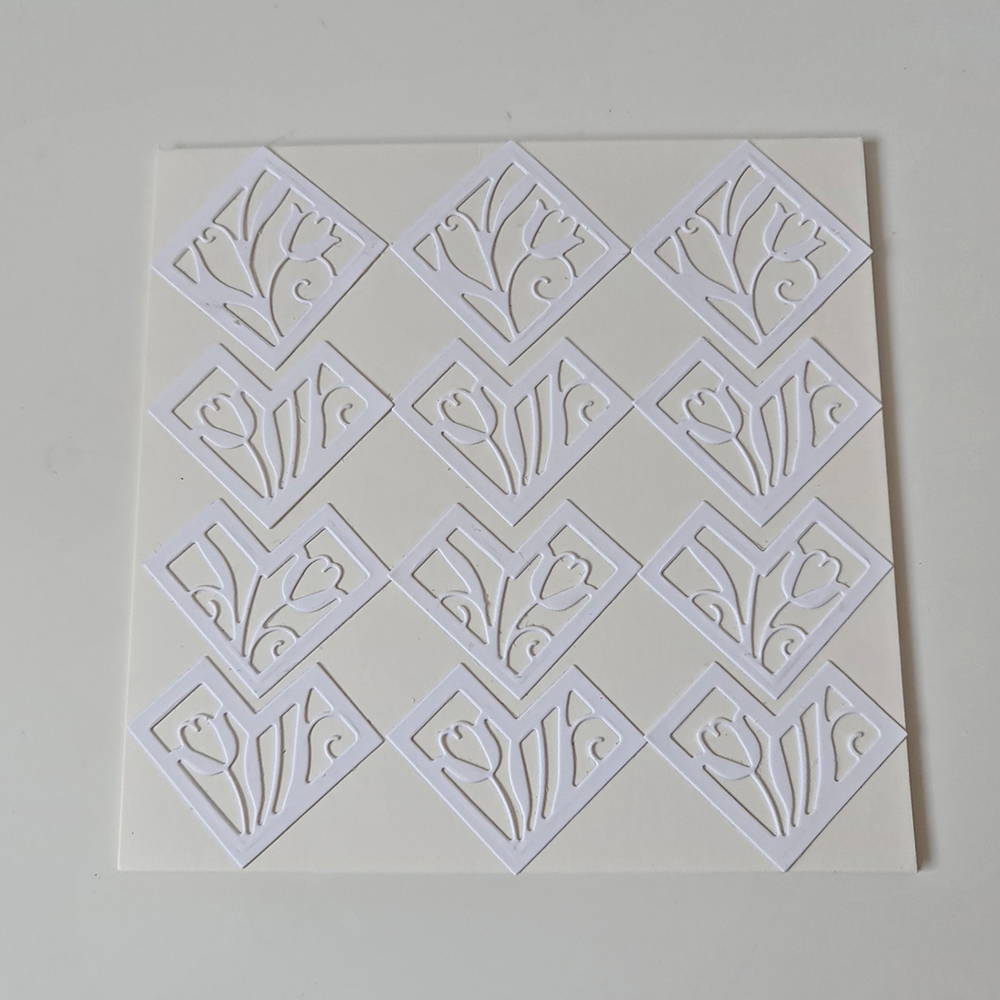
Once you’re happy with your layout, section by section stick them down with Tonic Deluxe Adhesive as shown in the photo. Then put aside to dry and work on next steps.
Step 4
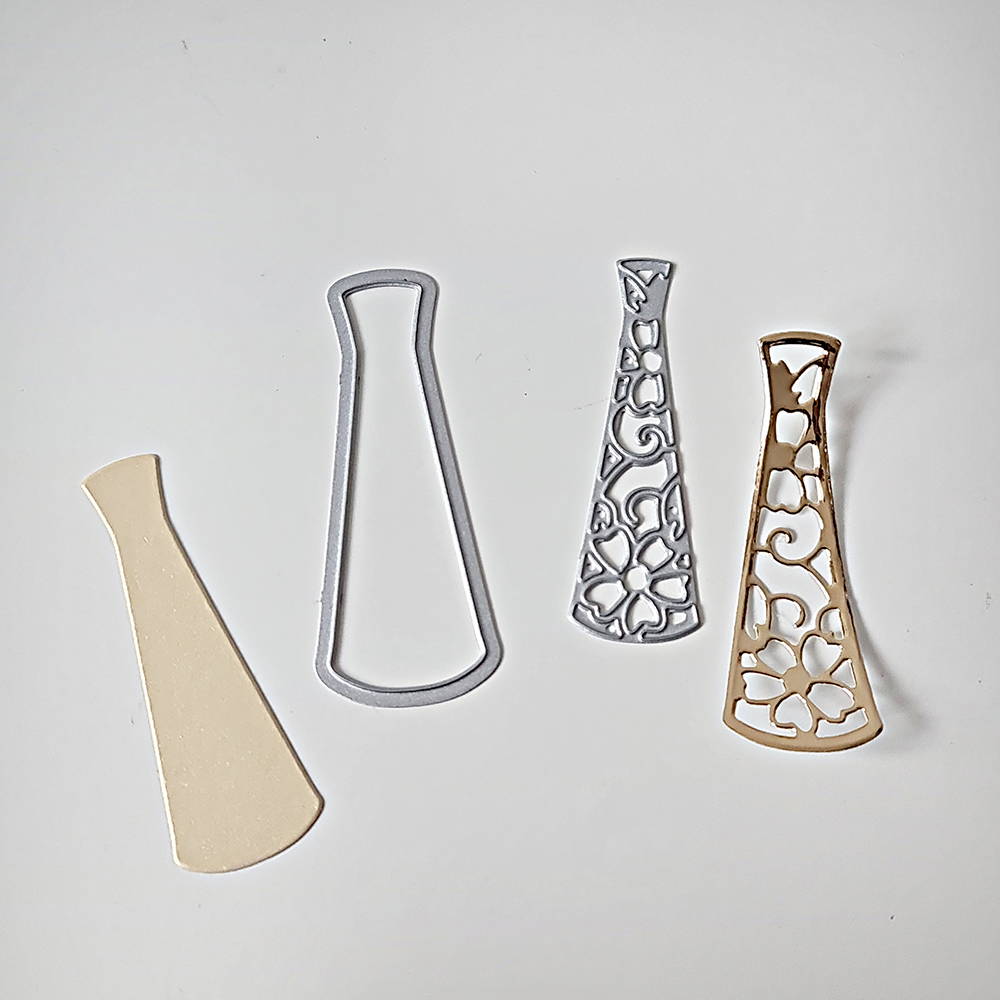
Take the vase dies and cut the solid shape using Craft Perfect Pearlescent Lemon Lustre Card and the decorative top layer using Craft Perfect Polished Gold Mirror Card. Stick them together using Tonic Deluxe Adhesive.
Step 5
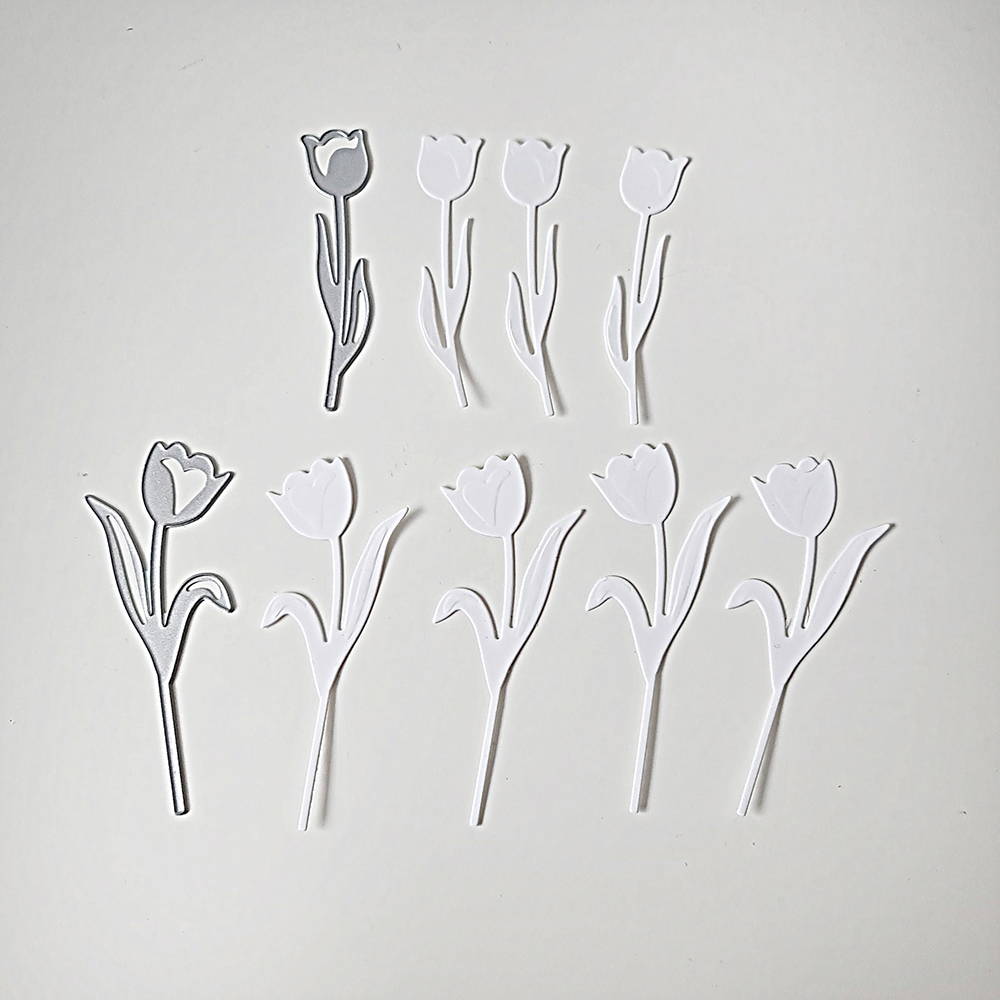
Now taking more of the Craft Perfect 300gsm White Smooth Card cut out both sizes of the tulip dies as shown in the photo. Four large and three small.
Step 6
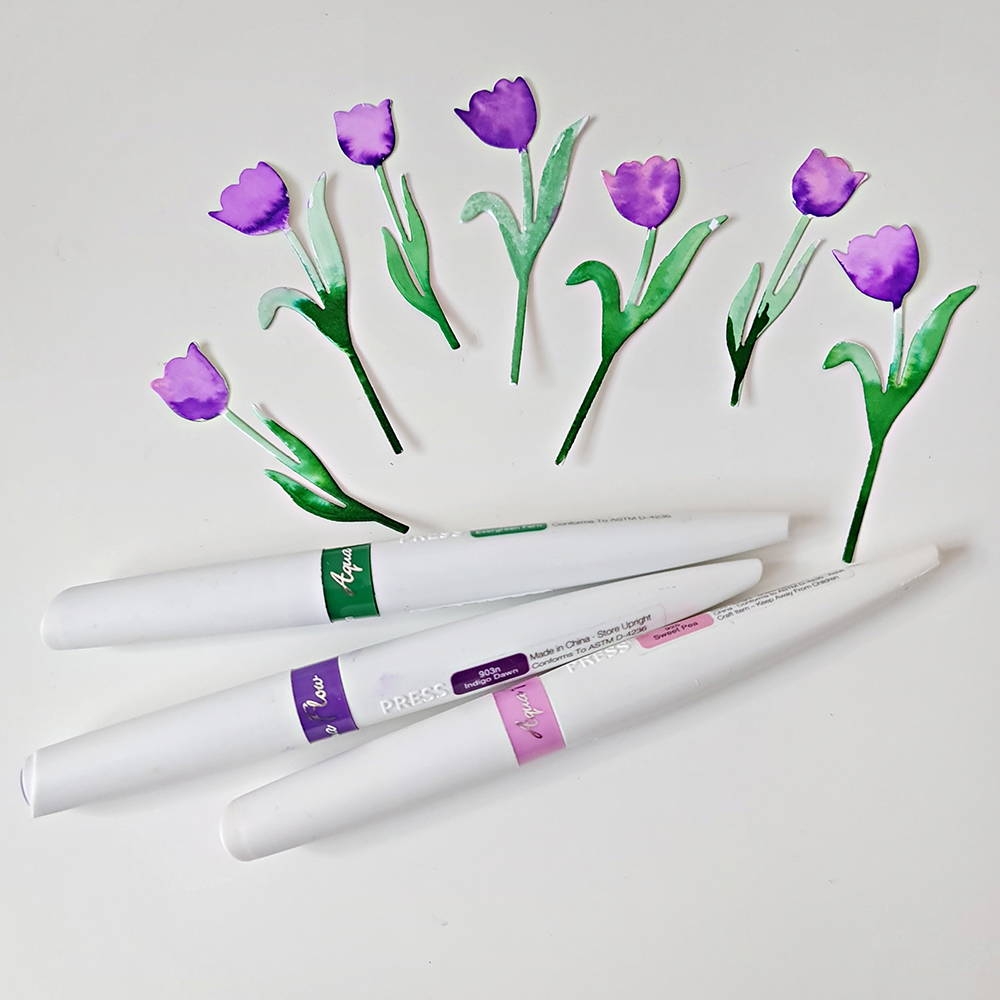
You can now colour your flowers in. I have used Tonic Studios Aqua Flow Pens with a Tonic Water Brush to create a watercolour affect.
Colours used - Indigo Dawn 903n & Sweet Pea 925 for the flower heads and Evergreen Fern 902n for the stems and leaves.
Step 7
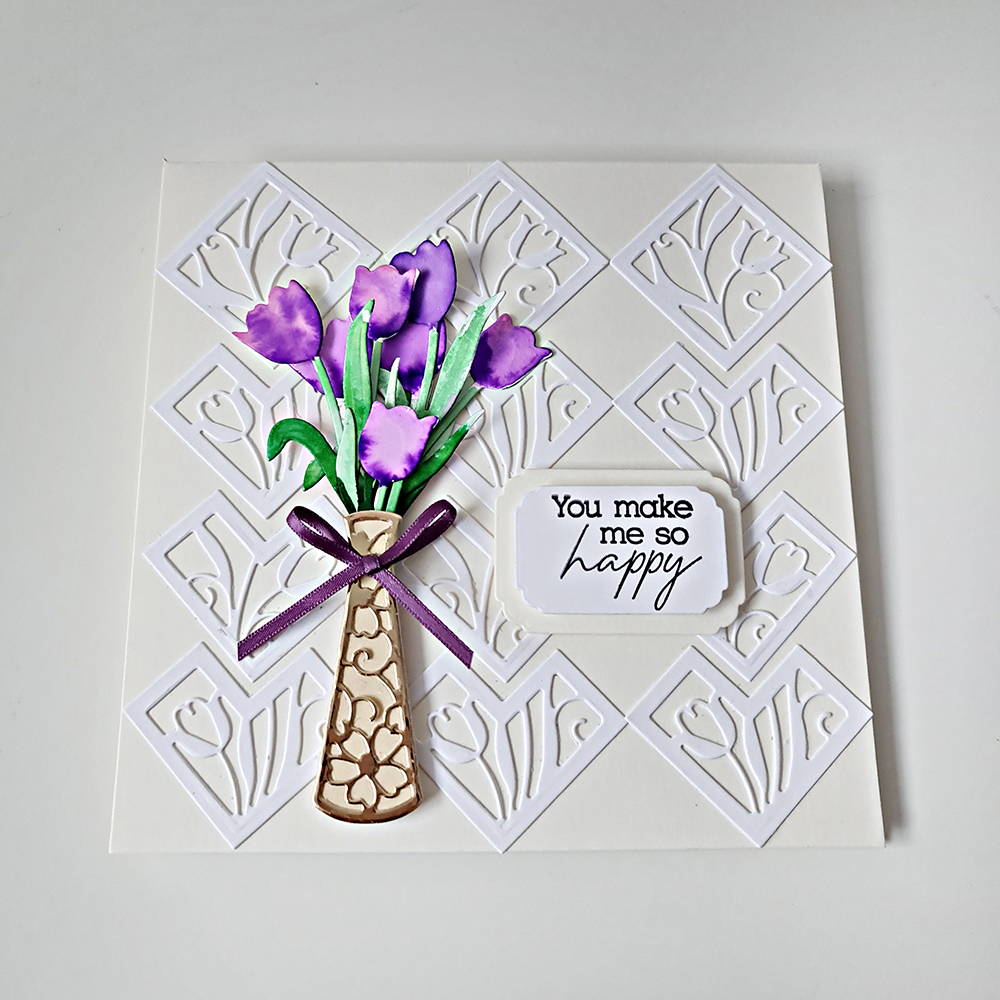
Now take the vase and add Craft Perfect Redline Tape to the back and stick the flowers as you desire to create the look of the flowers in the vase. Then use Craft Perfect Dimensional Foam Pads and add the vase along with the flowers on top of the ‘tiled’ card base, as shown in the photo. To finish the card stamp and add a sentiment from the coordinating stamp set with Black Shadow Ink Pad. Use a simple shape to stamp your sentiment on. (I have used small nesting dies from an older Tonic die set.) Finally add a mini bow on the vase using Craft Perfect 3mm Double Face Satin Ribbon in Aubergine Purple. This finishes the card.
Buy The Craft Project
