


Hello lovely friends, hope you are all keeping warm and busy with your crafting. Today I am
sharing this jewel toned desk tidy that can hopefully be a very special gift for someone.
Desk Tidy Make - What you will need

- Designers choice -Mini desk tidy die set
- x2 A4 Black classic craft perfect card
- x1 A4 Black velvet satin mirror card
- x1 A5 Emerald green mirror card
- x1 A5 Imperial Blue mirror card
- x1 A5 Electric Purple mirror card
- x1 A5 Magnificent Magenta mirror card
- x2 A5 white card
- Redline tape
- Flower for all seasons stamp set
- Colouring pens/pencils (optional)
- Deluxe adhesive
- Die cutting machine
Step 1
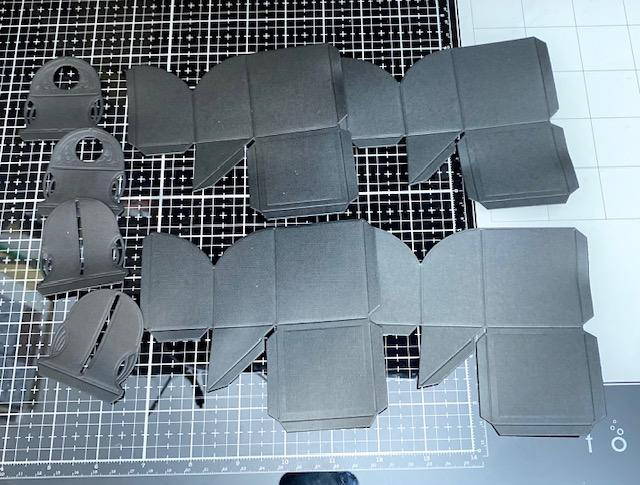
Die cut all the needed pieces according to the provided instructions, from the classic black cardstock.
Tip: die cut double of each of the handle/closure pieces
Step 2

Stick your matching handle pieces together to create one piece. This will make this bit more stable and longer lasting. Assemble your compartments according to the provided instructions. Even though the instructions say keep one base on one of your compartments, please cut of all the bases and make sure to keep the base pieces you cut off
Step 3
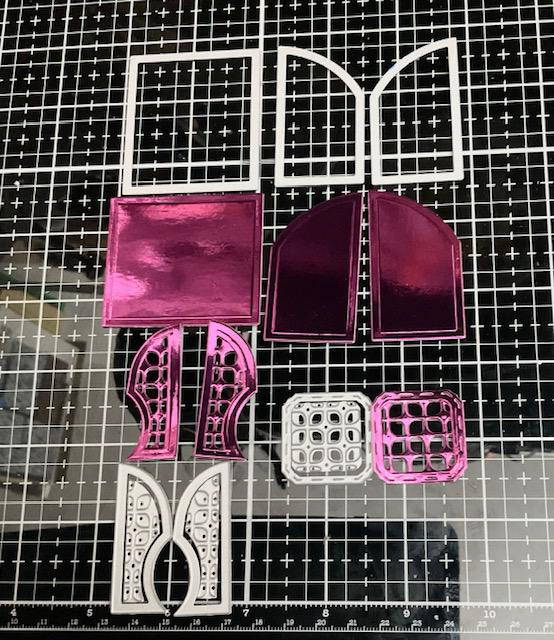
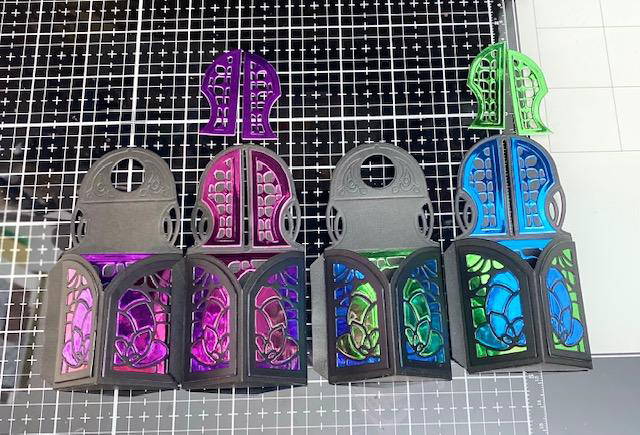
Using the die combinations in the picture, die cut these pieces out of every colour of the mirror card. So you should have x6 pieces of each colour.
Tip: only cut out the little square piece if you want to make a matching card
Step 4
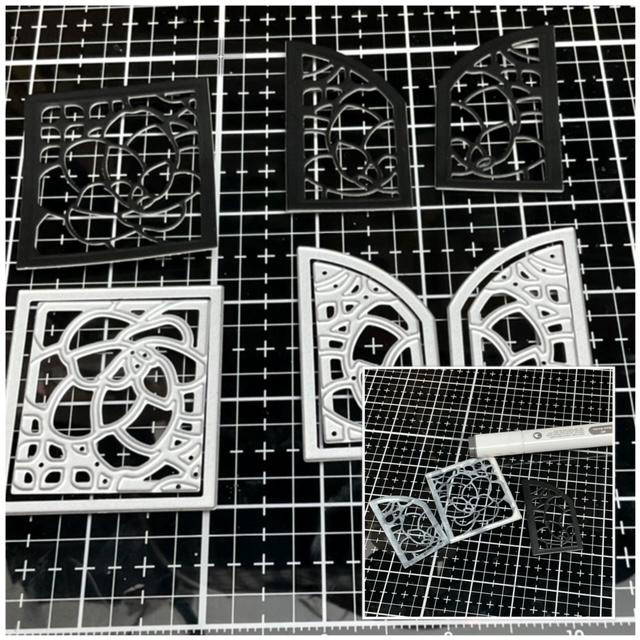
Using the die combinations in the picture, die cut x4 square pieces and x 4 pieces each of the left and right curved rectangle shapes from the black velvet card
Tip: If the white edges bother you then grab a dark grey marker and go around the edges on the reverse side.
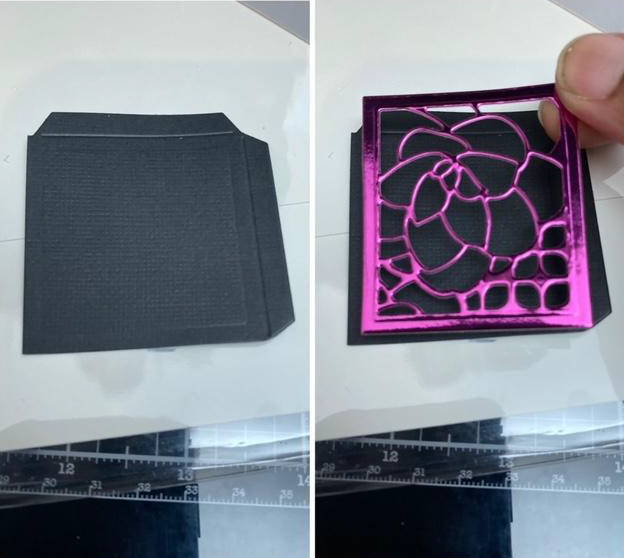
Step 5

Grab a mirror card piece and stick the coordinating black velvet card piece over the top. Die cut another floral panel in a contrasting mirror card colour, (magenta with electric purple and emerald green with imperial blue) then inlay just the flower part into your panel. This might
sound confusing but just refer to the picture please and don’t forget to repeat this 4 times to cover each box.
Step 6
Grab your left over base pieces from step 2 and cut off all the flaps. Then take your leftover mirror card panel from step 5 and stick it over this piece. Repeat this with all the four colours.
Step 7

In total you should have 4 pieces like this for all the four colours. Take your compartment and stick down the 2 front curved pieces. Then take the non-inlay square and stick it on the inside of your box. For now don’t stick on the inlay square.
Step 8
You should have your 4 compartments that look like this. Use the coordinating pieces to decorate the front and the back of your handles/closure pieces.
Step 9
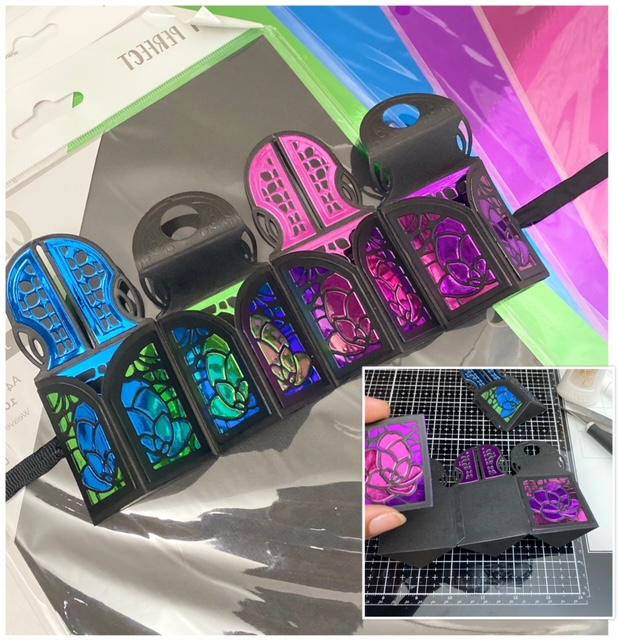
Following the provided instructions, join your compartments together. Use some redline tape and glue to stick some ribbon to the back of your first and last compartment. Then grab your square inlay pieces and stick them on the back of your compartments to complete your desk tidy.
Step 10
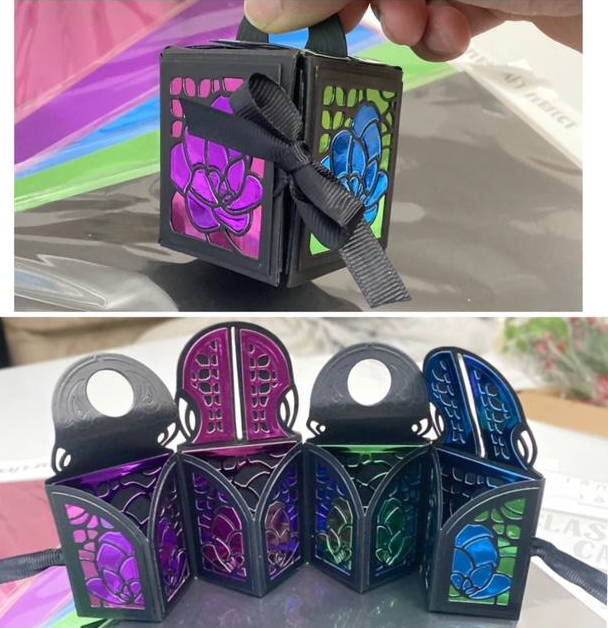
Now that your desk tidy is complete, you can keep it boxed up using the ribbon and closures or you can leave it wide open to show both sides of your beautiful panel.
Following the provided instructions, join your compartments together. Use some redline tape and glue to stick some ribbon to the back of your first and last compartment. Then grab your square inlay pieces and stick them on the back of your compartments to complete your desk tidy.
Card Makes - What you will need

- X1 A5 white card
- 3 pieces of mirror card
- squares (cut from step 2 in the above make)
- Scrap piece of black card
- Flower for all seasons stamp set (or any floral stamp)
- Black pen
- Foam tape
First Card Make
Step 1
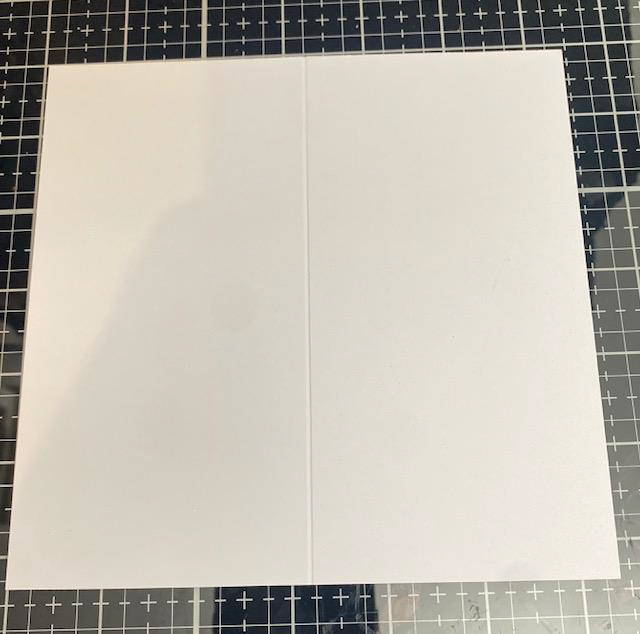
Measure and cut a piece of white card that is 6 ¼” by 6 ¼”. Score it at 3 ¼” and fold it to create your card base.
Step 2
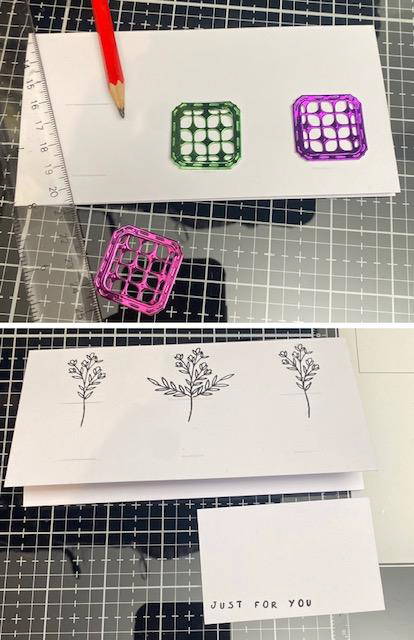
Place your mirror card squares and your flower stamp on the front of your card base to figure out an arrangement. Use a ruler and pencil to lightly mark where everything should be. Stamp your flowers where you marked and a sentiment on a scrap piece of white card. I used a flower for all seasons stamp set but you can use a flower die even if you prefer.
Step 3
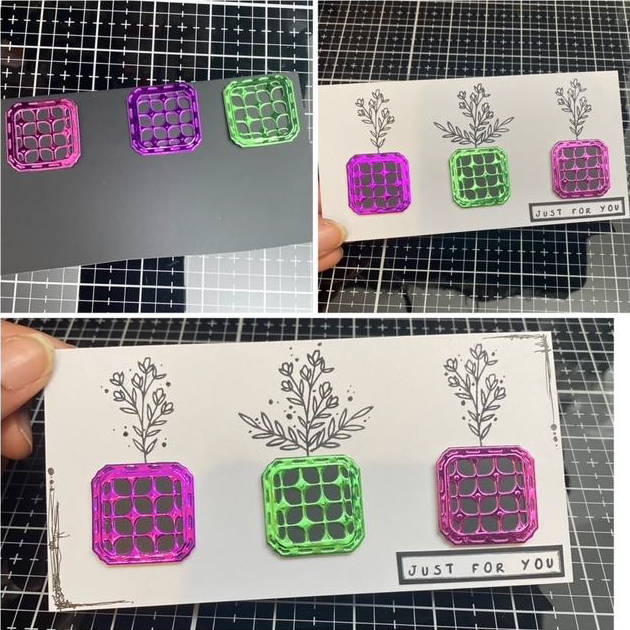
Stick your mirror card squares onto the black card and trim off the excess. Add foam tape to your squares and the sentiment strip, then stick everything in place. You can leave your card as it is but I used my black pen to add some extra detail.
Second Card Make
Step 1
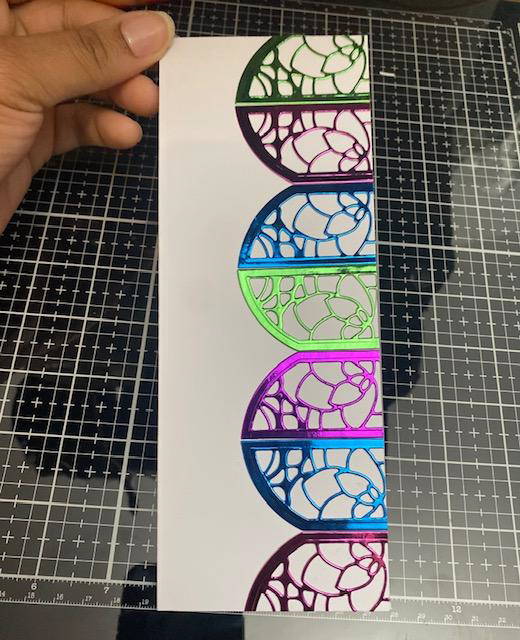
Grab a card base (the choice is yours) . I decided on a slimline base as it is my favourite type of card. Then take all your leftover mirror card panels from your desk tidy and stick them on the opening side of your base.
Step 2

You can have this card either horizontally with a sentiment at the top or vertically like what I chose and cut the sentiment into 3 short strips. Use your black pen to add detail or if you have time you can use black nuvo drops
Step 3
This step is absolutely optional but you can quickly colour in your panels using some colouring pencils or alcohol markers. The choice is yours just remember to have fun friend!
Buy The Craft Project
