 Gem Rewards
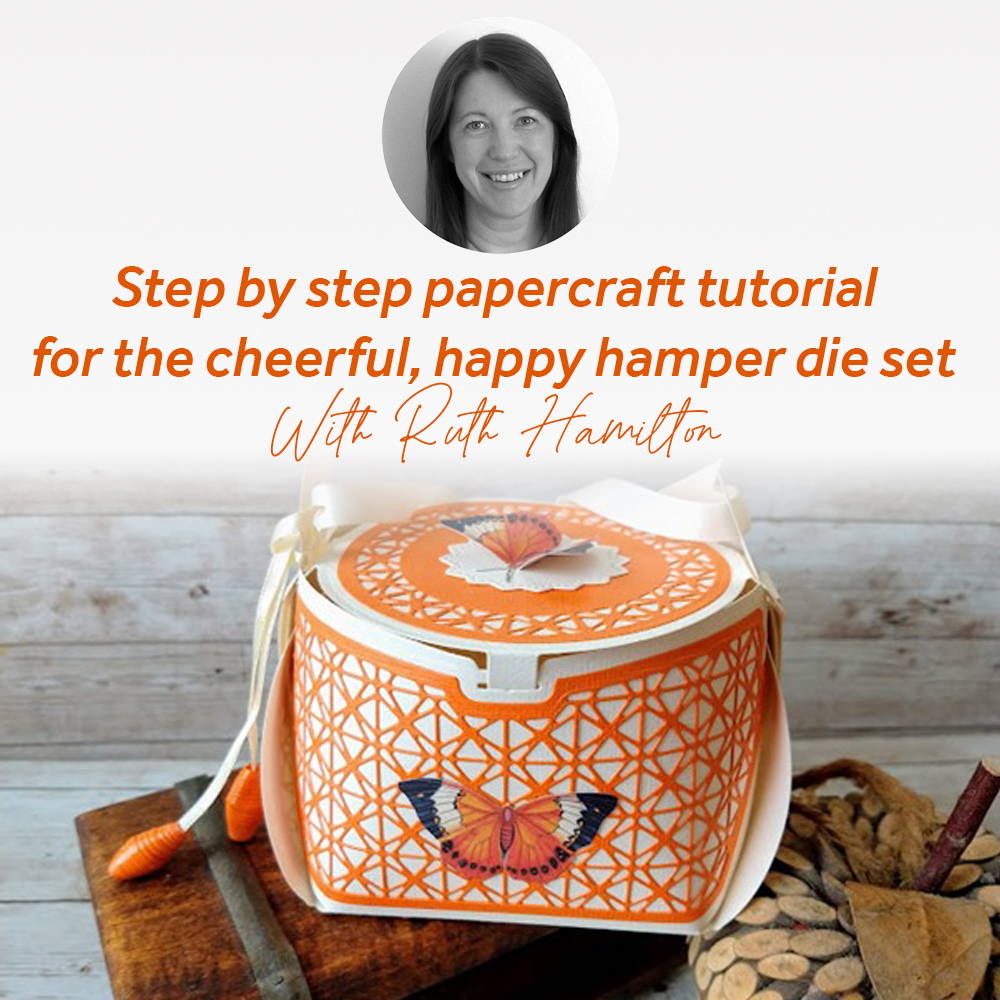
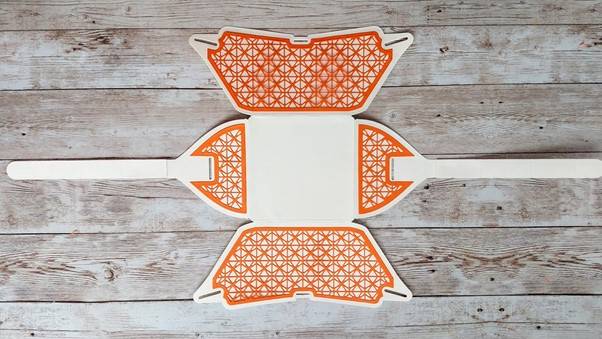
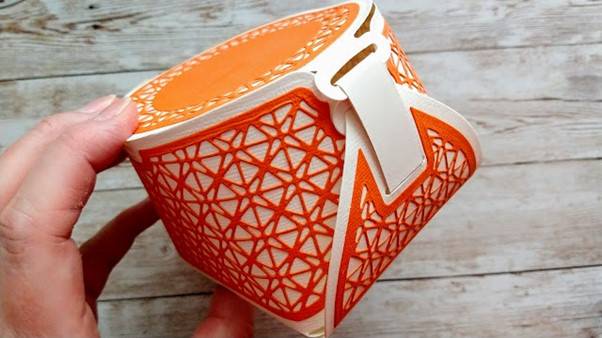
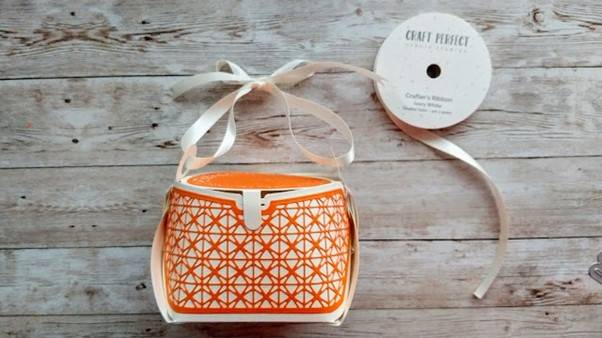
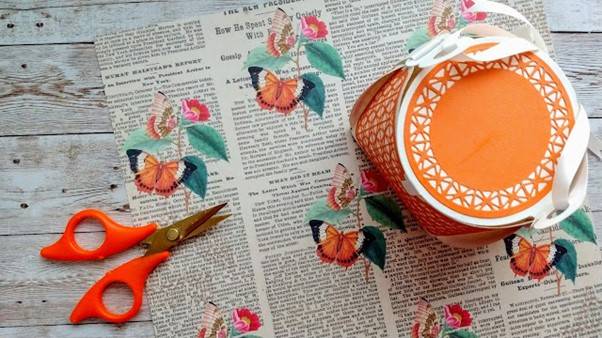
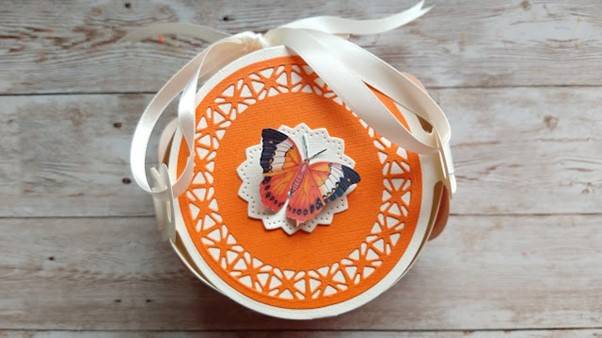
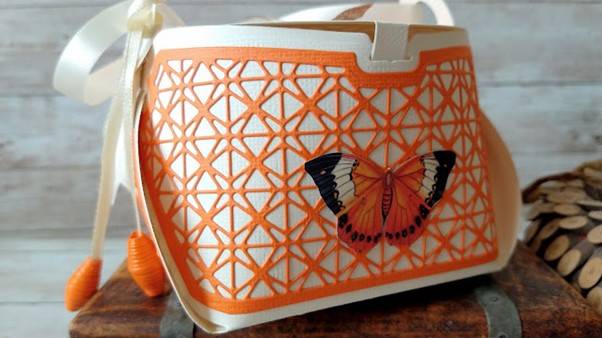
The Happy Hamper Gift Box die set makes the most beautifully shaped gift box that I've seen in a while! Even the name made me smile :)I thought I just had to make this in bright, cheerful colours and top it off with a butterfly.
The finished box measures 12cm wide, 9.5cm deep and 7cm tall.
What you will need
There are instructions inside the packet.
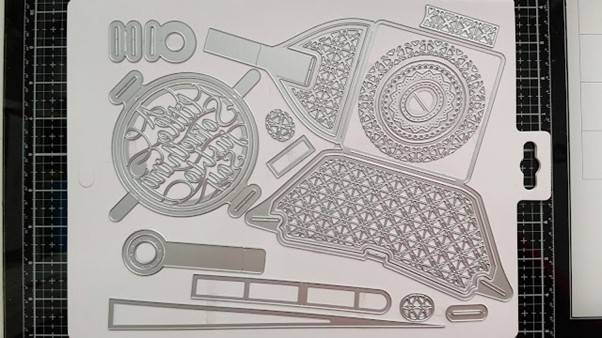
- Happy Hamper Gift Box die set
- Craft Perfect A4 card - Ivory White and Clementine Orange
- Craft Perfect Mariposa Moments 12 x 12 paper pack
- Nuvo Deluxe Adhesive
- Craft Perfect Crafters Ribbon, Ivory White Double Satin 9mm and 3mm
- Nuvo Crystal Glaze
Step 1
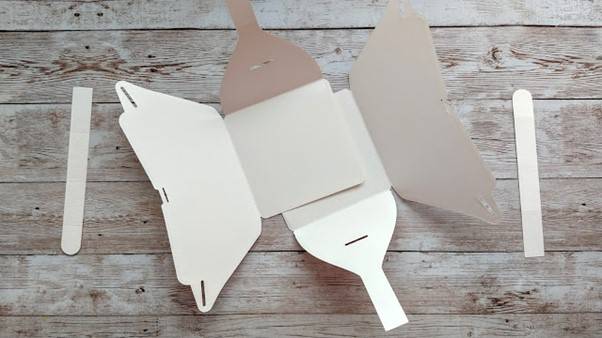
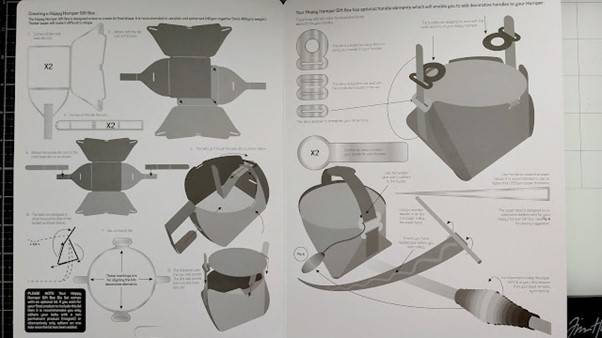
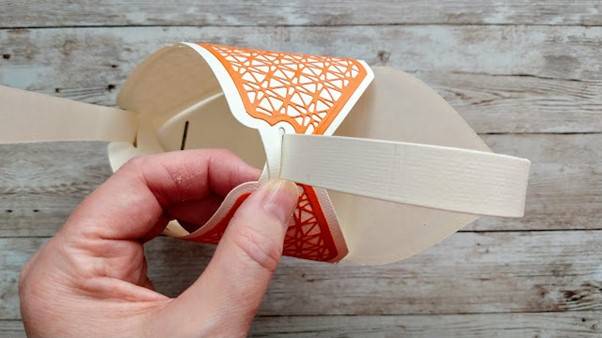
Die cut 2 of the outer dies and 2 strap dies from ivory card.
Step 2
Glue the bases together.
Step 3
Glue the straps onto the tabs on the bases.
Step 4
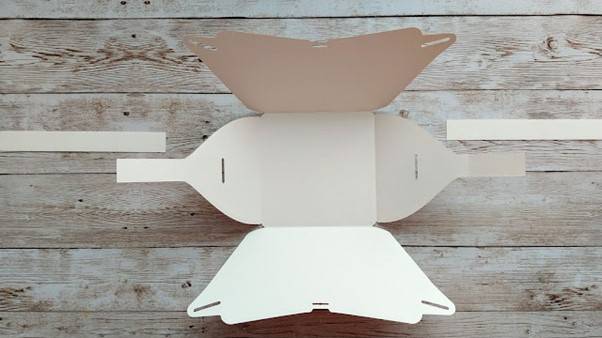
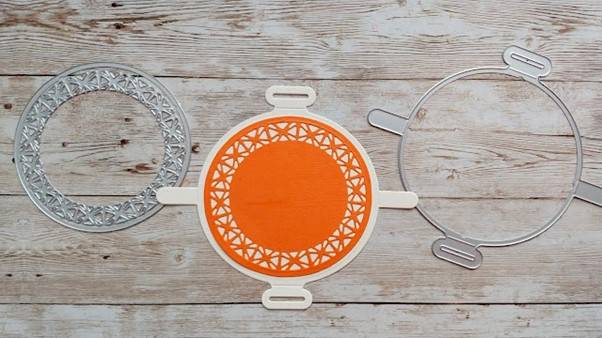
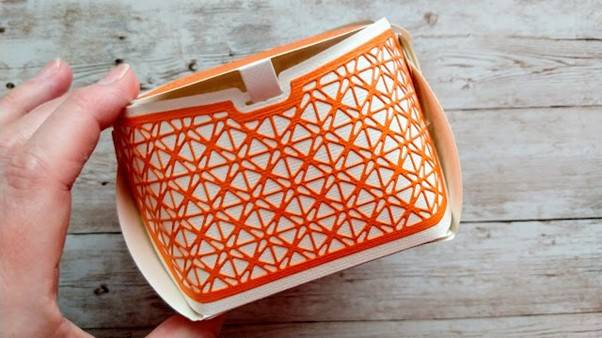
Using the outer dies and inner detail dies shown, make the decorative panels for the front bac and sides. You will need 2 of each.
Step 5
Glue the panels in place.
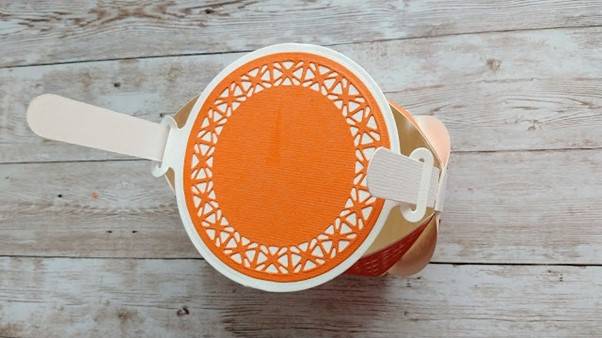
Step 6
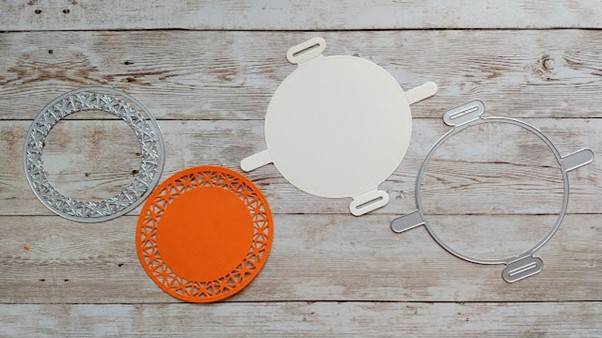
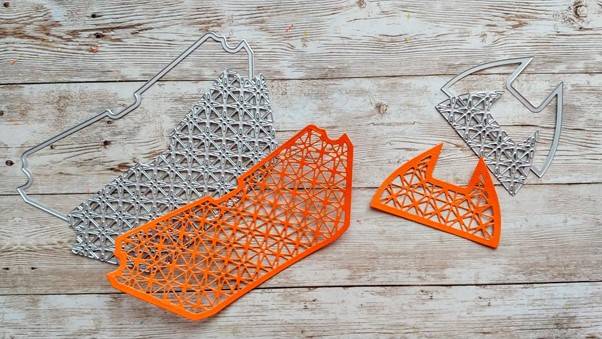
Cut out the lid shape from ivory card and use the 2 dies shown to make the orange panel. When cutting the orange panel, line up the little notches on the outer and inner dies.
Step 7
Glue the orange die cut onto the lid.
Step 8
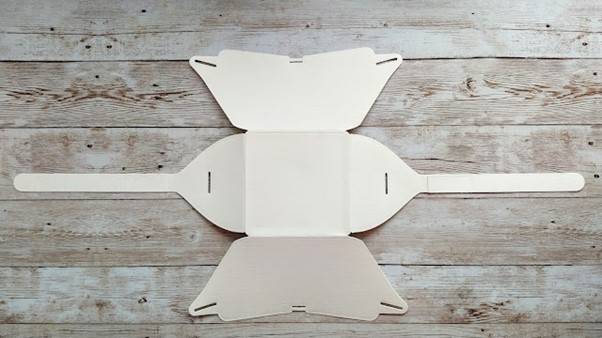
Bend the side panels together, line up the slits and fold the long tabs in through.
Step 9
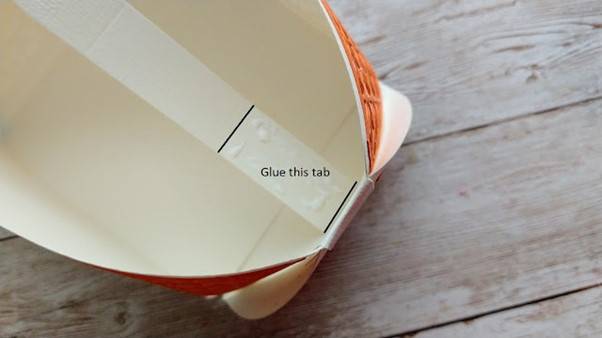
Add glue on the tab shown and adhere to the inside of the side panel.
Step 10
Fold the little tabs through the slits at the front and back.
THERE ARE DIFFERENT OPTIONS FOR THE HANDLE
If you are not adding a handle you can follow the next 3 steps
Step A
Thread the long tab up through the slit on the lid.
Step 2
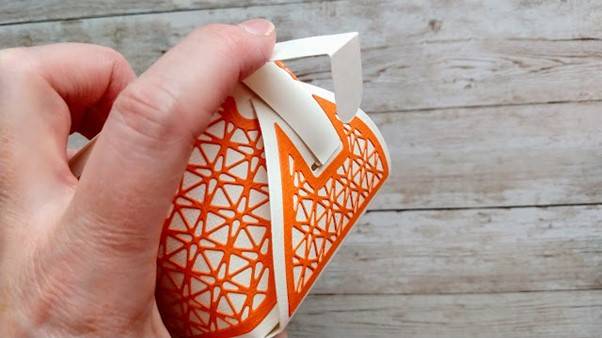
Fold the tab backwards.
Step C
Thread back into the slit in the side panel.
To add a ribbon handle
Step A

Die cut 2 ivory tabs with slits and glue the slit parts of both onto the corresponding slit on the lid.
Step B
Thread ribbon through the slits. Tie in a knot and bow.
Step 11
Cut out 3 butterflies from the paper pack.
Step 12
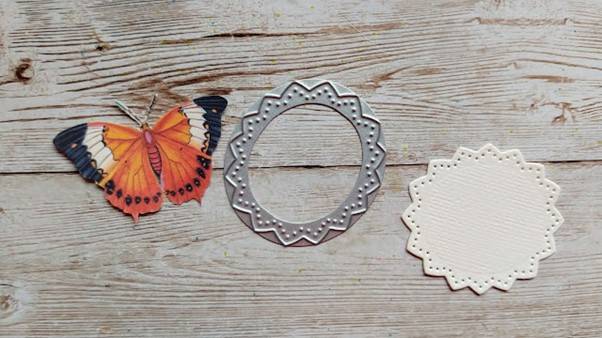
Die cut the fancy shaped oval from ivory card. On one of the butterflies, snip in between the wings at the bottom.
Step 13
Glue the oval onto the lid. Fold back the butterfly's wings and glue the body to the oval.
Step 14
Die cut 2 orange "bead" dies.
Step 15
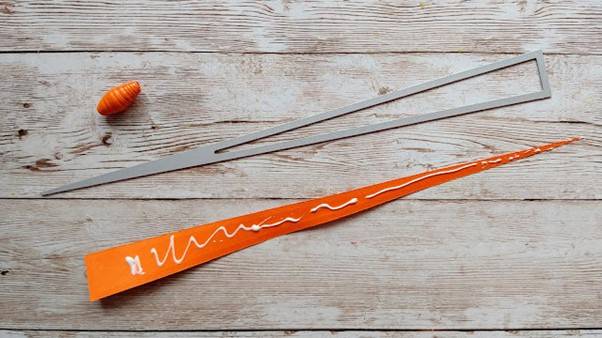
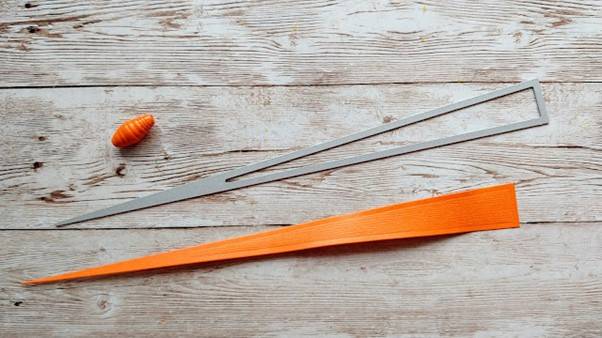
Spread glue along the length of the die cut leaving a little gap at the top (wide end)
Step 16
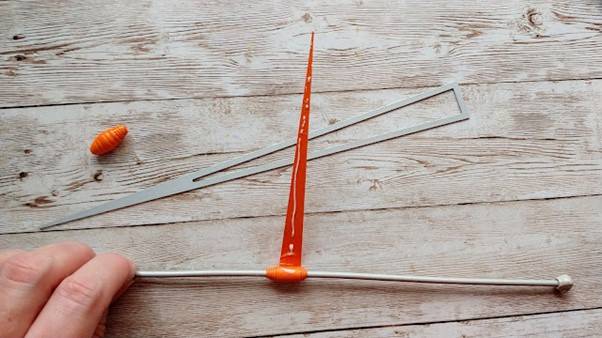
Use a skewer or knitting needle to roll up the bead. It is important to keep the paper central as you roll to ensure the bead is symmetrical.
Step 17
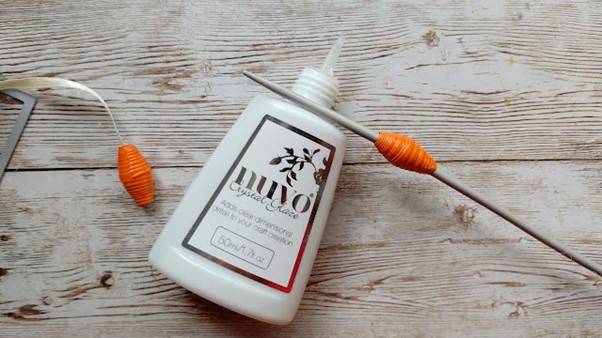
Leaving the bead on the needle, coat with Crystal Glaze and leave propped up to dry.
Step 18
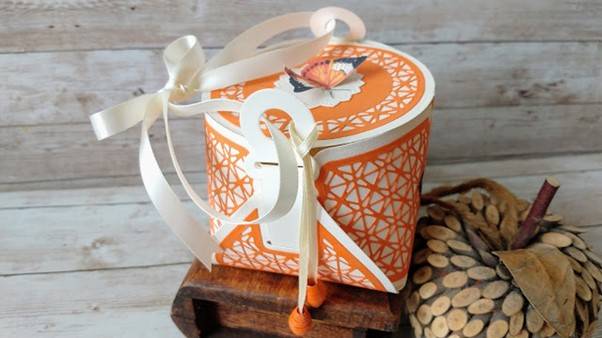
Attach the beads to the side of the handle with a loop of ribbon.
Buy The Craft Project