


The Tea, Cocktails and Cake die sets are so versatile and can be used for a whole plethora of occasions, but I’ve kept it simple for this step by step, giving you a couple of tips of how to snip into your die-cuts so you can layer them to give the lit flame on the candle, or help the writing within the cake design stand out nicely.
Step 1
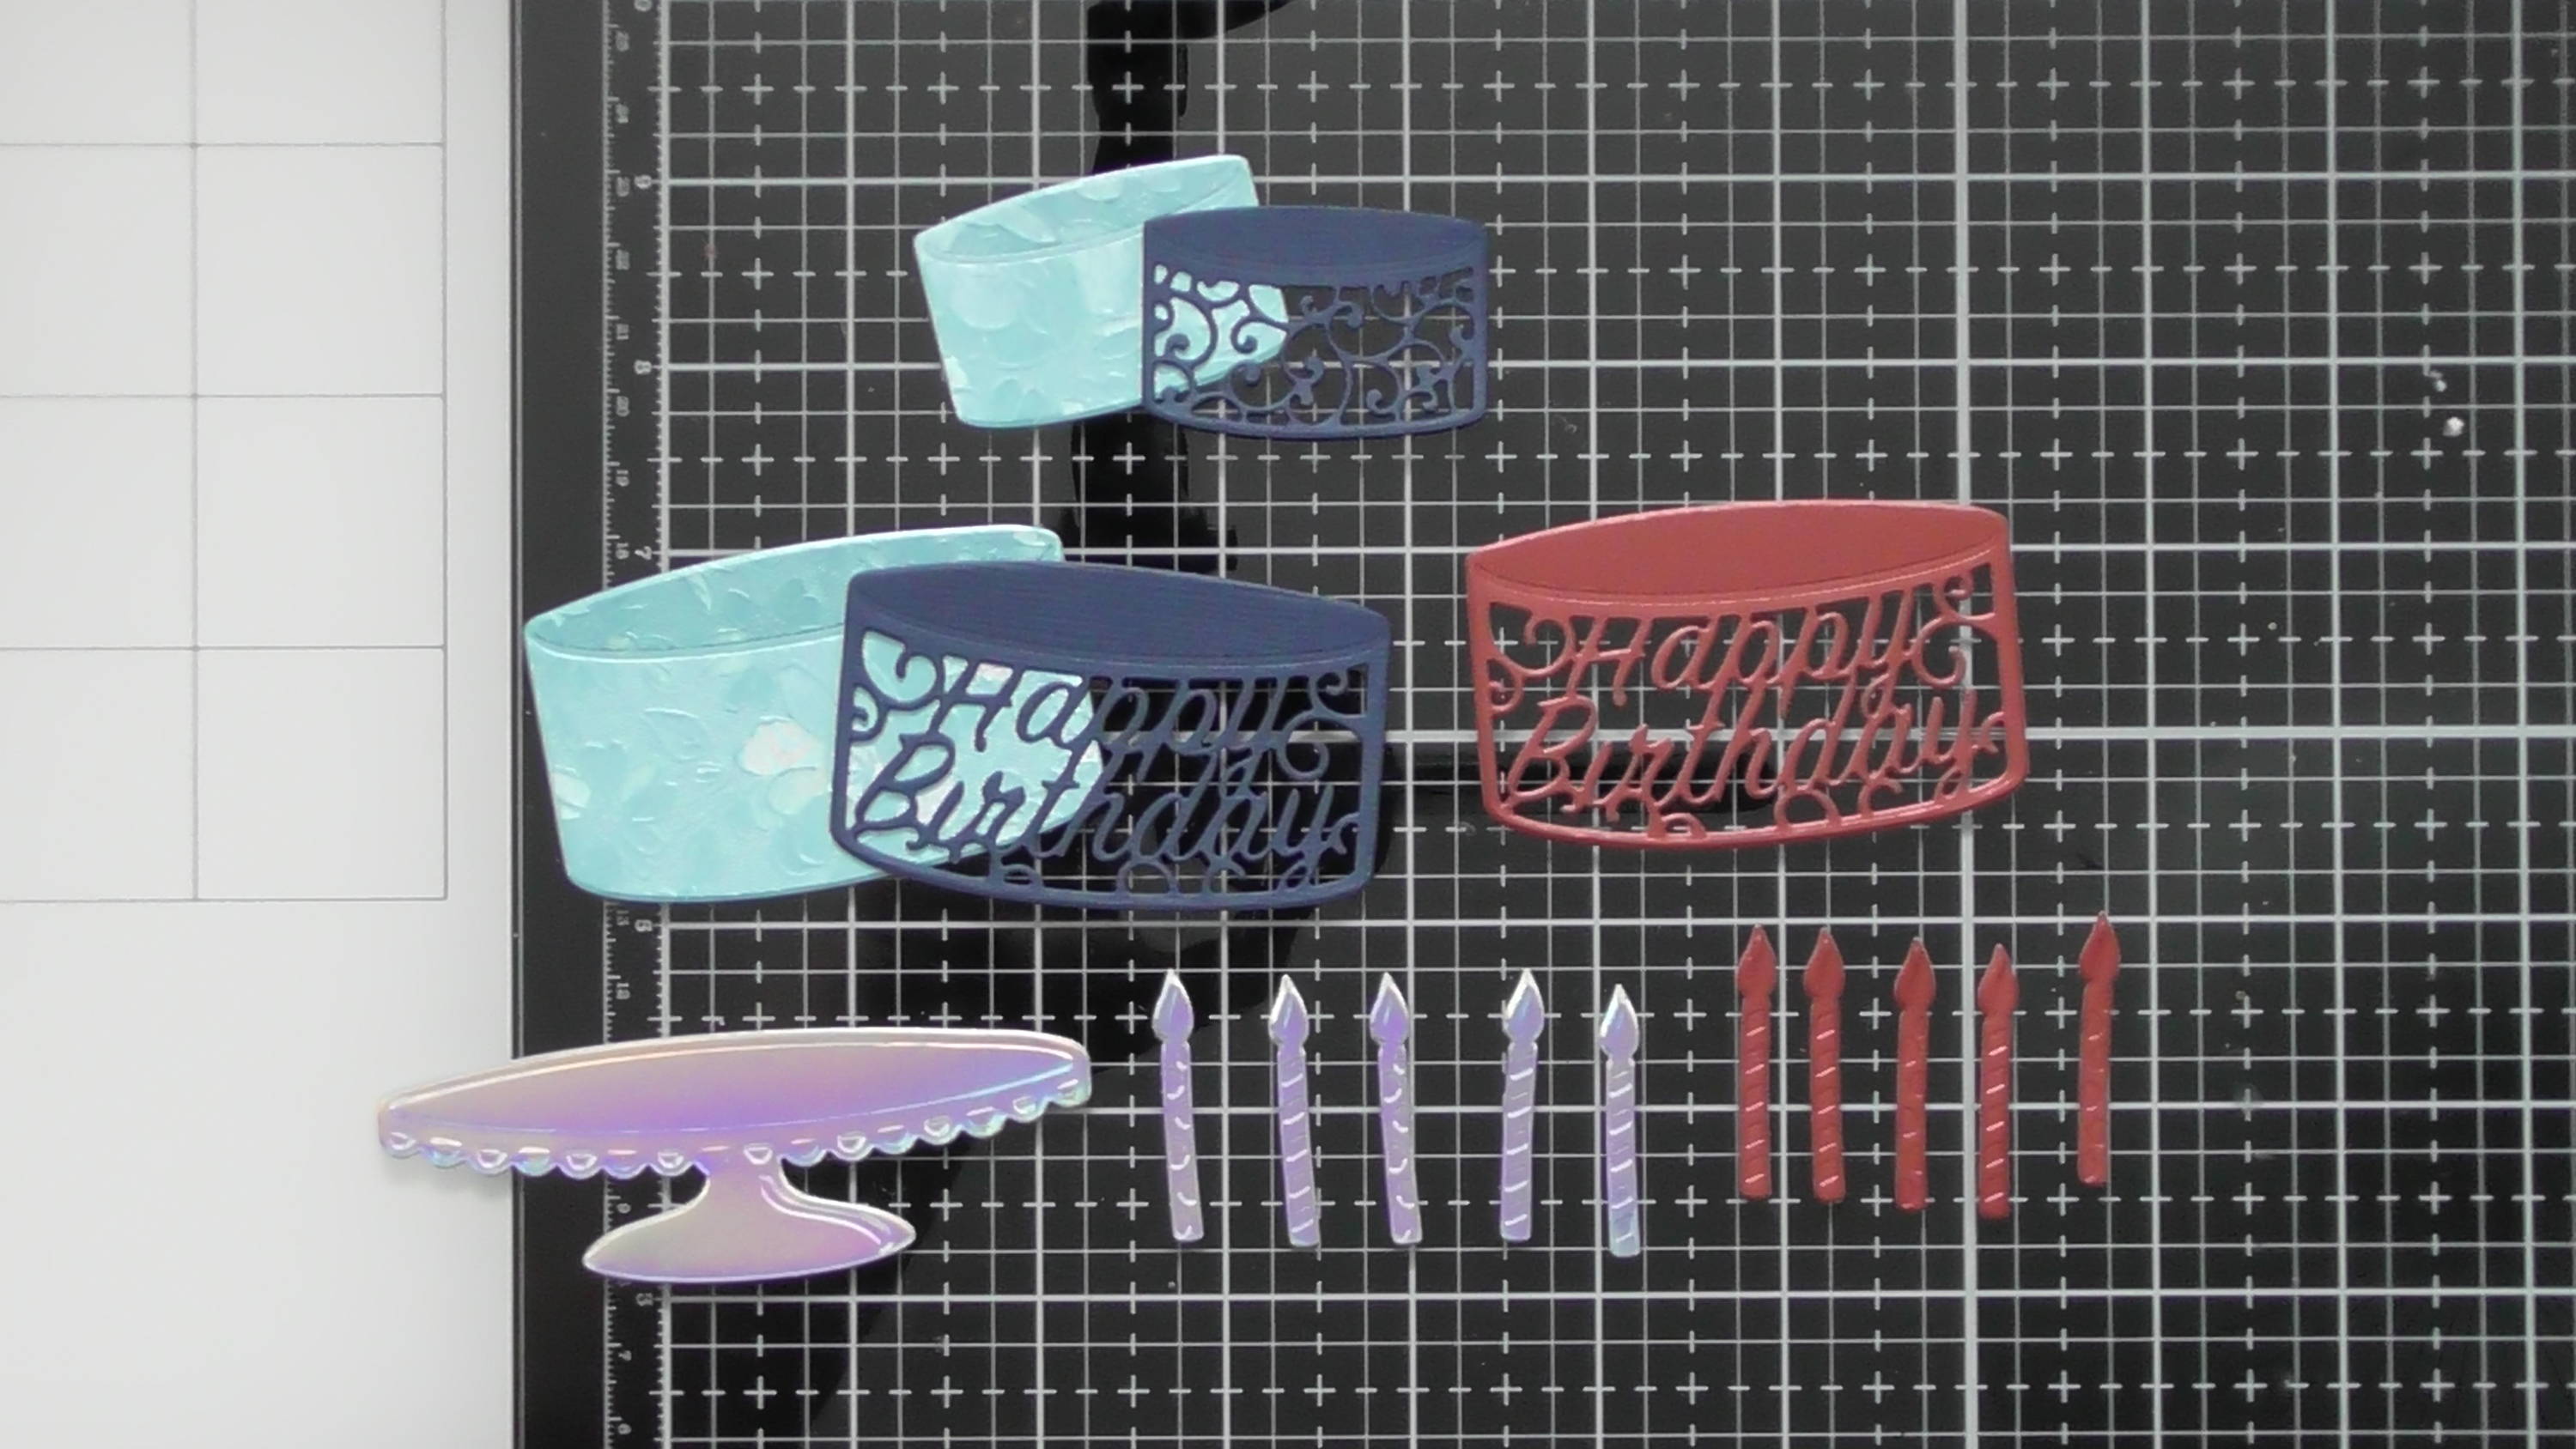
Chose the dies you want to use on your card, this’ll depend on your favourite size of card, as you can add more cake layers on a larger card. Then pick a colour scheme, I’ve gone for Blues, Red and Holo Waves :D For this card, you’ll need all the die-cuts shown above
Step 2
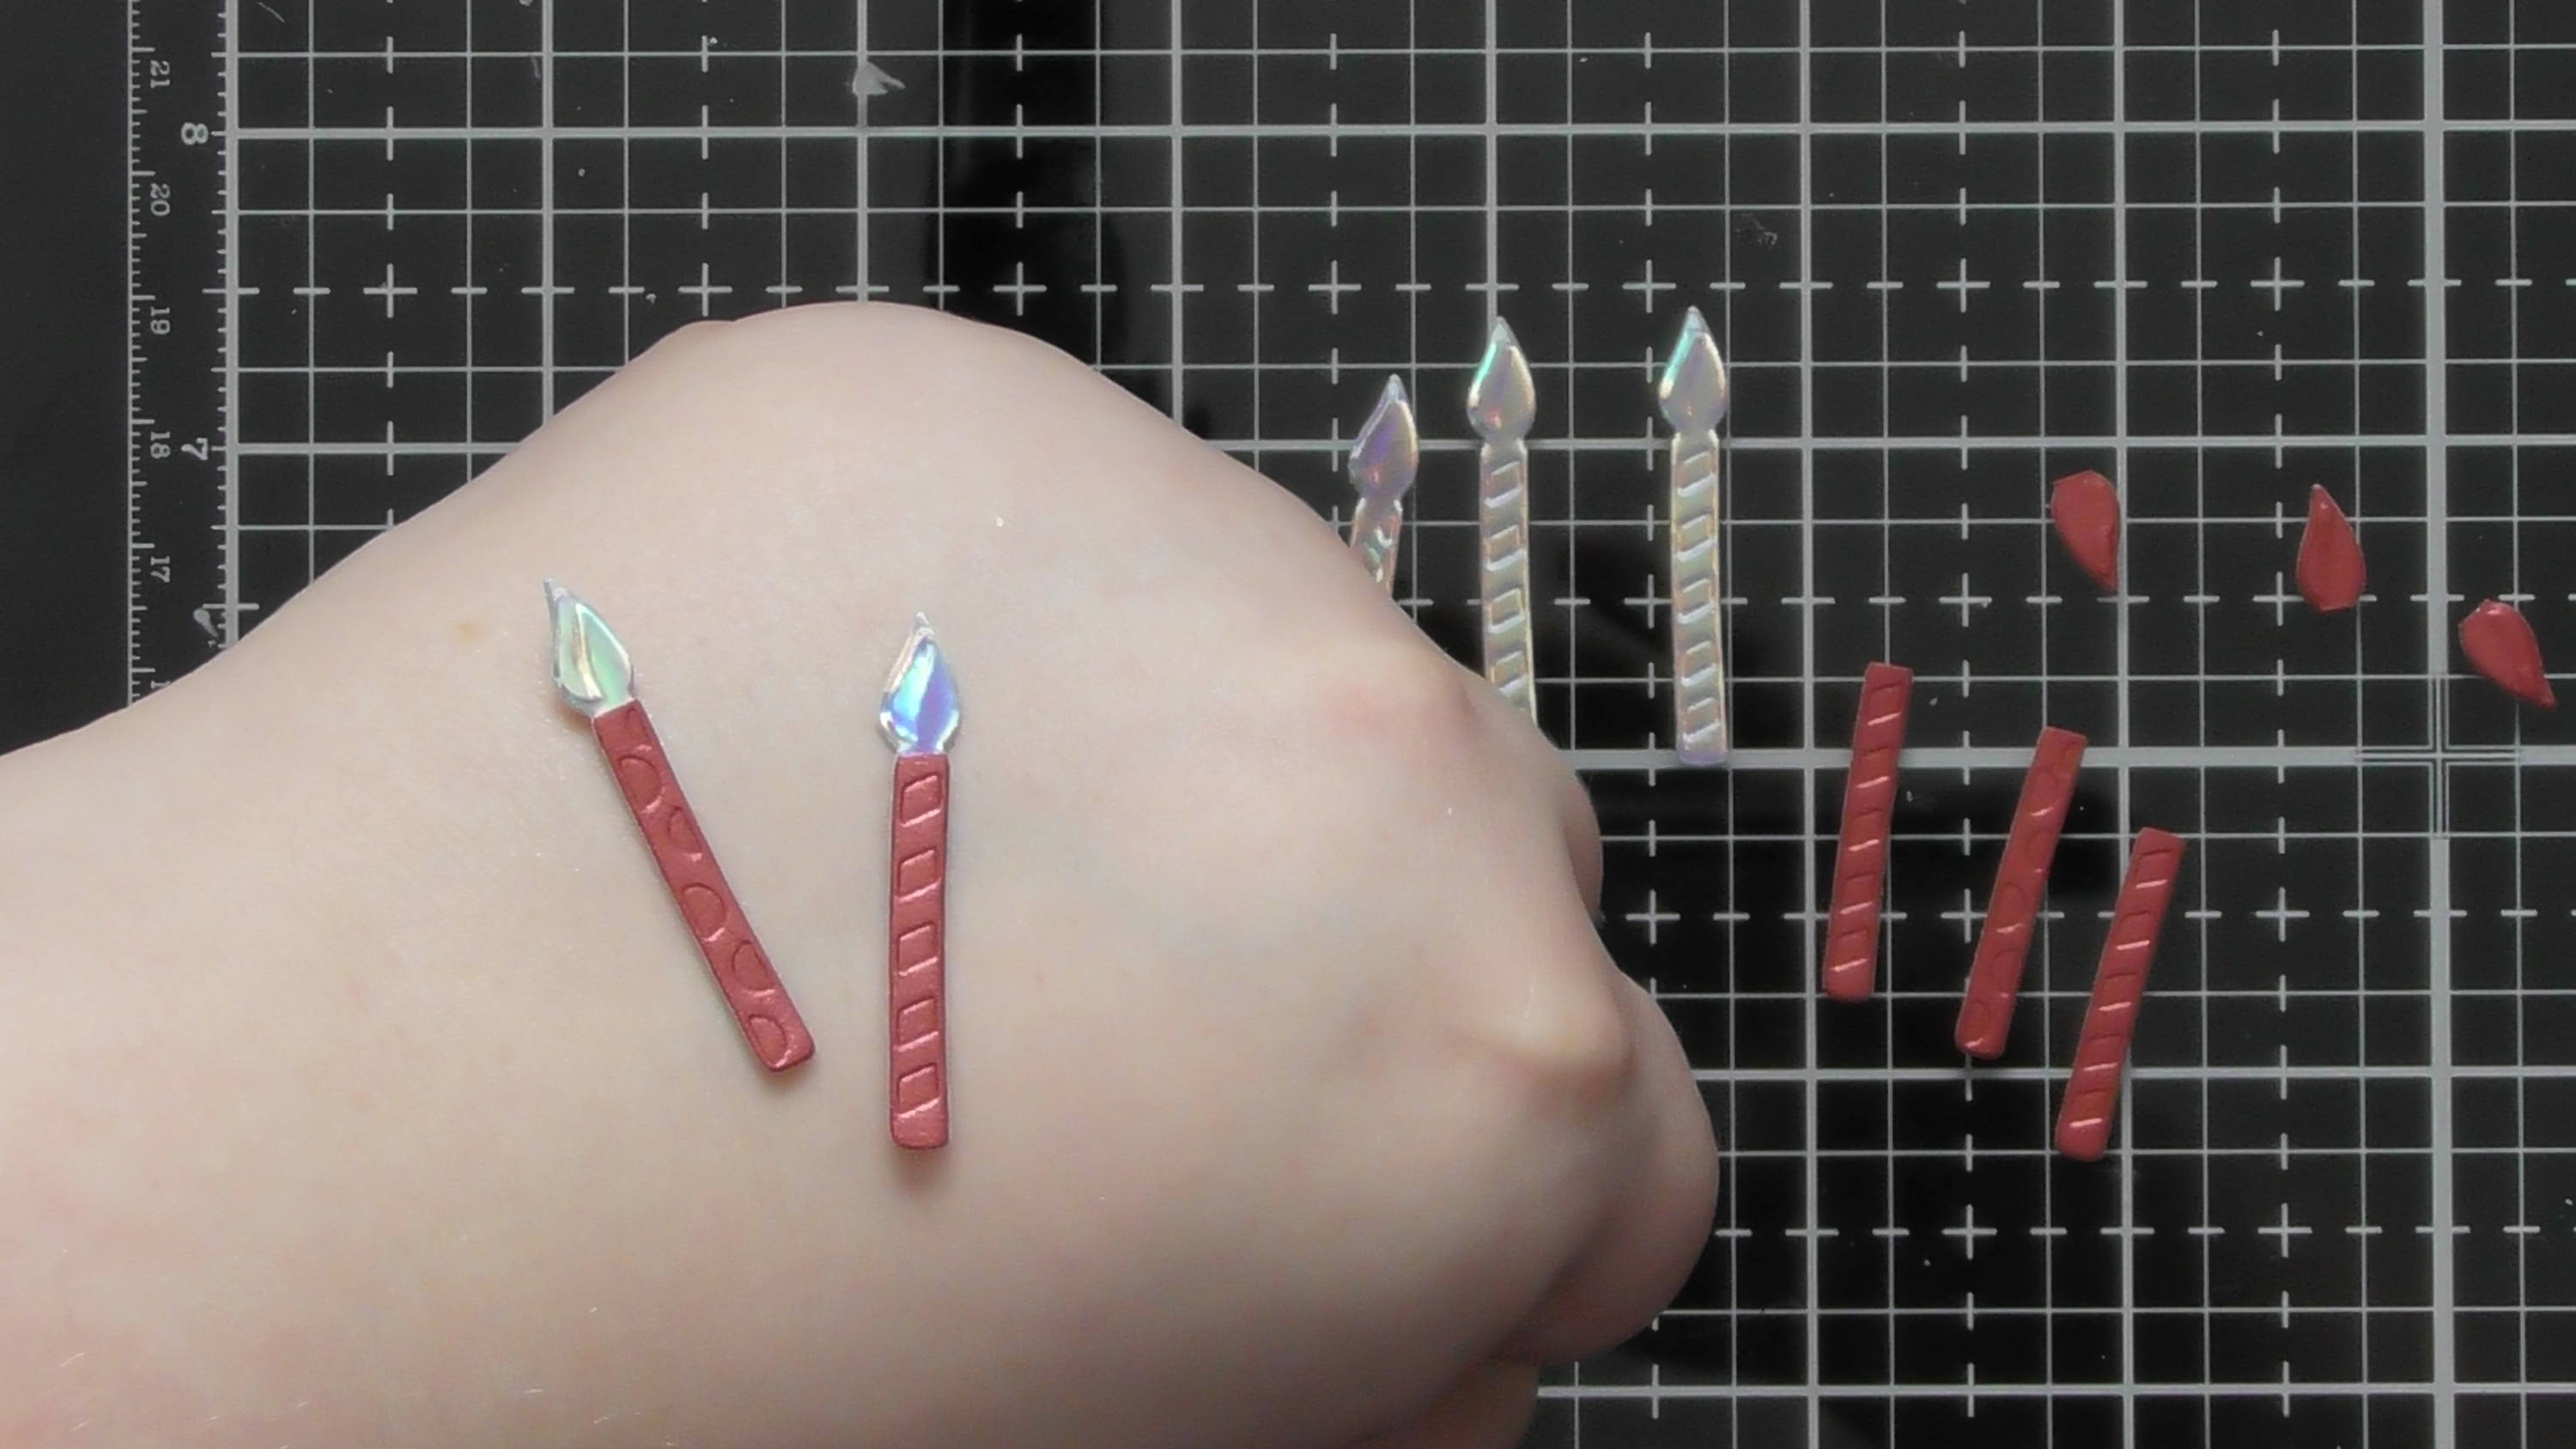
Firstly, let’s add the lit flame to the candle. You can do this 2 ways, but my favourite way is to snip the red flame off, and add the red candle to the whole Holo Waves (flame coloured) die-cut, but feel free to try it the other way round too.
Step 3
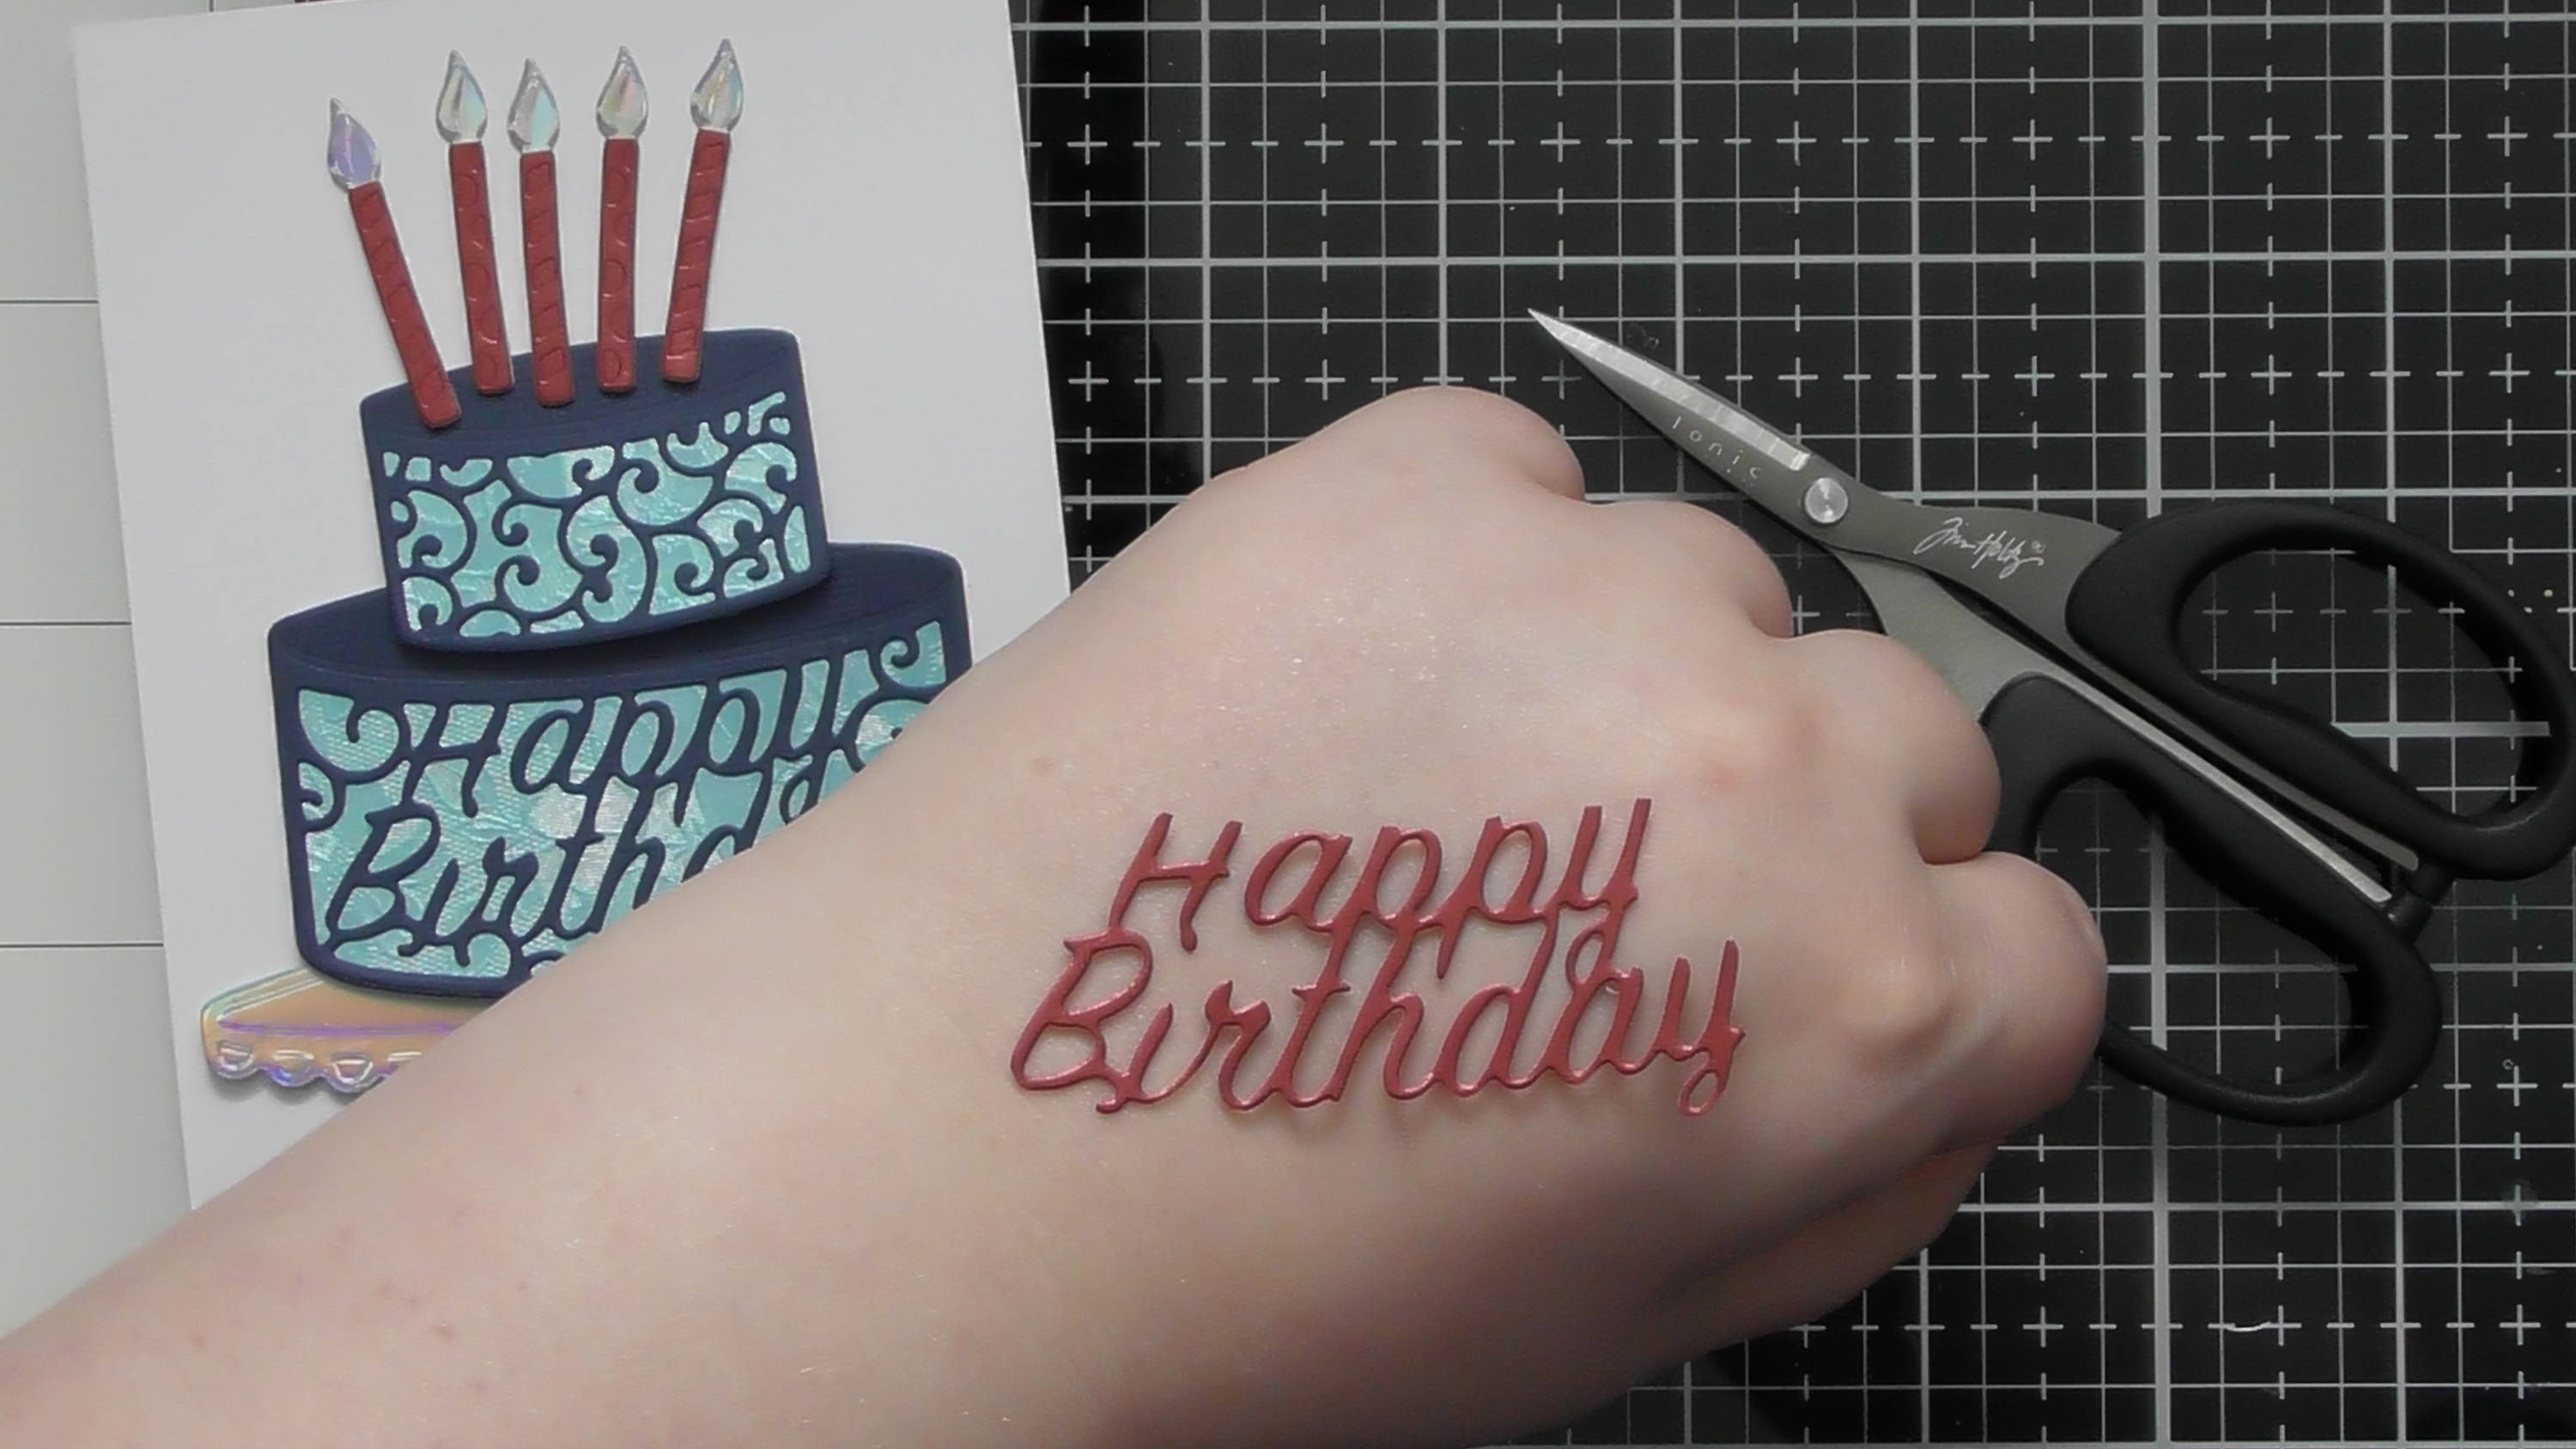
Then for the cake, we have a decent contrast between the 2 blues, but to tie the colour of the candles into the rest of the card, die-cut another large cake tier from red and snip out the happy birthday as shown.
Step 4
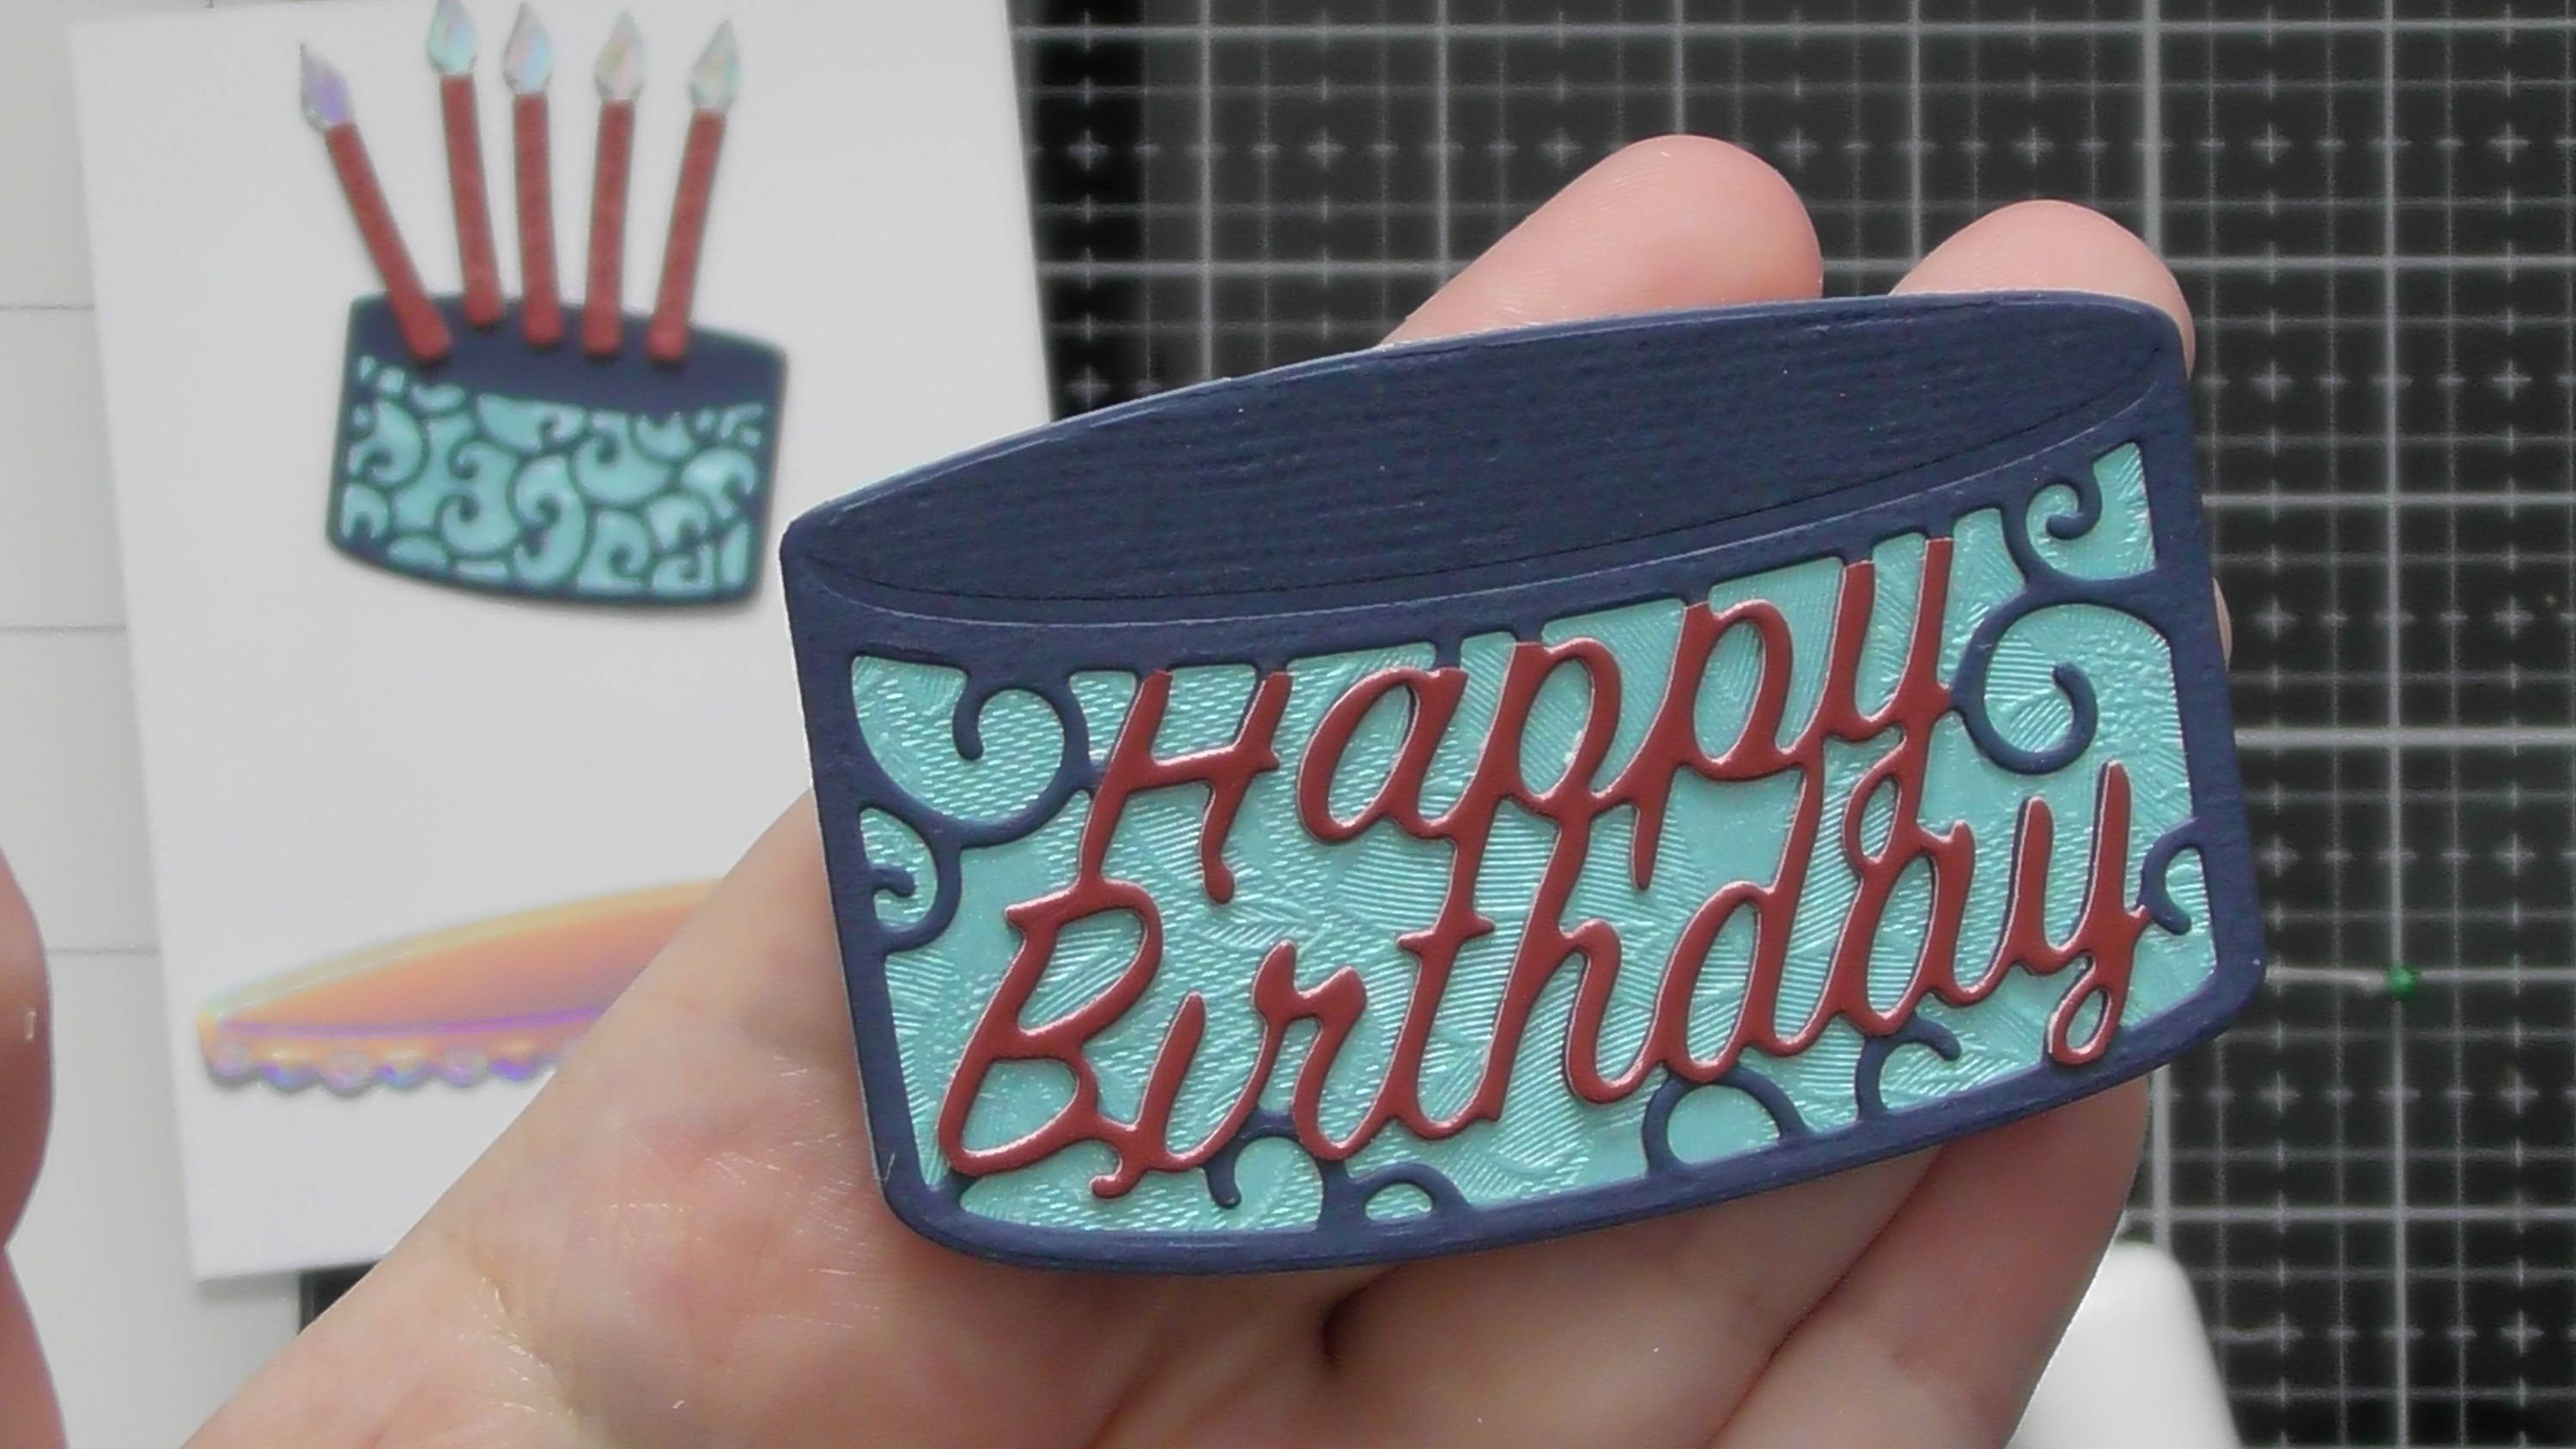
Then we can layer up the 2 blues and the red happy birthday to give this effect :D It also kind of gives the feel that the words were written in a different colour of icing to the main cake decoration too.
Step 5
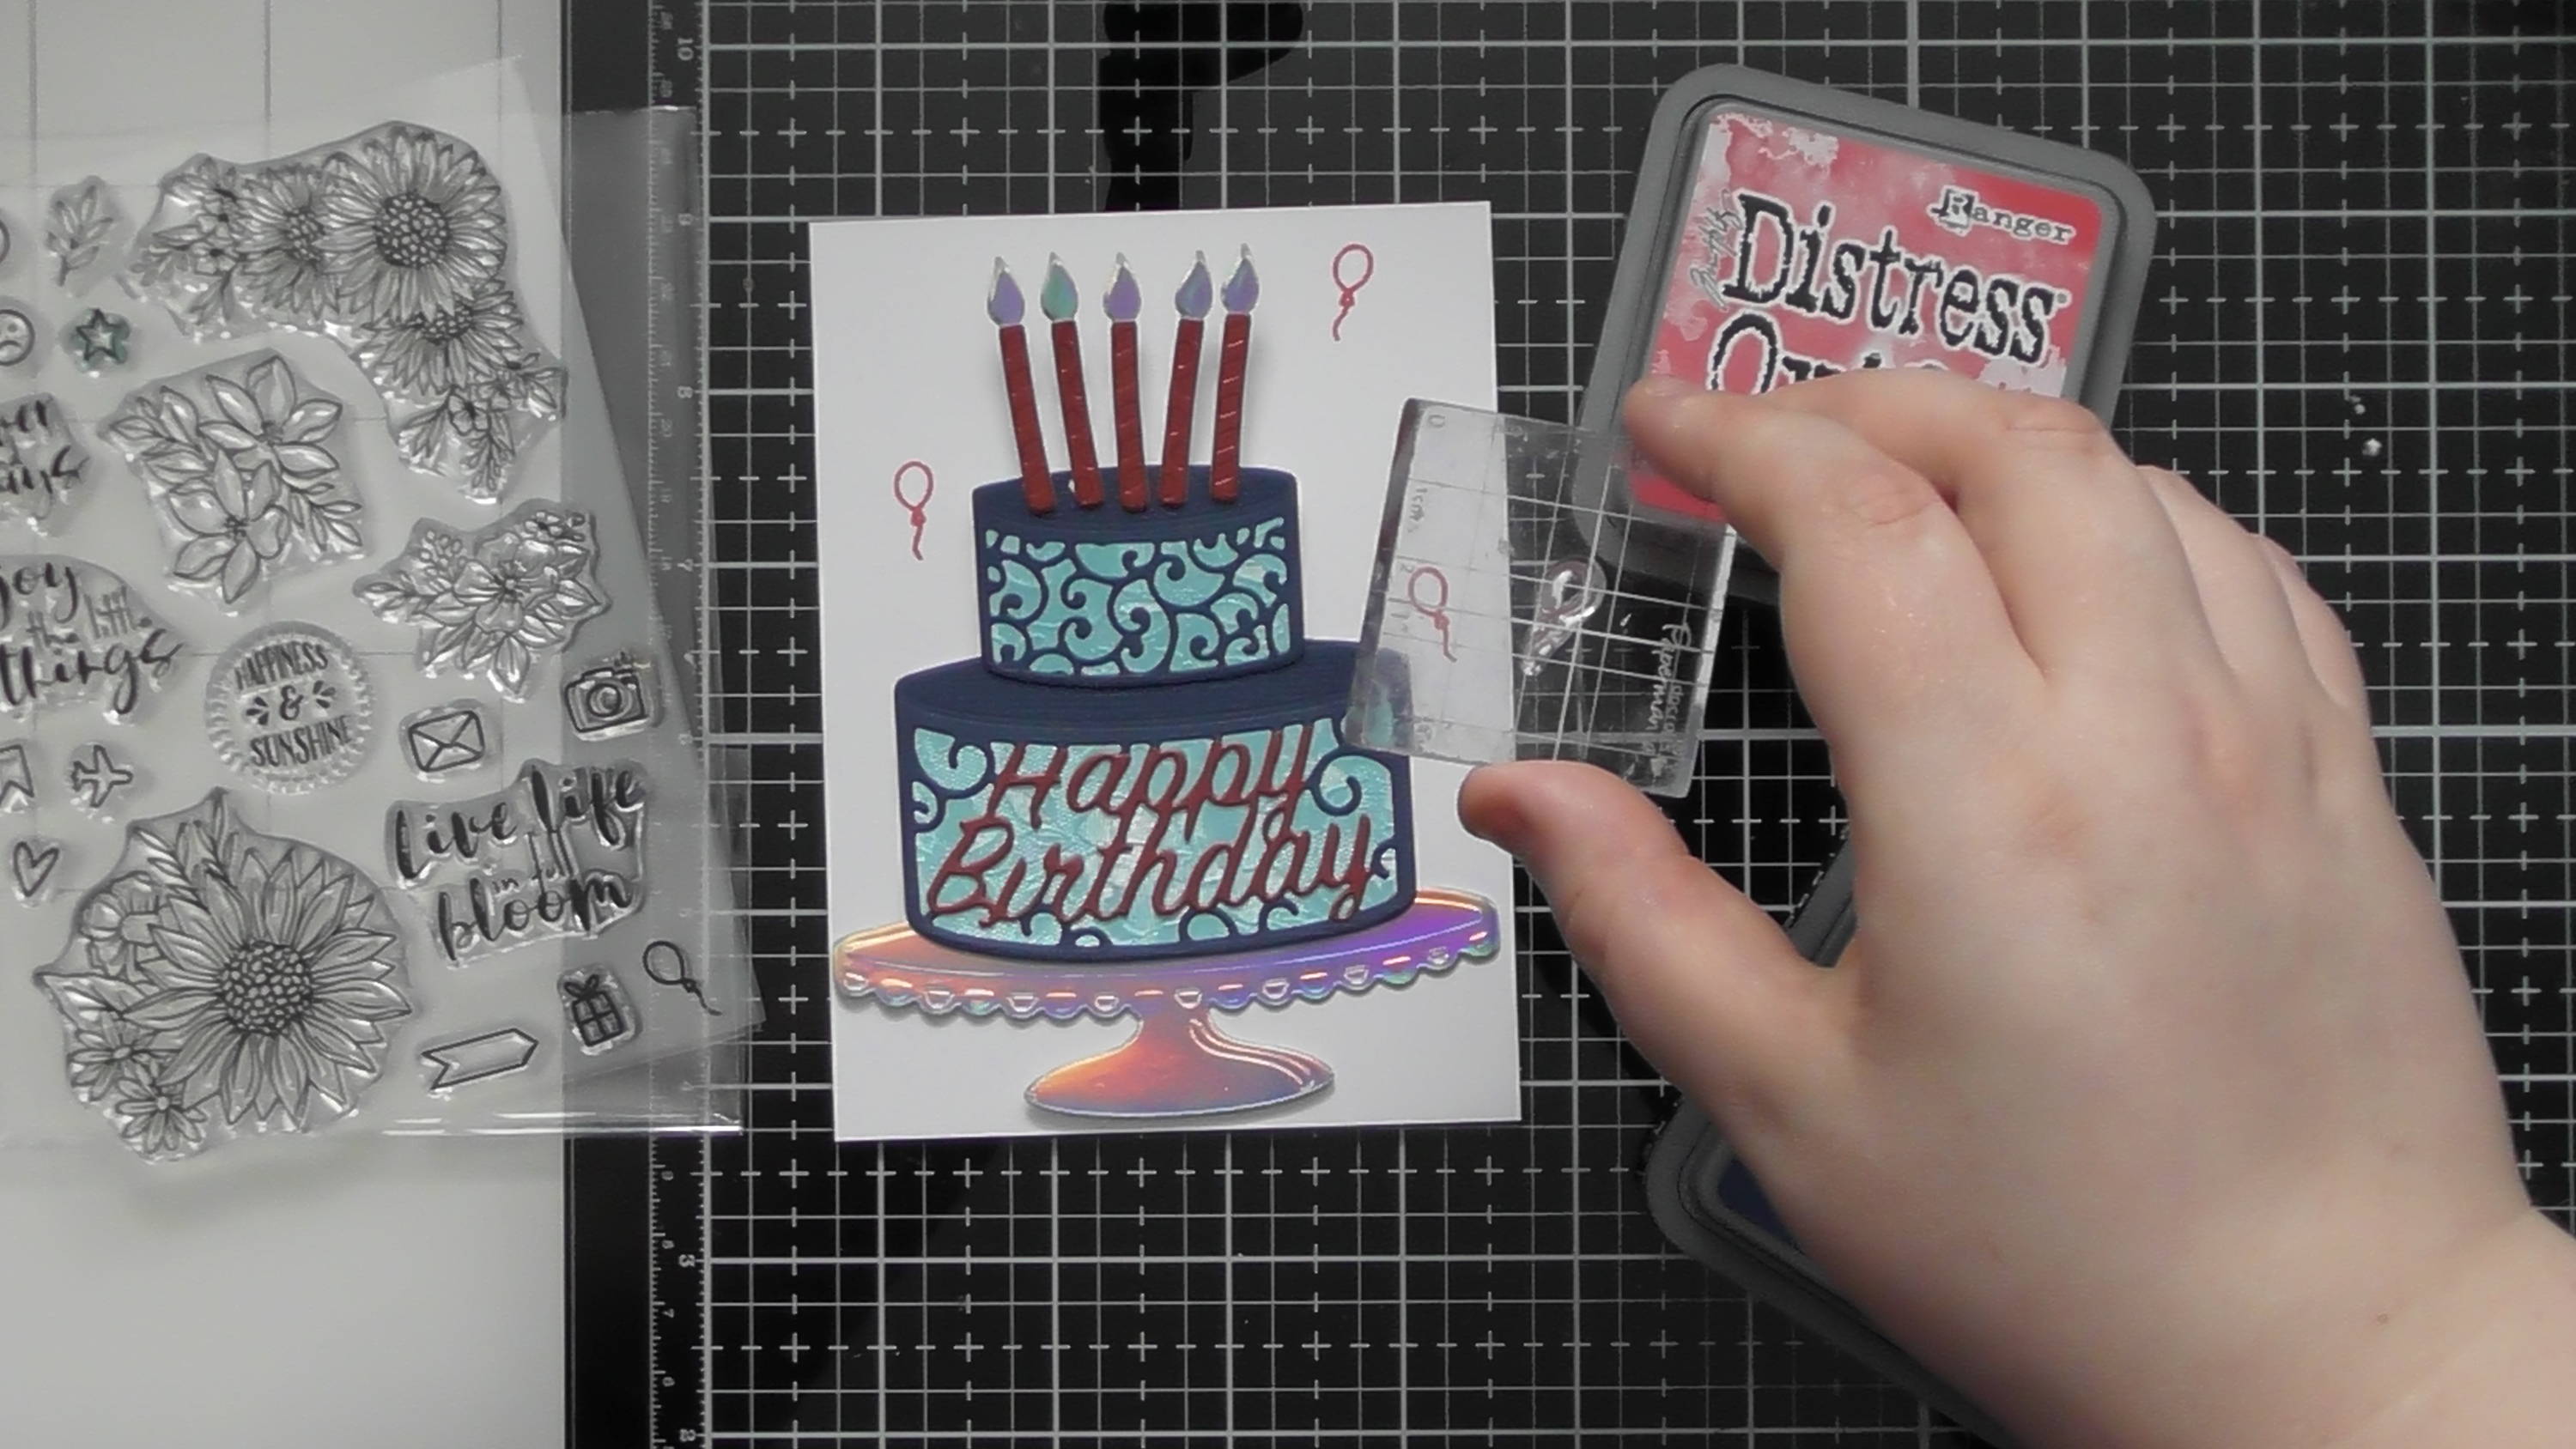
Once I layered up the 2 tiers of the cake (I chose largest and smallest) and added the stand and candles, I felt like it needed a simple background, so I grabbed the stamp set from Issue 2 of the Official Tonic Magazine along with 2 Distress Oxides that matched my card colours.
Step 6
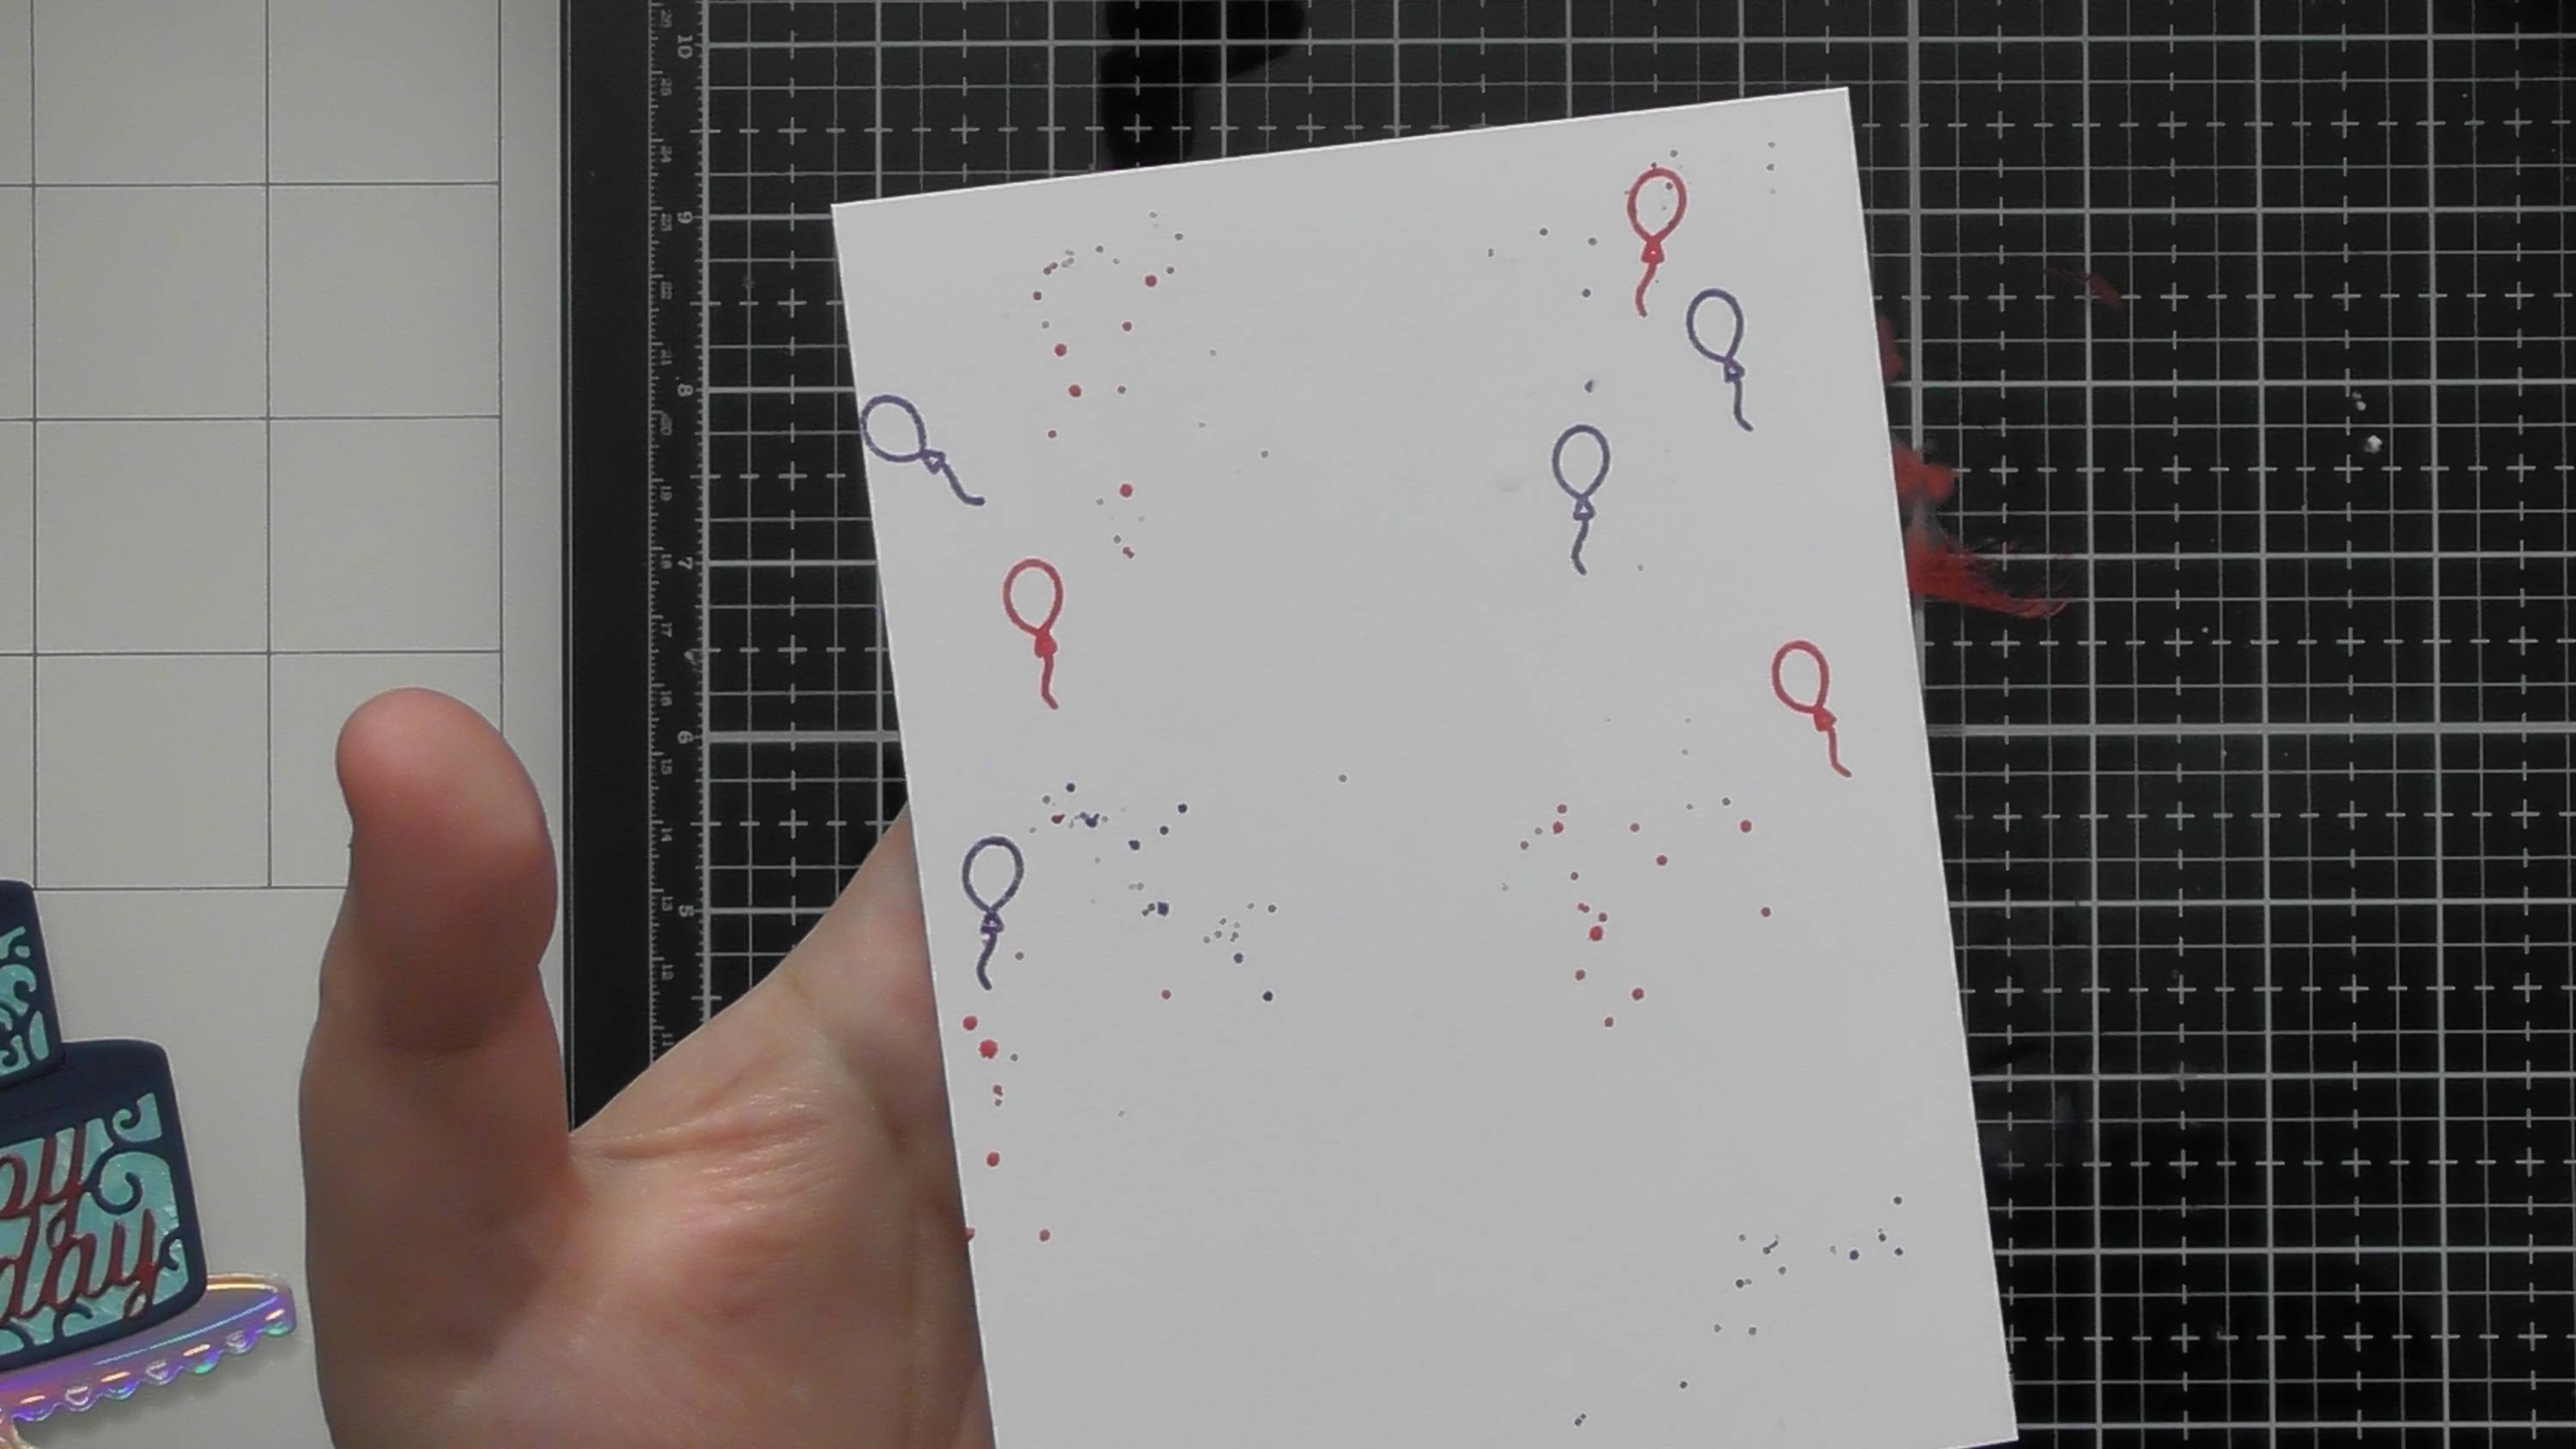
I then stamped a few of the tiny balloons in the red and blue around where the cake will sit, and of course I had to add some ink splattering in both colours too, just water down a little ink and use a fine paint brush to add the splatter.
Step 7
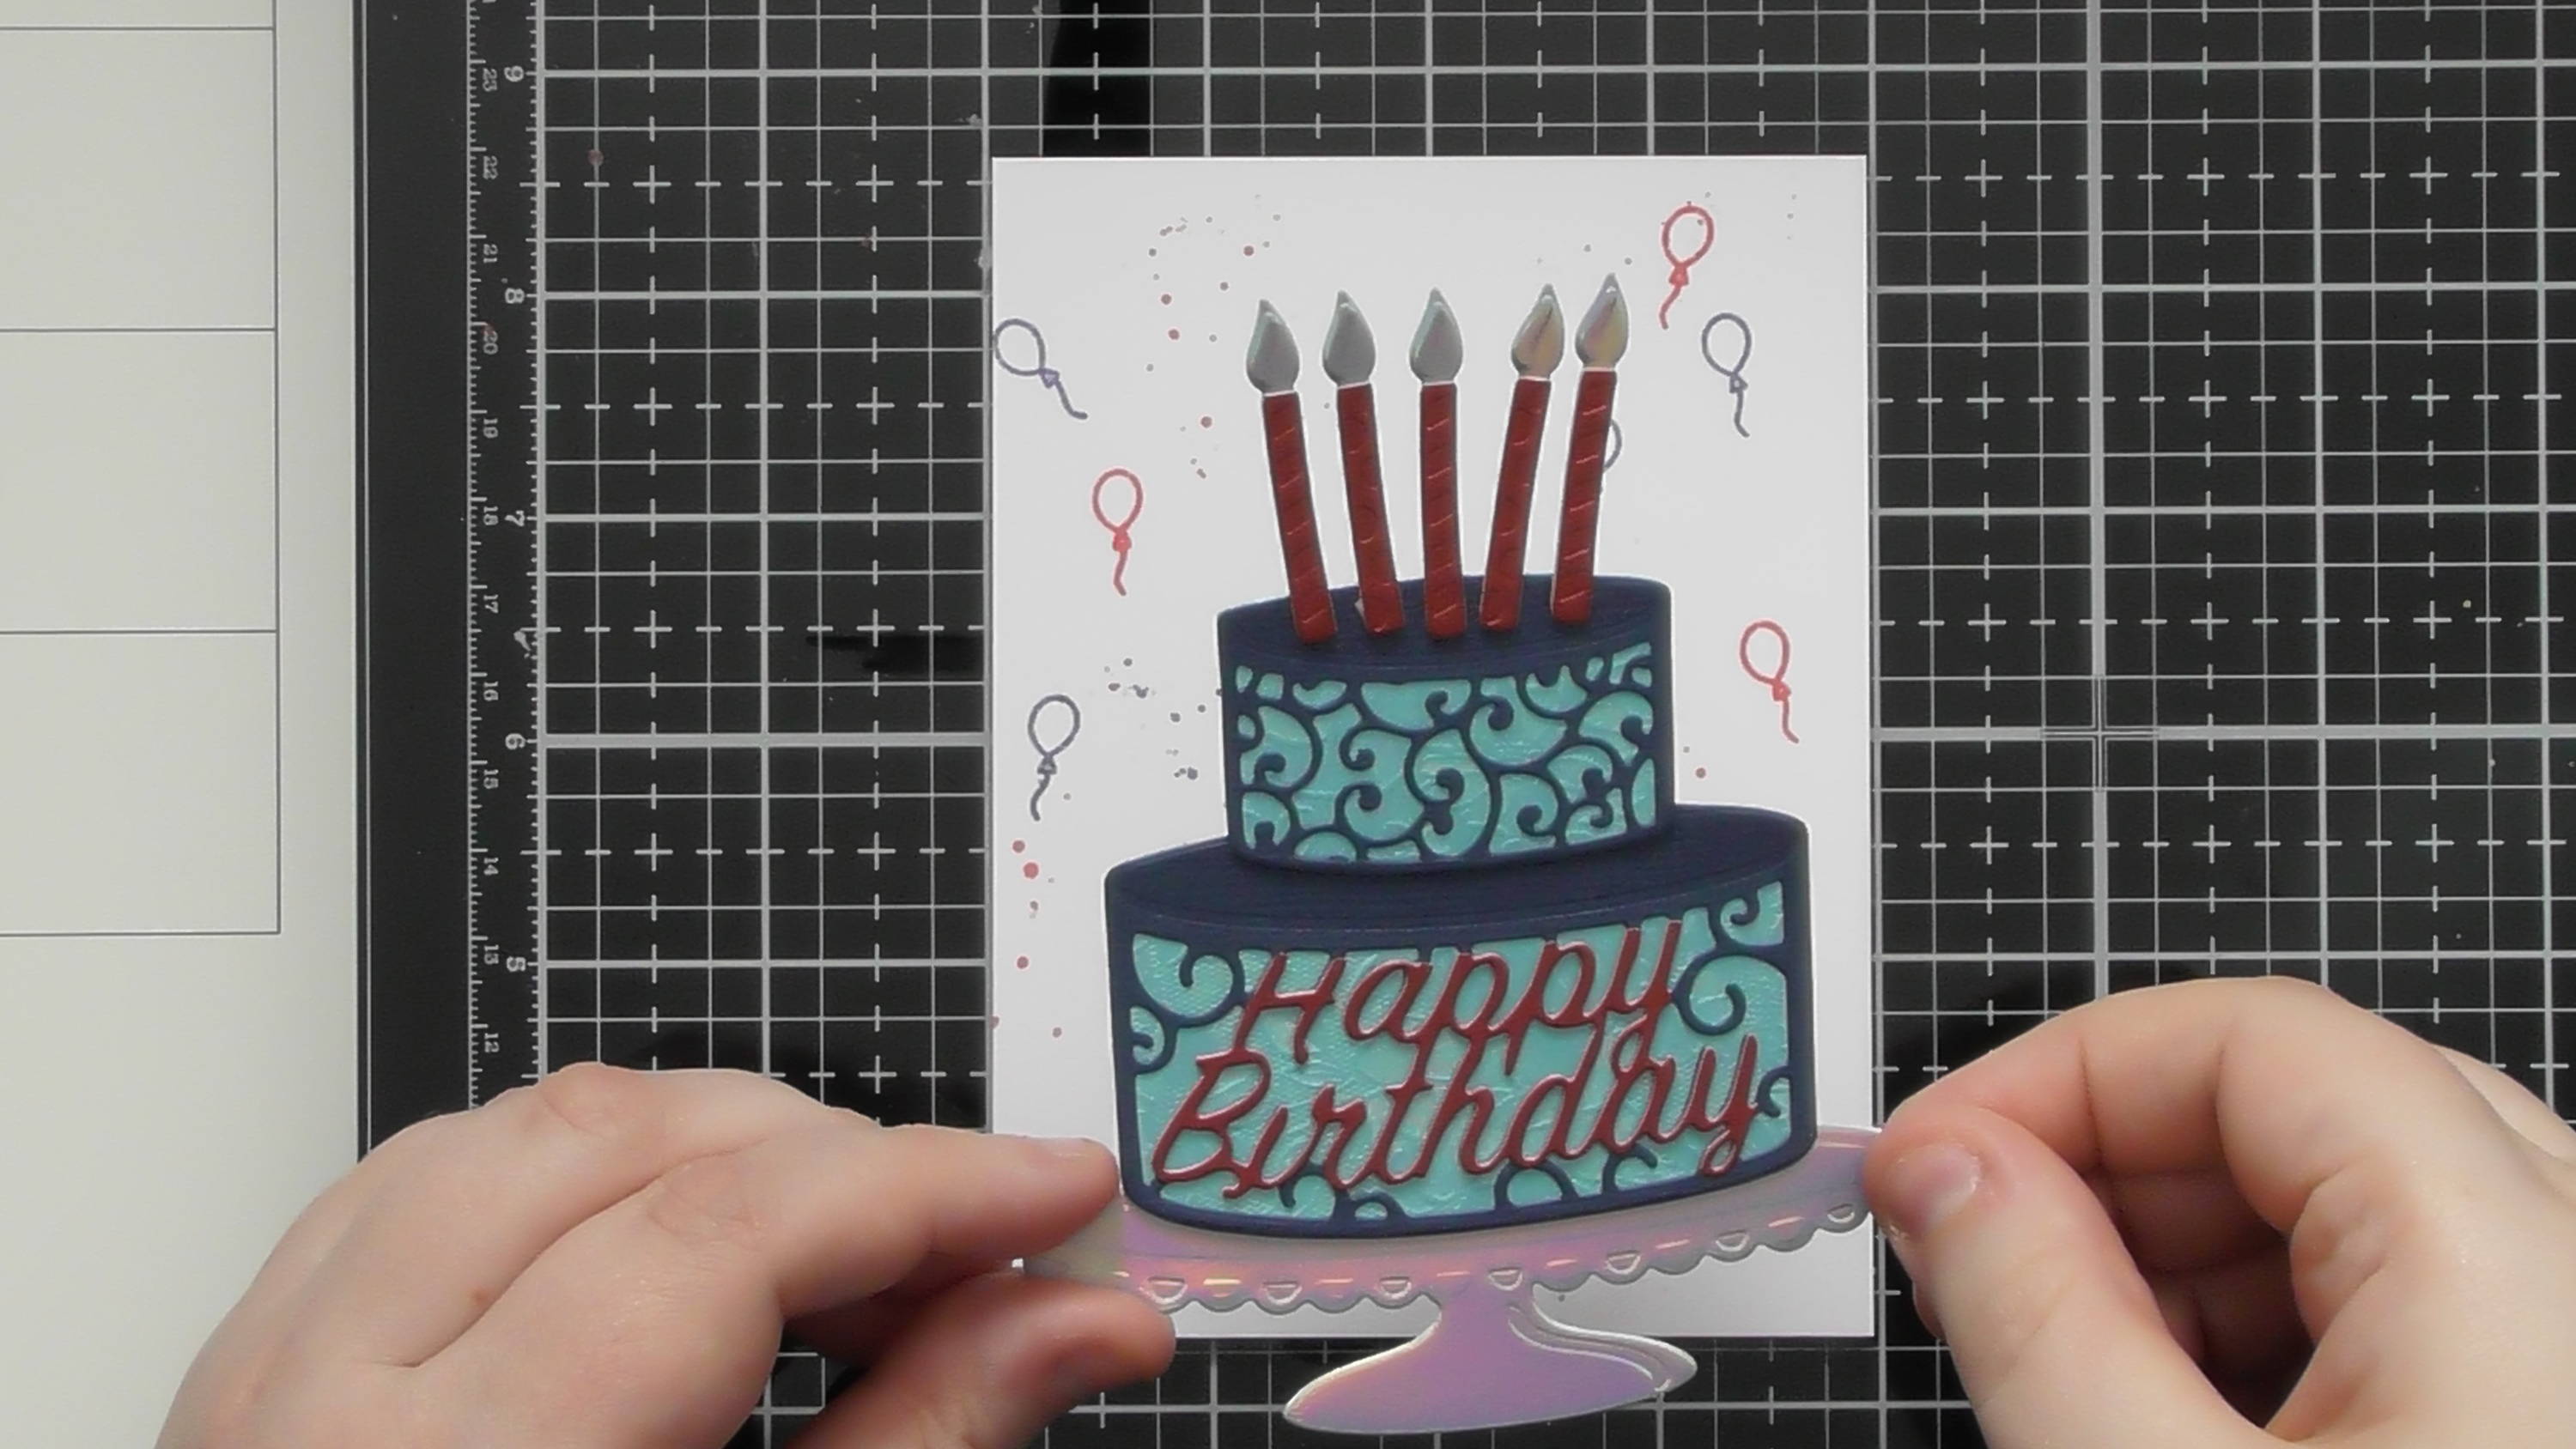
Once the background was dry, I added my completed cake, and I added it on foam tape to give a little dimension.
Step 8
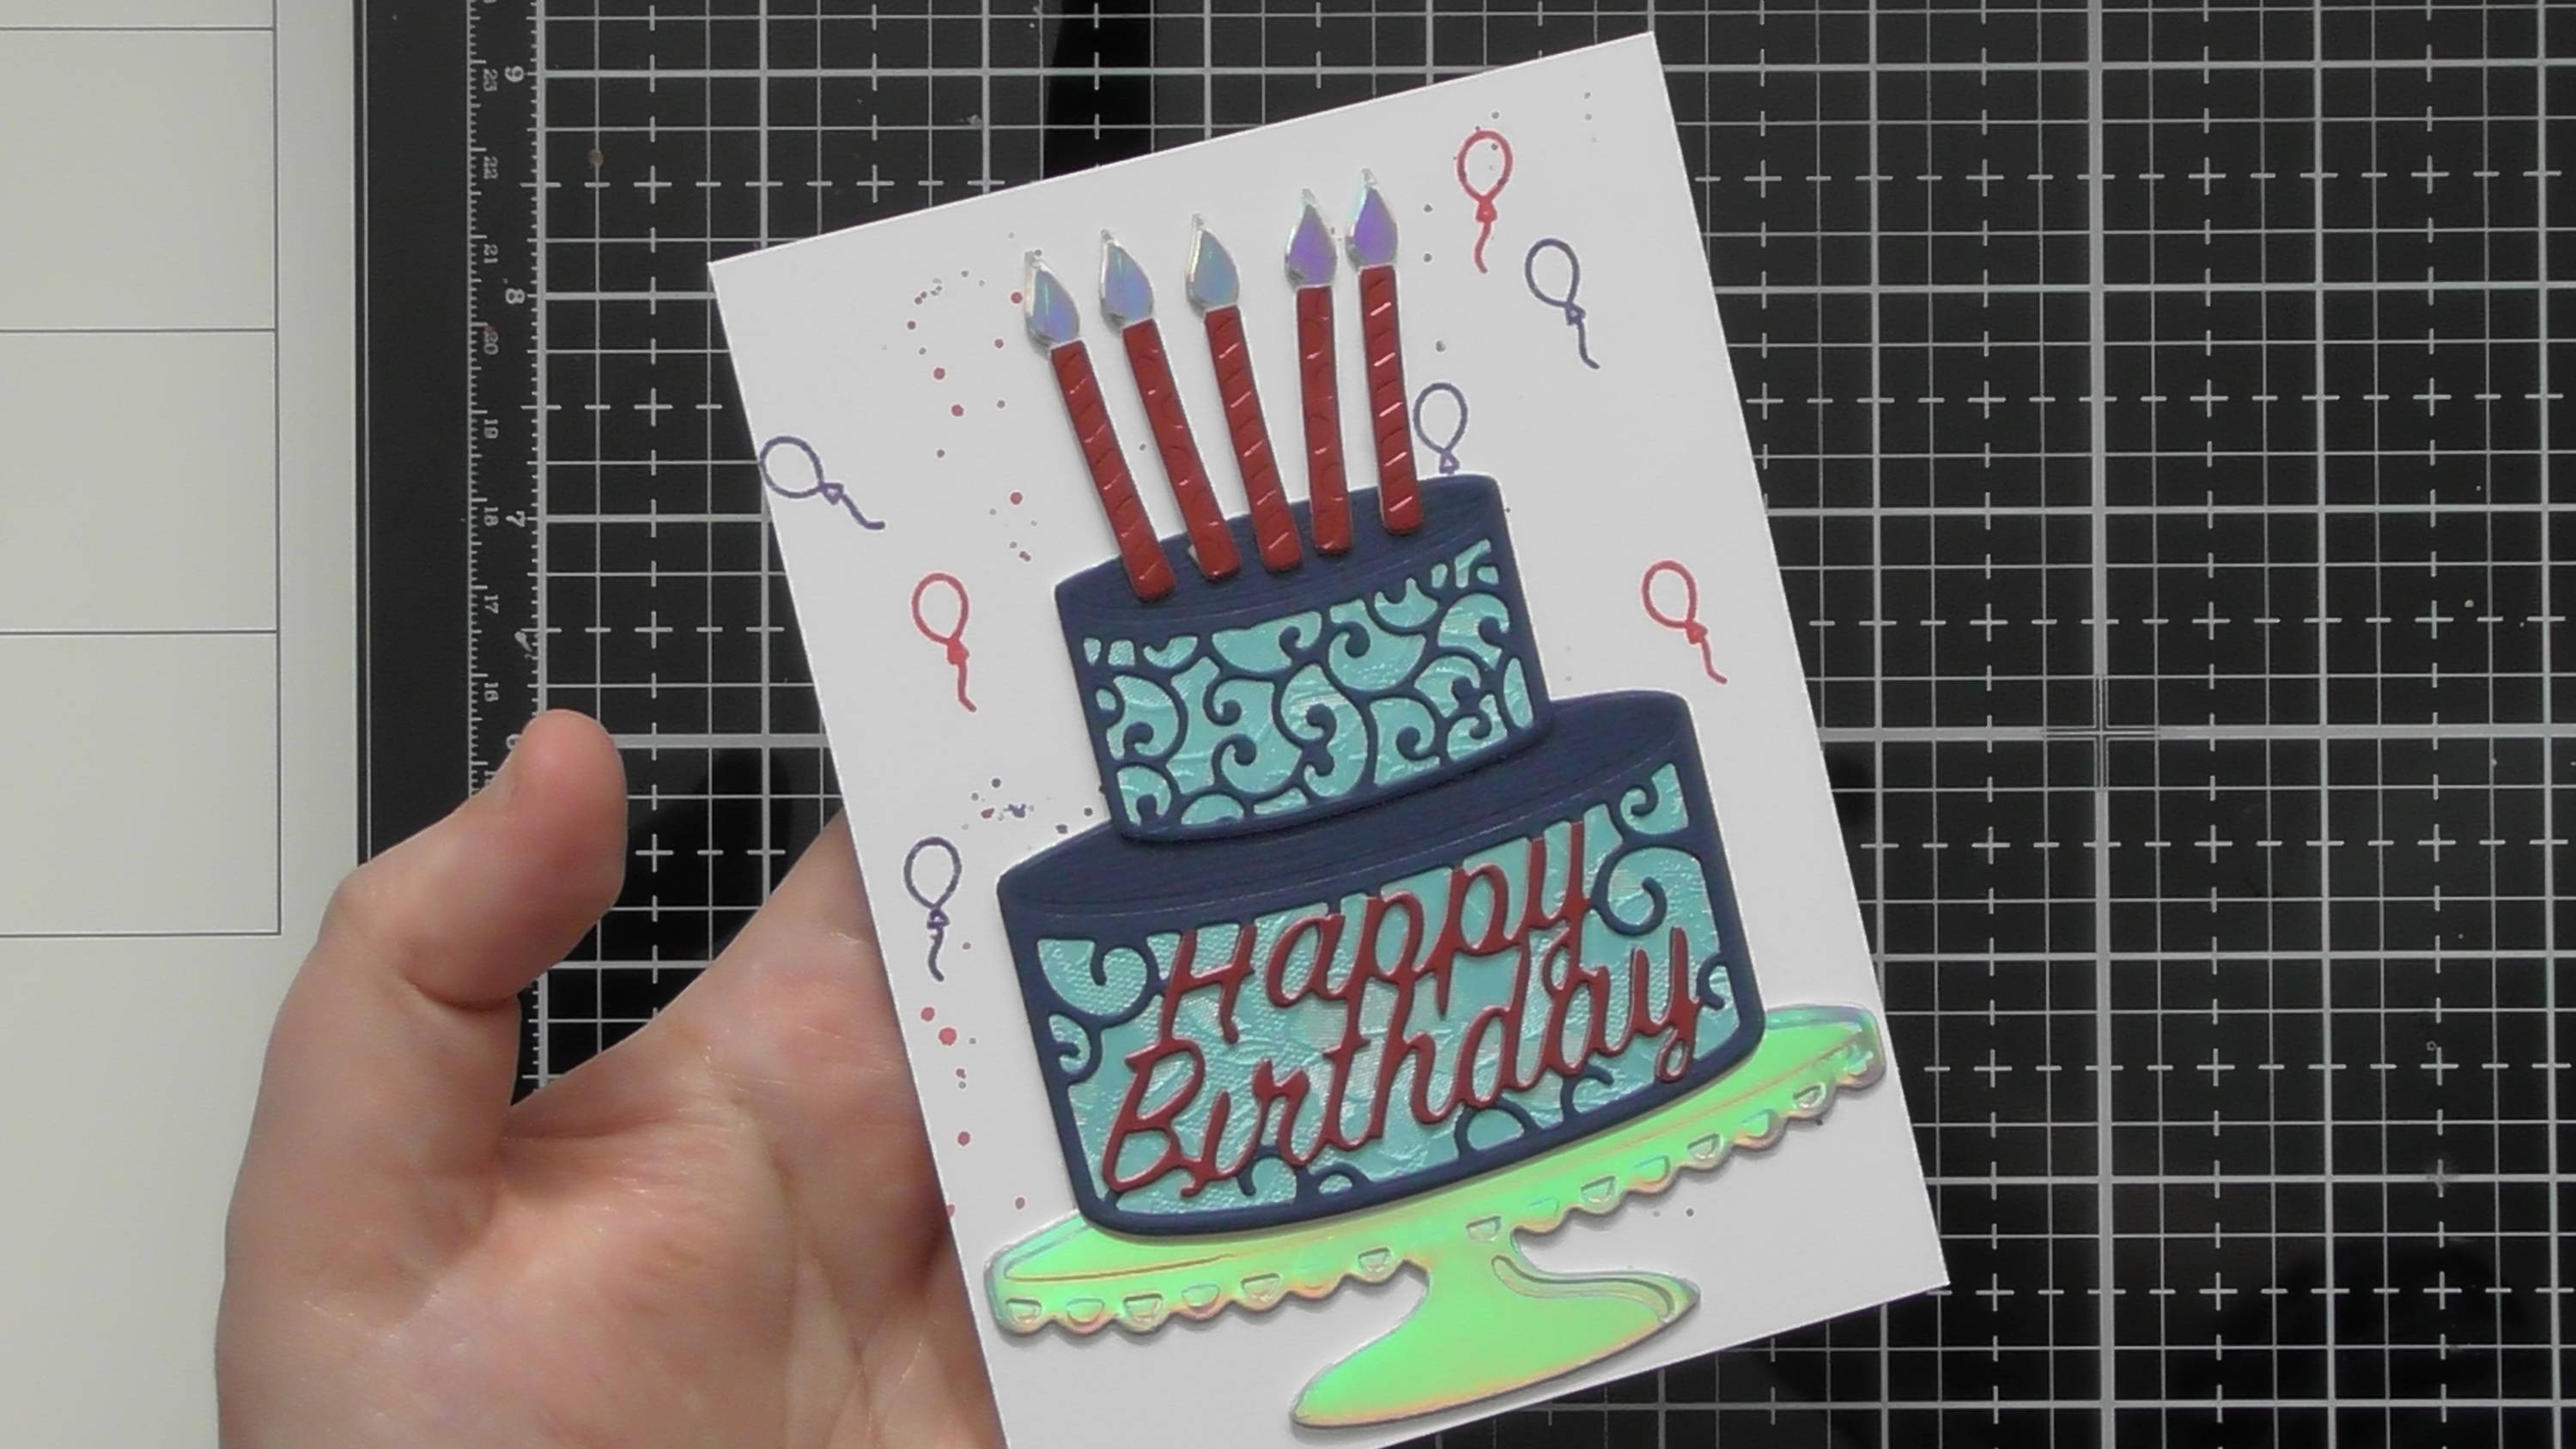
And there you have your finished card, just simply add your panel to your card blank. Panel size is 10 x 13 cm and card blank is 10.5 cm x 13.5 cm.
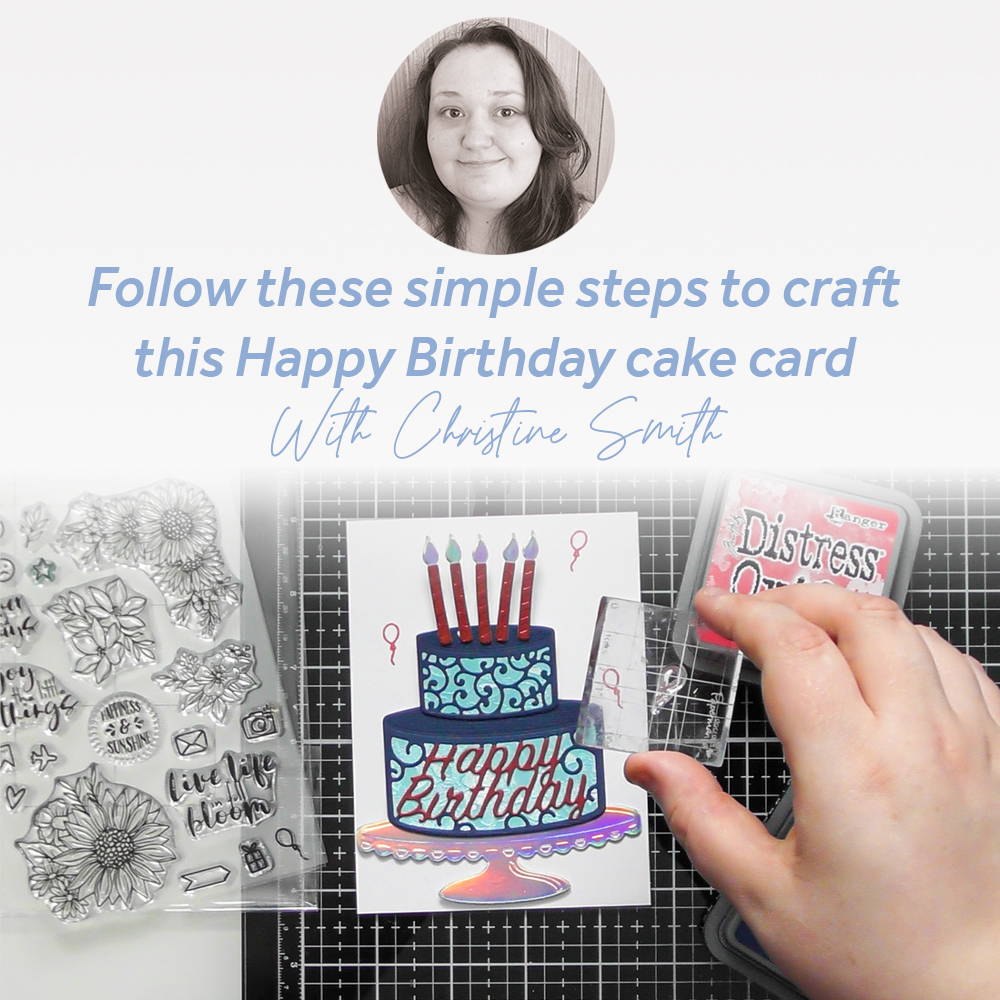
Hope you liked this quick and simple card!
Christine xxx
Buy The Craft Project
