


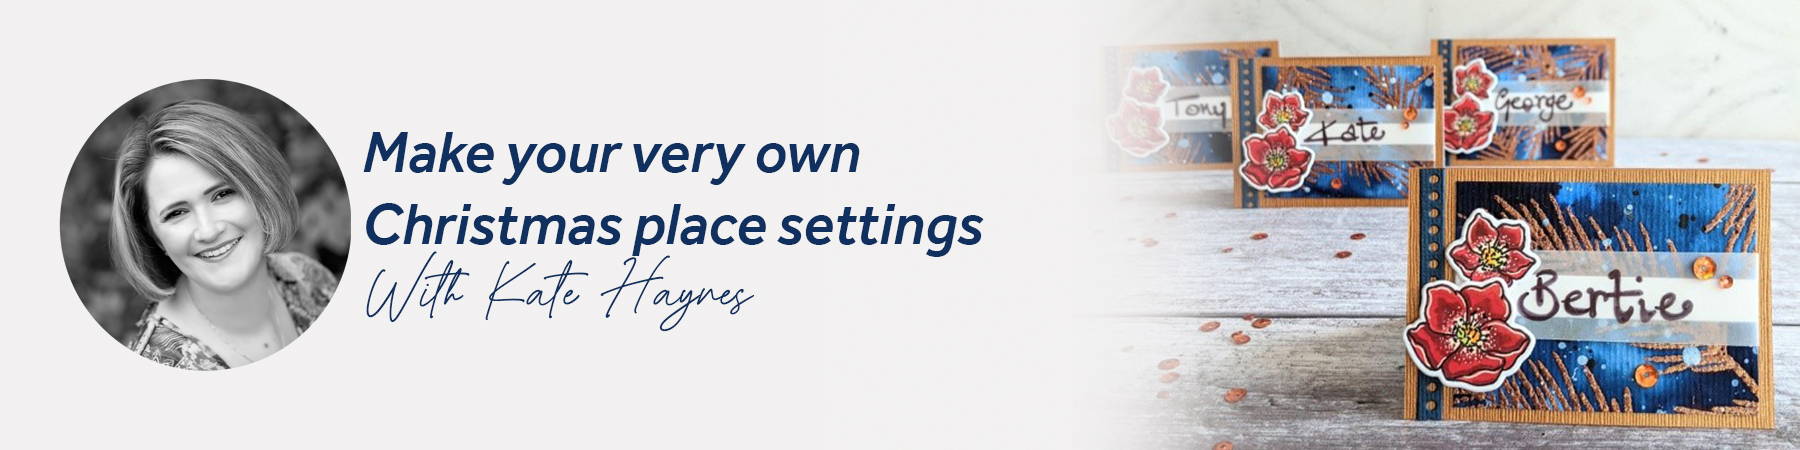
Hi everyone!
Although I know some of us ‘crazier’ crafters have been thinking about our handmade Christmas cards since the summer, but with the festive season now a lot closer, I’d like to share with you an idea for a little twist on Christmas card crafting.
Ever since I can remember, my Mum would always put in so much time and effort into her ‘Christmas table’ on the big day. I come from a small family, so there would rarely be many more than 4 of us around the table but that never stopped Mum from pulling out all the stops with handmade floral arrangements/garlands, beautiful napkin displays and posh crackers to name but a few things that she would put so much time, love and thought into. As a result, to this day, I absolutely love a Christmas table and all of the many personal details that can be included on them.
One such detail is name place settings for your guests (ideal especially if you do have a larger gathering and what to try and maintain a little order over who sits where and with whom!) So here is a set I have made in a slightly less ‘traditional’ colour palette using the Tonic Stamp Club Set ‘Christmas Rose’.
For the project you will need:
- Stamp Club Christmas Rose Stamp & Die Set
- Craft Perfect A2 Watercolour Pad
- Nuvo Clear Mark Embossing Pad
- Nuvo Embossing Powder - Copper Mine
- Nuvo Aqua Flow Pens - Azure Blue, Blue Velvet & Water Brush
- Nuvo Hybrid Ink Pad - Black Shadow
- Nuvo Alcohol Markers - 375, 377, 381, 391, 410, 473
- Nuvo Pure Sheen Sequins - Autumn Blaze
- Craft Perfect Speciality Card - Siena Treasure
- Craft Perfect Classic Card - Navy Blue
- Craft Perfect 300gsm Smooth Card - White
- Tonic Studios Trimmer (with scoring attachment)
- Craft Perfect Double-sided Tissue Tape 6mm
- Nuvo Deluxe Adhesive
- Sticky foam pads
- Vellum
- Black fineliner or fine marker pen
- White gel pen
- Small scissors
- Ruler & Pencil
- Clear Stamping Block
- Heat gun
- Water spray
- Black & White acrylic paints
- Small paintbrush
- Die cutting machine
Step 1
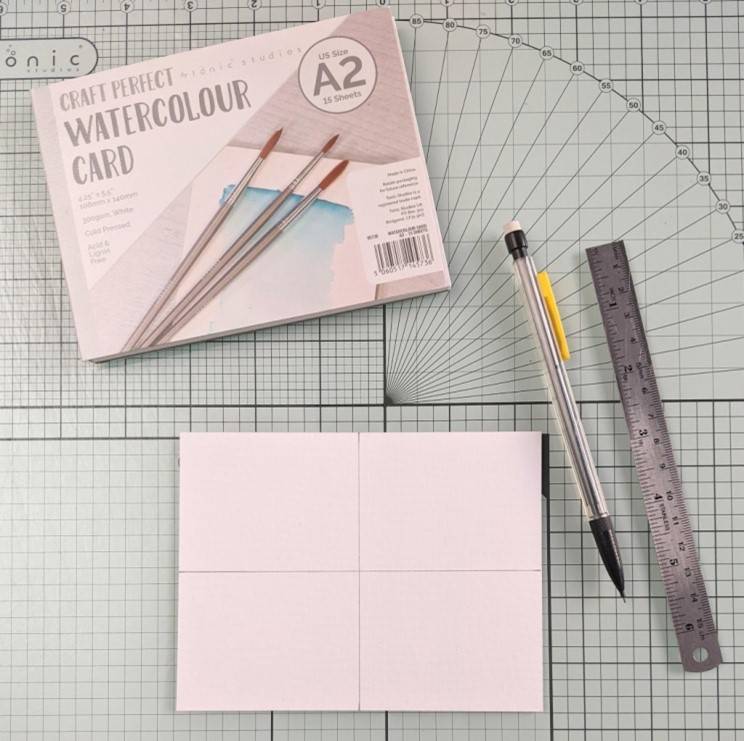
On the back of a piece of A2 watercolour card, draw pencil lines dividing it into quarters (approx 54 x 70mm)
Step 2
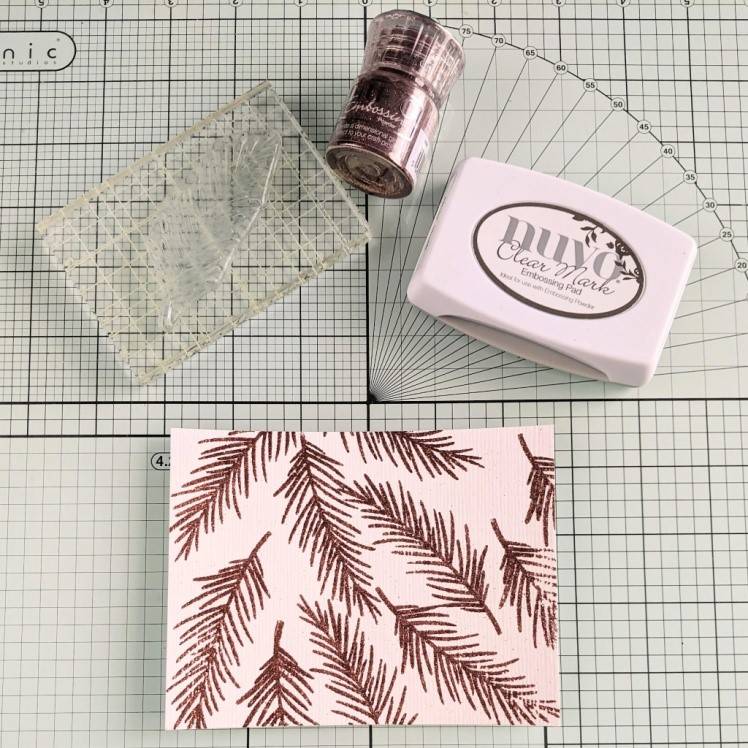
Using a clear stamping block, in Clear Mark embossing ink, randomly stamp the leaf all over the front of your A2 panel. Apply ‘Copper Mine’ embossing powder and heat set with a heat gun.
Step 3
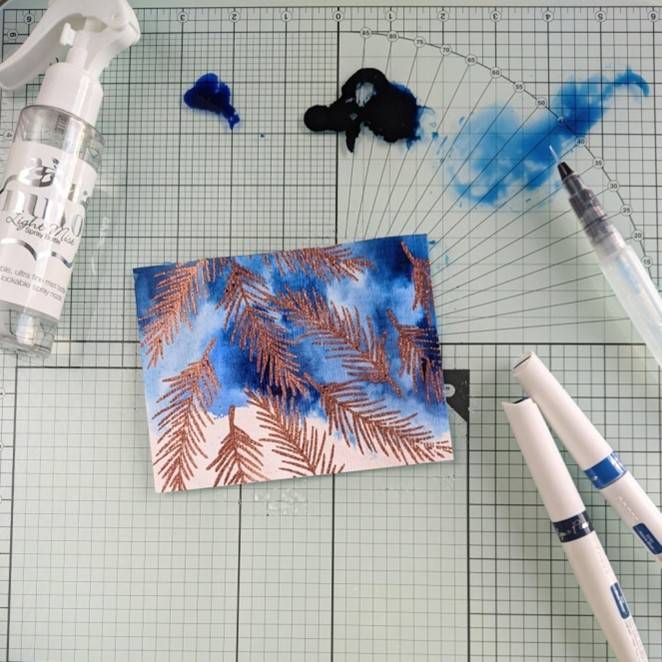
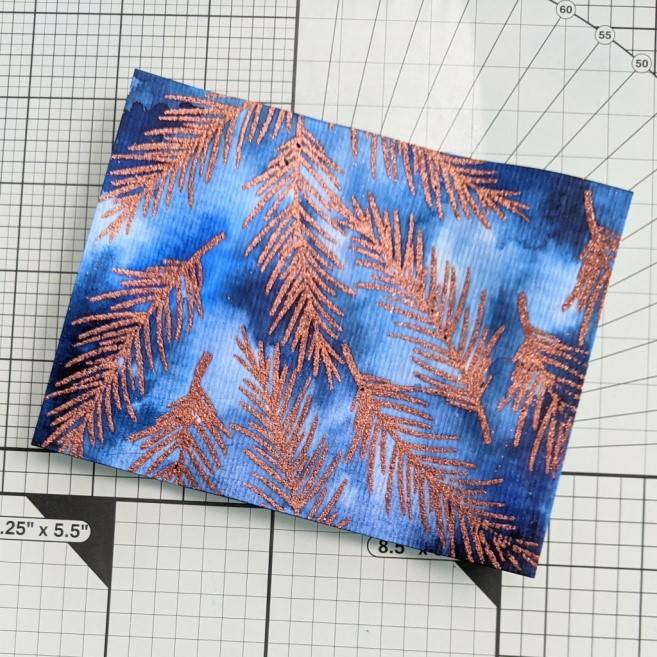
Transfer some of the ‘Blue Velvet’ and ‘Azure Blue’ Aqua Flow pen ink onto something like a palette or glass crafting mat. Lightly spray your A2 panel with water and then using an Aqua Flow water brush, start applying the blue inks to the panel. Initially start off lighter (you may find it easier to mix some of the ink with water to dilute down, before applying to the page) Gradually increase the intensity of the ink to create lighter and darker areas around the embossed leaves. Set aside to dry naturally or dry with a heat tool.
Step 4


On the back of a piece of ‘Siena Treasure’ speciality card measure and draw out a rectangle measuring 172mm across and 240mm down. Divide this up into 8 rectangles, each measuring 86 x 60mm. Mark the line in between the first and second rectangle down, as well as the line between the third and fourth rectangles down as a ‘score’ line.
Using a scoring tool, score the two fold lines and then cut the remaining lines using a trimmer or guillotine to create four equal sized pieces. Fold along the score lines to create your name card blanks.
Step 5
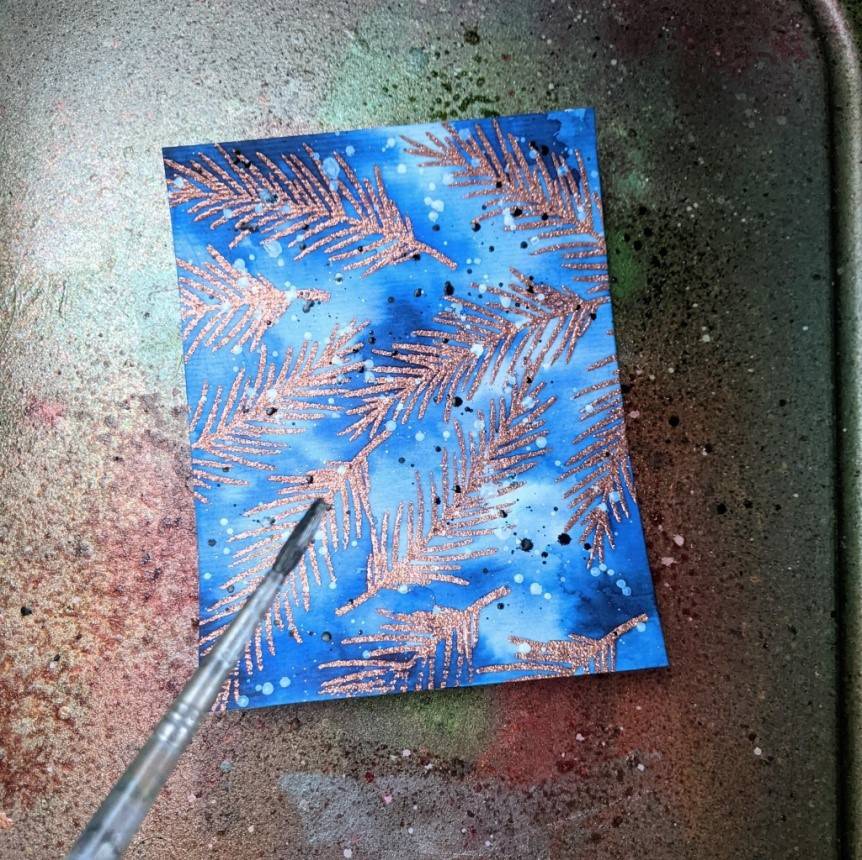
Your inked panel should be dry now. Using a small paintbrush, splatter with white and black watered down acrylic paint. Set aside to dry.
Step 6
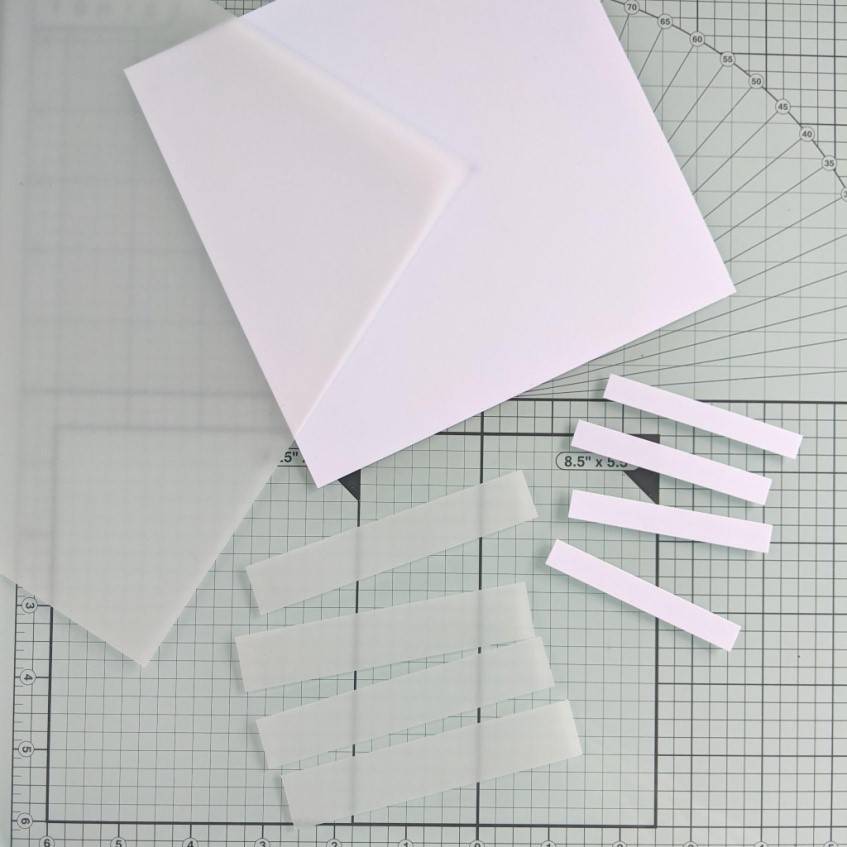
In white cardstock, cut x4 strips measuring 10 x 70 mm
In vellum, cut x4 strips measuring 20 x 105 mm
Step 7
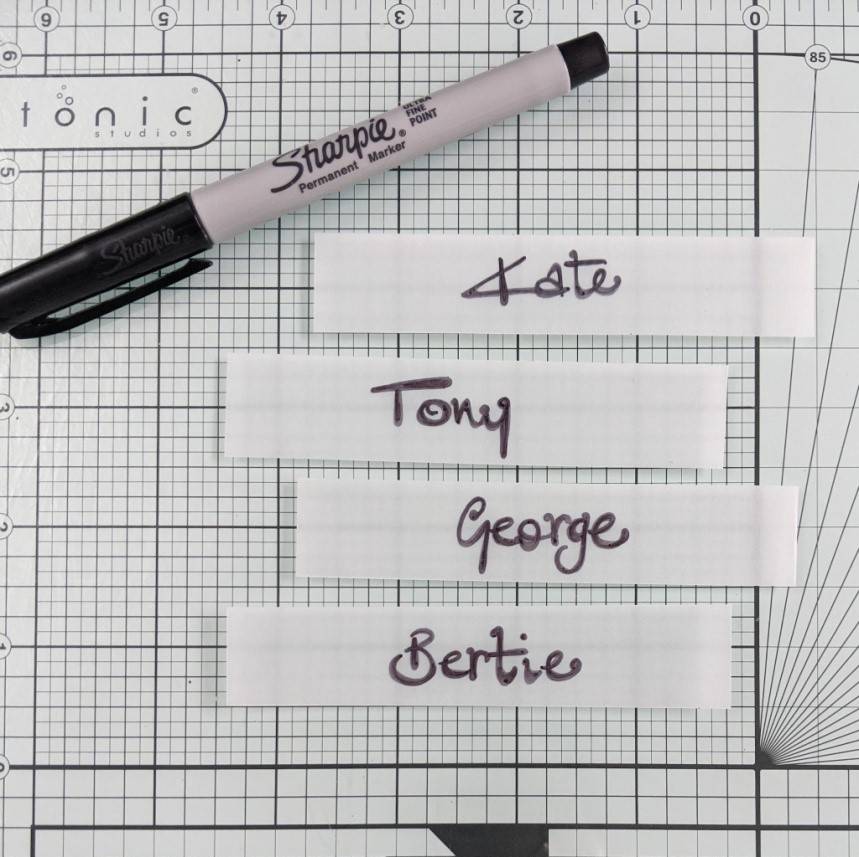
Using a fine pen, write the names of your guests onto the vellum strips.
Step 8

Now dry, using a guillotine or trimmer, cut your embossed inked panel into four, following the lines you drew on the back.
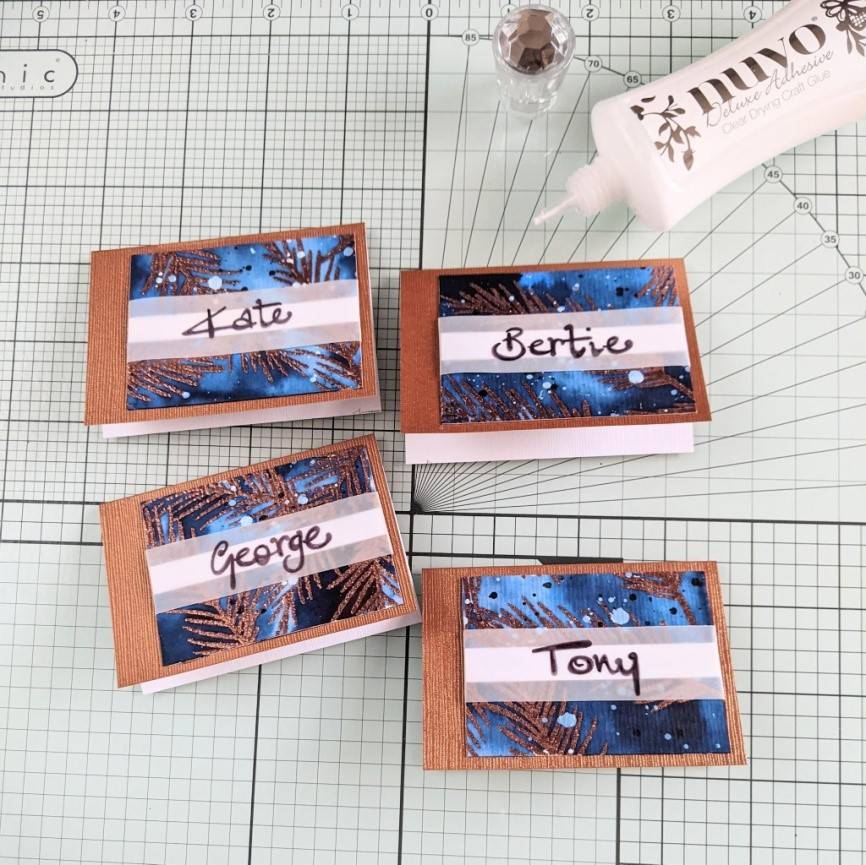
Step 9

Across the centre of your 4 smaller panels, attach the white strips of card. Here I have used 6mm double-sided tissue tape.
Step 10
This next step is in two parts and I’m really sorry I forgot to take a photo of the first part!
First, over the top of the white strip, place the named vellum strip, fold it around the sides of the mini embossed panel and secure in place at the back.
Secondly, as shown in the photo, glue the mini panels onto your mini card blanks - Set over to the right hand side so that the border on the top, bottom and right are equal but the left hand side is wider.
Step 11


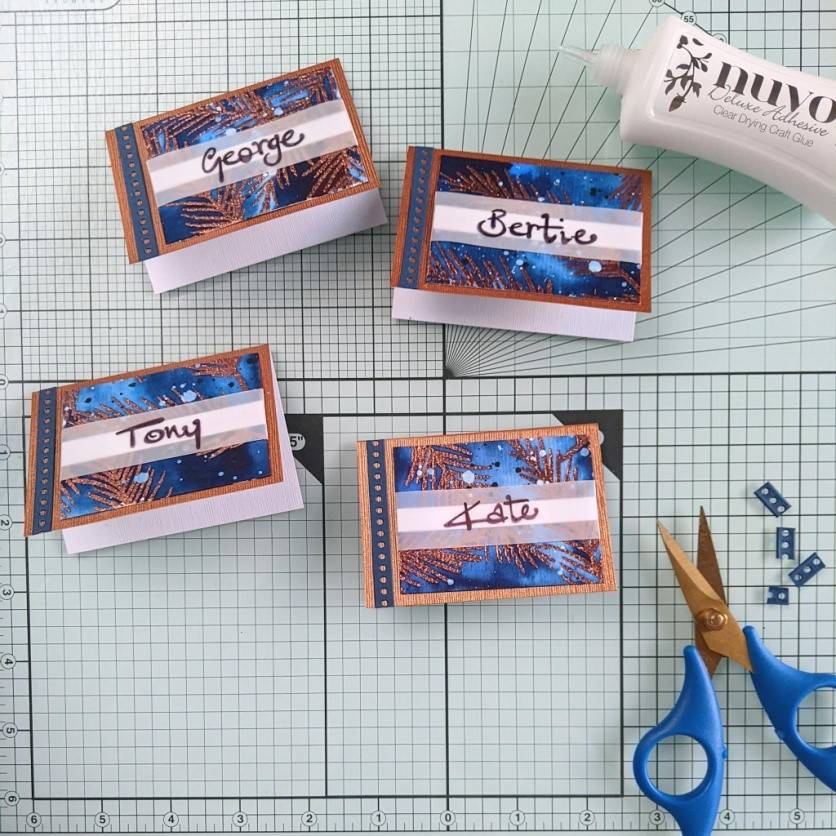
Using the three frame dies from the ‘Christmas Rose’ set, cut a frame in ‘Navy Blue’ cardstock and then snip off the corners, leaving you with 4 strips (don’t worry that two are slightly shorter)
Step 12
Across the centre of your 4 smaller panels, attach the white strips of card. Here I have used 6mm double-sided tissue tape.
Step 13

This next step is in two parts and I’m really sorry I forgot to take a photo of the first part!
First, over the top of the white strip, place the named vellum strip, fold it around the sides of the mini embossed panel and secure in place at the back.
Secondly, as shown in the photo, glue the mini panels onto your mini card blanks - Set over to the right hand side so that the border on the top, bottom and right are equal but the left hand side is wider.
Step 14
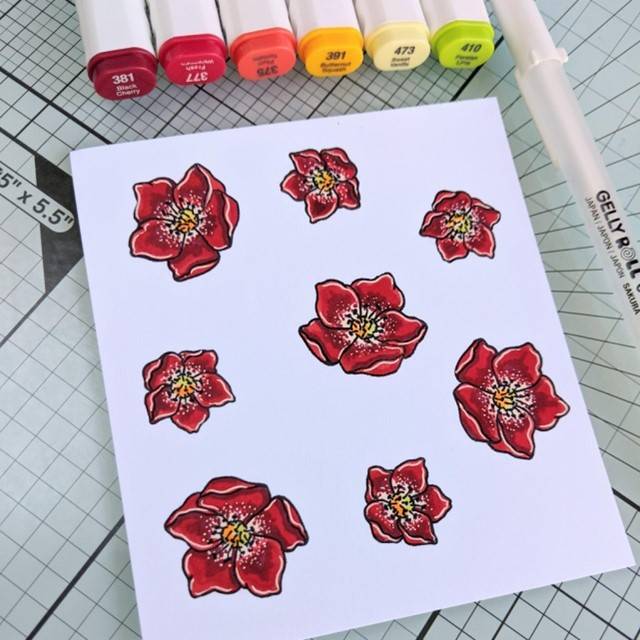

Colour in the stamped flower images using Nuvo Alcohol Markers and use a white gel pen to add a few ‘light’ details. Cut out the flowers using the coordinating dies.
Step 15

Using some Nuvo Deluxe Adhesive, glue the smaller of the flowers into position as shown.
Step 16
Apply a sticky foam pad to the back of the larger flowers and attach as shown; slightly overlapping the small flower.
Step 17
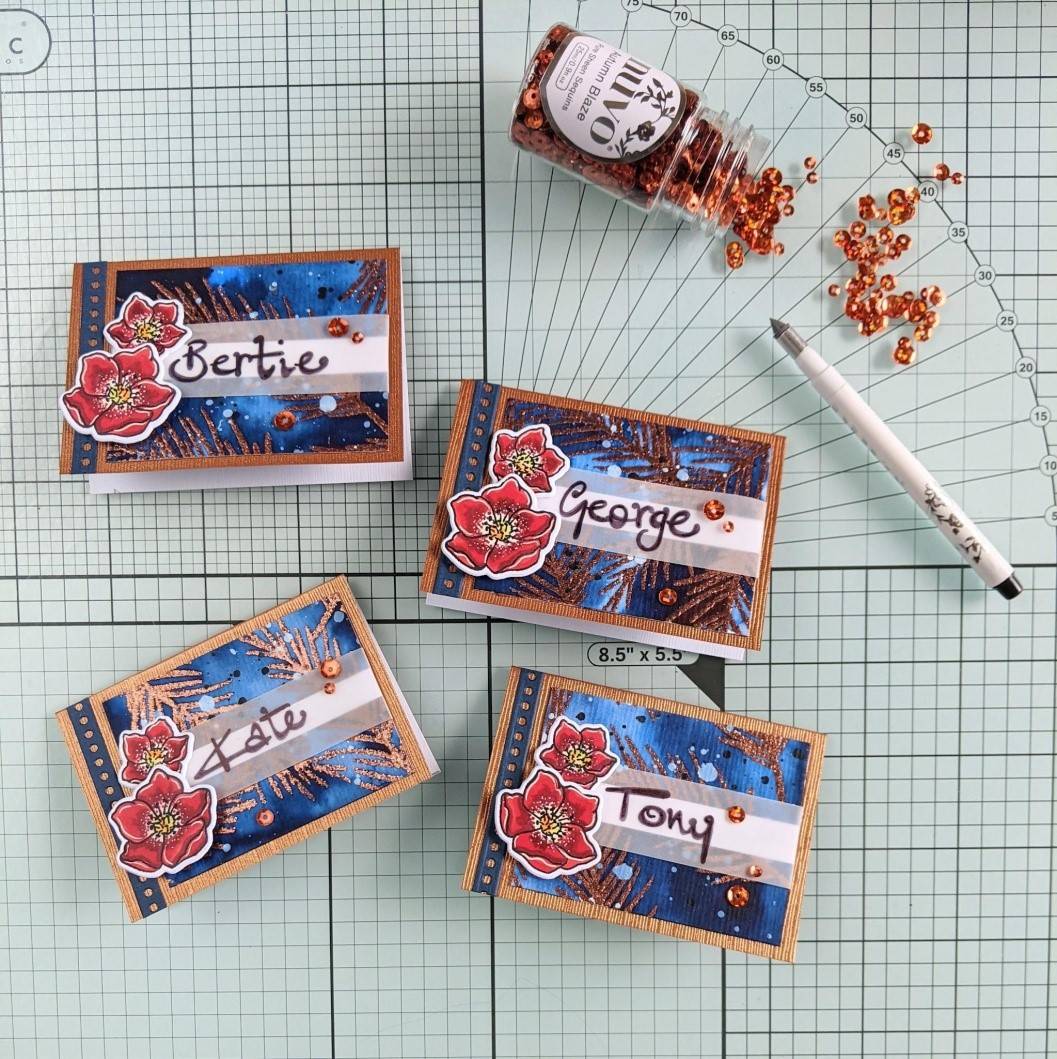
Add a few sequins dotted around to finish.


I hope this inspires you to take your christmas crafting beyond making cards this festive season and that you have lots of fun making your christmas a very ‘personal’ one.
Happy crafting!
Kate x
Buy The Craft Project
