


Hi everyone! My name is Shilpa, and I’m here to share with you all a card using the beautiful Designer’s Choice Corsage & Carnations die set.
This die set is packed full of pretty floral detailed dies and amazing layering dies. Perfect for simple die cutting and adding to your cards, or cutting and colouring or even paper piecing. It’s a versatile set which can be used for many different occasions and all year round! Really beautifully designed!
Hope you enjoy re-creating the card I have made for you today.
Crafty hugs
Shilpa xxx
Step 1


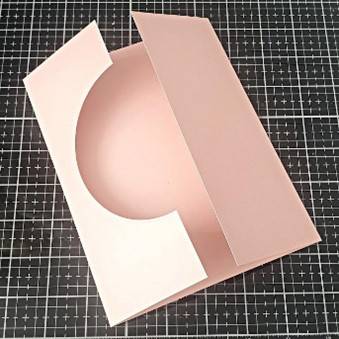

To create the gatefold card base, you will need an A4 piece of Craft Perfect Pink Ballet card.
Cut the card to 7 ½” x 11 ½”, then score 3” from either side to the middle to create your gatefold card. Then place the largest plain circle die on left panel of the card with low tack tape and pass through your die cutting machine (you will need a large A4 plate die cutting machine, I used my Tonic Tangerine). This will leave you with a semi-circle on the card.
Step 2
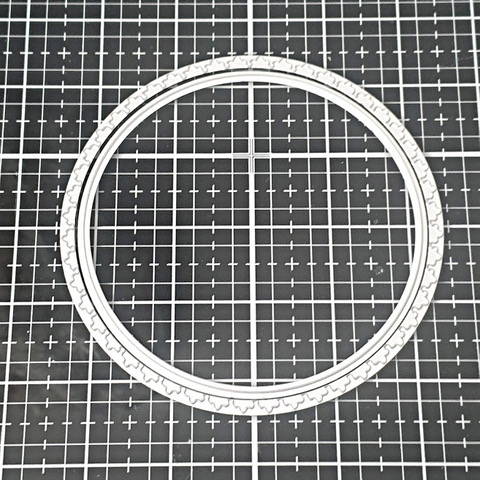

To create the aperture frame you will need to take an A4 sheet of 300gsm Black Smooth Craft Perfect card and cut the largest fancy circle with the largest plain circle together, as shown below. You will need to do this twice. Remember to keep the centres of both frames too, as they will be used.
Step 3

Using Tonic Deluxe Adhesive stick the black frames around the semi-circle cut of the card, one on top and one behind. (This will create a sturdy frame on the card.)
Step 4

Now you will need to take an A4 piece of craft perfect in Honey Gold satin card. Cut a large plain circle with a fancy verso die design to cut into the circle, like in the photo below (there are two different designs that cut into the card stock, you can pick which one you like). Then stick the gold decorative circle on a black circle from part2 using Tonic Deluxe Adhesive.
Add Tonic Deluxe Adhesive to the back of the gold and black circle (only on the right side) and carefully place it on the closed card, placing it within the frame as shown in the photo. To finish the back of this circle, now stick the remaining black circle from part2 on the back.
Step 5

To decorate the centre of the card you will need to use the same black & pink card used already for the card. Using the decorative layered circle dies cut the black card. And to back this section cut out a solid pink circle as shown in the photo. Use Tonic Deluxe Adhesive to stick these together. Then put Craft Perfect Dimensional Foam Pads on the back and stick in the centre of the card and add some drops of Vintage Dusty Rose Drops around it to add more interest.
Step 6
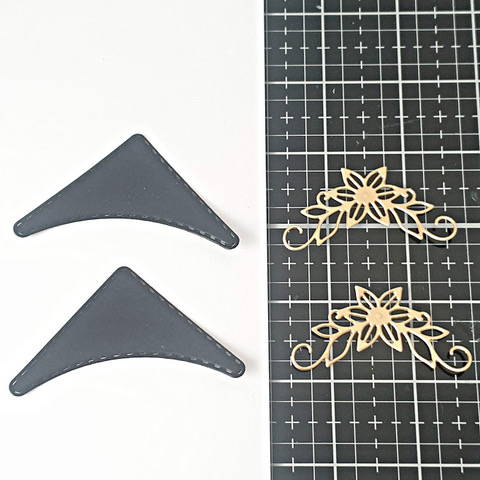
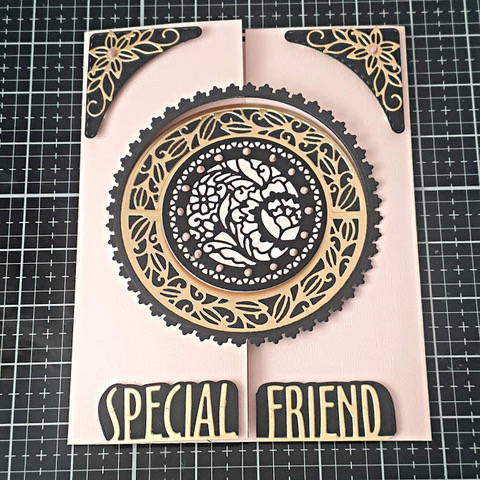
To further embellish the card, cut two corners using the solid corner die in black card, and two fancy corners in the gold card. Stick these layers together using Tonic Deluxe Adhesive. Then add these corners to the top of the card using Craft Perfect Dimensional Foam Pads.
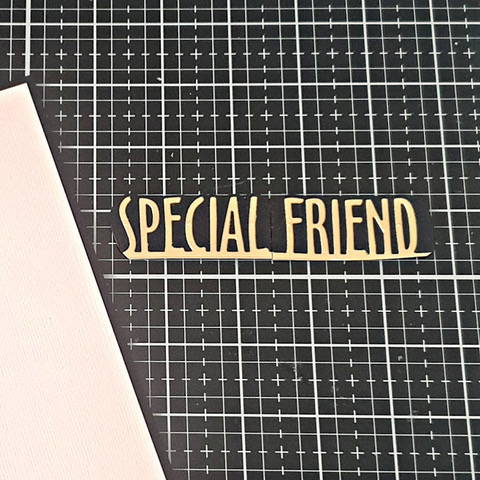
For the sentiment, use You’re Appreciated Sentiment Header die set in the same colours as the corners. Snip the sentiment in half after sticking the layers together and add Craft Perfect Dimensional Foam Pads on the back. Place these two pieces on either side of the gate fold panels.
Step 7

The final touch for this card is on the inside. To make it sturdy, add a matted and layered section. I’ve used a piece of 5 ½” x 7” Craft Perfect Black smooth card and a piece of
5 ¼” x 6 ¾” Craft Perfect Pink Ballet card. Use Tonic double sided adhesive tape to stick this on.
Your card is now complete!


Buy The Craft Project
